How to Set Page Margin on Windows
The Page Margin feature allows you to set or adjust the margins of your PDF pages easily for a clean and organized layout. This helps improve the document's appearance and prepares it for printing or sharing. Users get the ability to set the margin of each page separately by specifying their numbers or adjusting it in a go. To learn how to adjust the margin of the pages in your PDF, read the steps mentioned below:
Step 1
After you have opened your desired document in the PDFelement’s interface, head to the sidebar located on the left and click on the “Organize” option. Next, press the “Three Dots” icon located on the top toolbar and press the “Page Margins” option available there.

Step 2
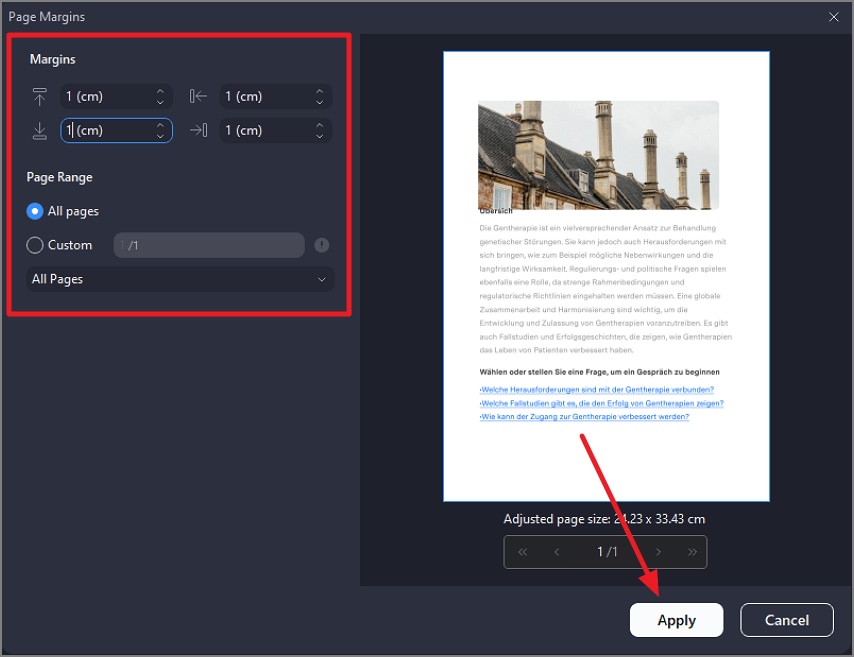
In the following small window, set the “Margins” from the left by adjusting each scale separately from its drop-down menu. Specify the “Page Range” and preview the changes in the preview on the left. Save the applied changes by clicking on the “Apply” button located at the bottom.