PDFelement 11 User Guide
-
Get Started on Mac
-
Open PDF on Mac
-
View PDF on Mac
-
Create PDF on Mac
-
Annotate PDF on Mac
-
Edit PDF on Mac
-
Combine PDF on Mac
-
Organize PDF on Mac
-
OCR PDF on Mac
-
Convert PDF on Mac
-
Fill PDF on Mac
-
Protect & Sign PDF on Mac
-
Print PDF on Mac
-
Share PDF on Mac
-
PDF AI Tools on Mac
PDFelement Tutorial Videos
PDFelement 11 User Guide
PDFelement 10 User Guide
PDFelement 9 User Guide
PDFelement 8 User Guide
How to Sync Signatures on the Cloud
When it comes to digital signatures on PDFs, they can streamline the process of signing documents. If you are able to sync them across multiple devices, it can ensure your signatures are always available. Here's a step-by-step guide to help you sync signatures on the cloud using PDFelement:
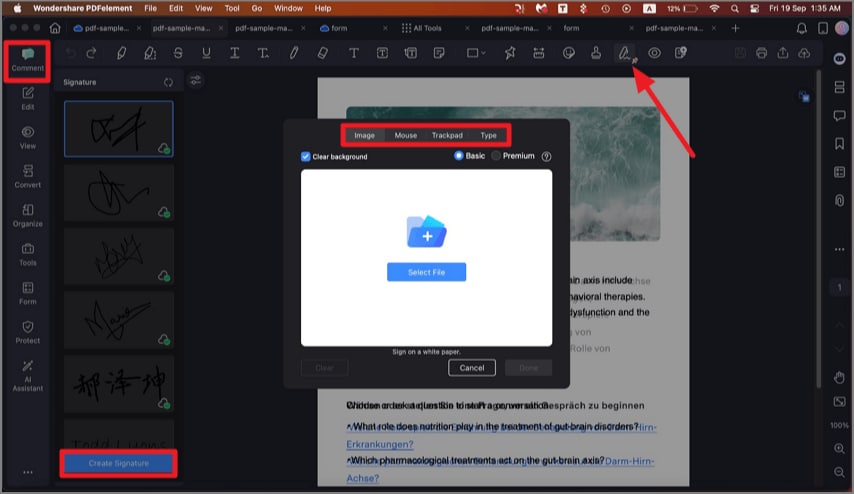
- Once your PDF file is open in PDFelement, proceed to access the "Comment" tab from the main toolbar at the top. Within this tab, click the icon of the pen's nib, which represents "Signature."
Open signature feature
- Now, move to the right-side window, where you can create the signature using multiple options. To do that, press "Create Signature," and a small window will pop up with three options, including "Image," "Mouse," and "Trackpad."
Make a signature for PDF
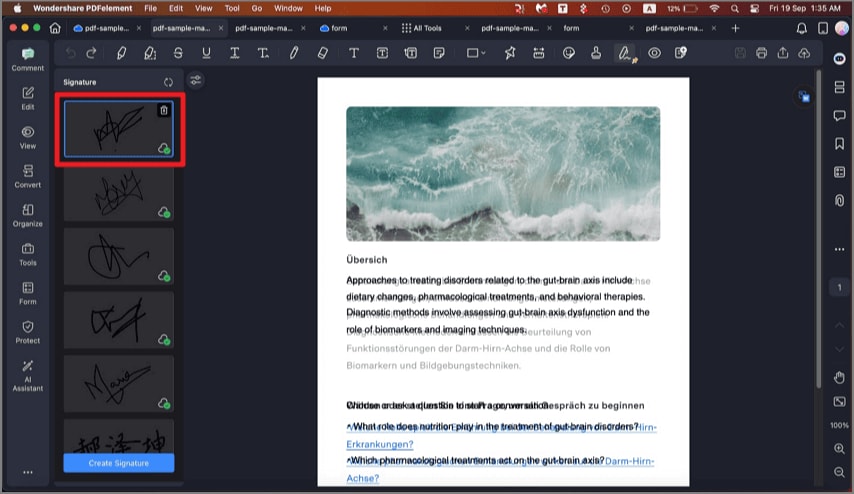
- Here, utilize any of the three options to establish a signature for your PDFs. Once created, the signature will appear in the right side window, where you can select it to sign the document. The digital signature you created will remain stored in the PDFelement Cloud. You can create and remove as many signatures as you want.
Save signature to cloud
Note: If you want to access these signatures from another device, you will need to log in using the same PDFelement account. This will ensure your signatures are synced across documents on different devices.