
How to Make a PDF Fillable on Mac Manually
PDFelement for Mac provides a complete form toolkit with various form field options which are used to create specific field type. In order to create, please click the "Form" button first, and then click the following buttons below it to create form fields.
- Text Field: Text filed is used for inputting information allowing for both alpha and numeric values to be included.
- Check Box: Check boxes allow for multiple selections to be chosen from a list of given options.
- Radio Button: Radio Buttons are also used for making selection, except for that only one selection is allowed to be checked. Once one of the radio buttons is selected, the remaining buttons will turn to grey and be non-selectable.
- Dropdown: A Dropdown supplies a list that can be accessed by clicking on the downward-facing arrow. You can choose a single item among the expanded list to fill in the specific field.
- List Box: List Boxes provide multiple choices in the form of a scroll-down list. You can press the Command key while selecting to choose more than one options at the same time.
- Button: Buttons are used for triggering an action, such as submitting the form or resetting the form.
- Digital Signature: A digital signature can be used to authenticate the identity of a user as well as the document content. It stores information about the signer along with the date, time, and state of the document when it was signed.
Index
1. Add text field
Click the Organize Pages Button on the top left.
- Click the "Form" menu on the Main Toolbar.
- Select the "Text Field" icon and then choose the location in the document that you need to add a text field element. The text field will be labeled as "Text" by default.
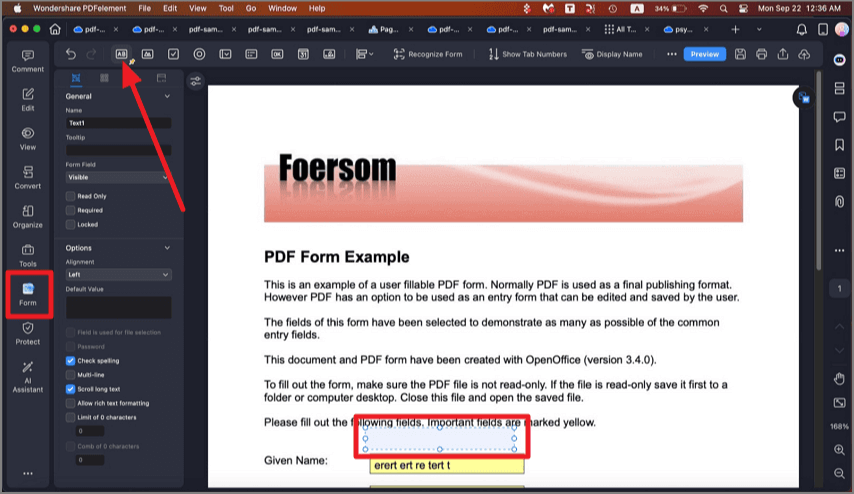
A screenshot highlighting a text field within a form.
- Click on the text field or right-click the field and select "Properties" to modify its properties on the right-side panel.
- In the "General" option, you are able to alter the name of the field.
- "Options" allow you to set the alignment mode for the text, and also add in a "Default Value" for the text box as needed. You can also set spelling check, multi-line, scroll long-text, rich text formatting, limit of characters, and comb of characters available for that text field.
- If you need to alter the boxes appearance that can be completed through the "Appearance" option on the top middle of right side.
- To format the text field, select a format category from the "Format" tab in the right side.
- If the data in the text field is for calculation, check the calculate option and define the existing fields in which the data will be calculated by clicking the "..." button. For example, the following is the property for Text6 on the PDF, and after settings this, it will calculate Text6=Text2+Text3. When you input data in Text2 and Text3, Text6 will get the sum result automatically.

A screenshot of the text field calculation settings.
- Choose the actions and triggering mode for the text field in the "Actions" tab.

A screenshot of the text field actions settings panel.
2. Add check box
- Under the "Form" tab, click the "Check Box" icon, and drag the mouse to the place that you require the check box.
- In the right-side panel, define its name and modify its appearance as needed.
- In the "Options", you can pick the check box style and modify the export value.
- Choose the triggering actions for the check box in the "Action" tab.

A screenshot highlighting a checkbox form field.
3. Add radio button
- To add a radio button, select the radio button icon under the "Form", click on the PDF page.
- In the right-side panel, define its name and modify its appearance as needed.
- Select the button style under the "Options". If you want all radio buttons checked when one button is selected, check the option of "Button with the same name and choice are selected in unison".
- Modify the actions for the radio button in the "Actions" tab.

A screenshot highlighting a radio button form field.
4. Add a dropdown
- Under the "Form" tab, click the "Dropdown" icon. Drag your mouse cursor to add a dropdown on the PDF page.
- In the right-side panel, define its name and modify its appearance as needed.
- In the "Options" tab, add an item and enter an export value in the "Export Value" text box. Repeat this step until you have all of the items that you need.
- Check the "Sort items" option if you want all the items stored by alphabetical order. To manually reorder the items, choose the item, and click the "Move Up" and "Move Down" buttons. If you want to remove an item, select it and click the "Remove" button.
- If you are looking to have the information submitted by the user, check the "Allow user to enter custom text" option.

A screenshot highlighting a dropdown form field.
5. Add a list box
- Find the list box icon from the "Form" tab, and click on the page to insert the list box.
- In the "Option" window, add the new item and include an export value into the "Export Value" field.
- You can arrange the items by alphabetic order by clicking "Sort items".
- If you want the respondent to select multiple items at the same time, check the "Multiple selection" option.
- Create actions for the list box field in the "Action" tab.

A screenshot highlighting a list box form field.
6. Add a button
- Click the "Button" icon under the "Form" tab. Drag your cursor to add a button to the desired location.
- In the right-side panel, define its name and modify its appearance as needed.
- In the "Options" part, you can define the button layout. Choose your preferred icon from the local folder and give it a label in the "Label" text box, and then select the button layout.
- Customize the actions for the button field in the "Actions" tab.

A screenshot highlighting a button form field.
7. Add a date field
- Head to the "Form" tab, and locate the "Date" icon. Effortlessly drag and drop it to your desired position on the PDF page.
- To fine-tune the date field, navigate to the right-side panel. Here, you can specify its name and customize its appearance.
- If necessary, enhance user guidance by adding a tooltip to the date field.
- In the "Options" tab, streamline data entry by assigning a default value in the designated "Default Value" text box.
- For an additional layer of accuracy, activate the "Check spelling" option if you wish PDFelement to scrutinize the input spelling within this field. If required, define a character limit to ensure concise entries.
A screenshot highlighting a date field icon added to a form.
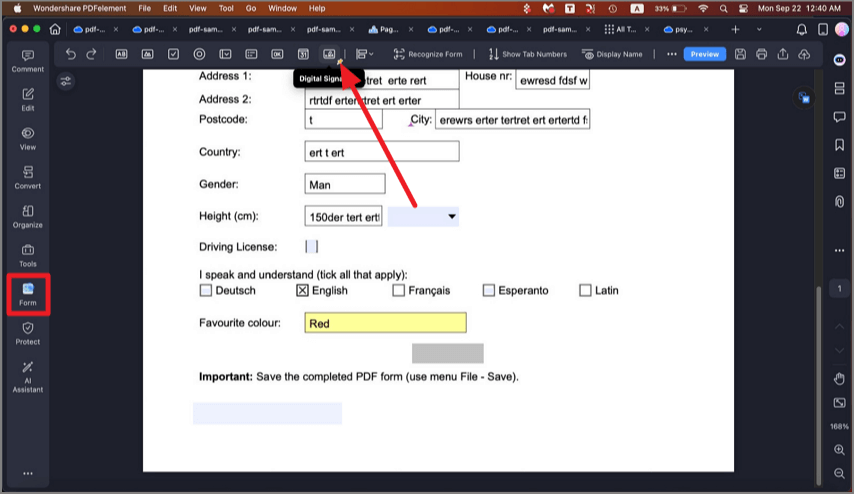
8. Add a digital signature
- You can use PDFelement Professional for Mac to create a digital signature field by clicking the "Form" > "Digital Signatures" button, then send the PDF file to others to add digital signatures.
A screenshot of a document displaying a digital signature field."
- Or you can use our program to add the digital signatures directly. After adding a digital signature field, please click the "Preview" button, then click the "Sign Here" symbol.
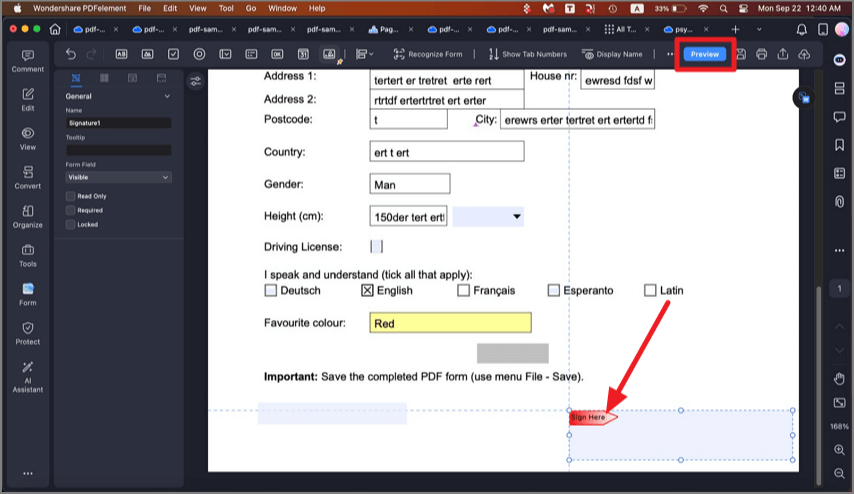
A screenshot showing a preview of a digital signature.
- In the pop-up window, choose a digital ID. If you do not have any ID yet, please click the "Create" button to create one.
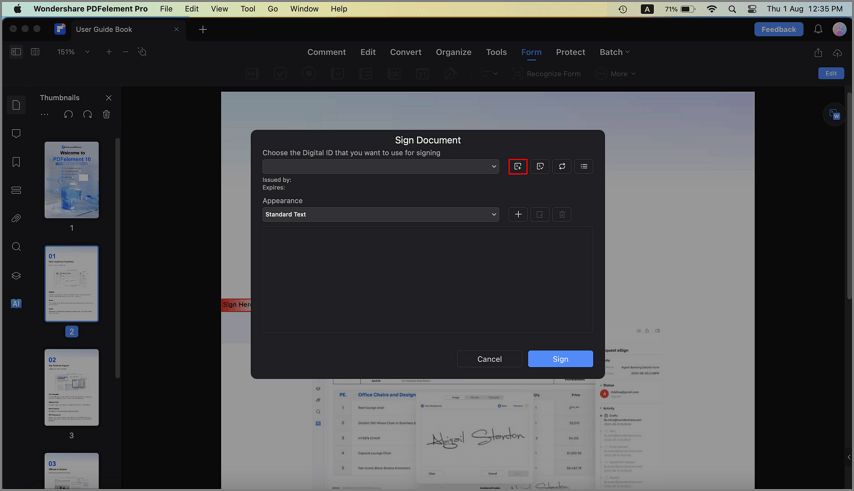
A screenshot of the digital signature creation interface.
- In the pop-up windows, enter the Identity information to be used for creating the self - signed Digital ID, an then click the "OK" button.

A screenshot of the digital ID creation dialog.
- It will go back to the first "Sign Document" window and you can preview your digital signature. You can also click the "Create" button under the "Appearance" tab to change the style of your Digital signature.
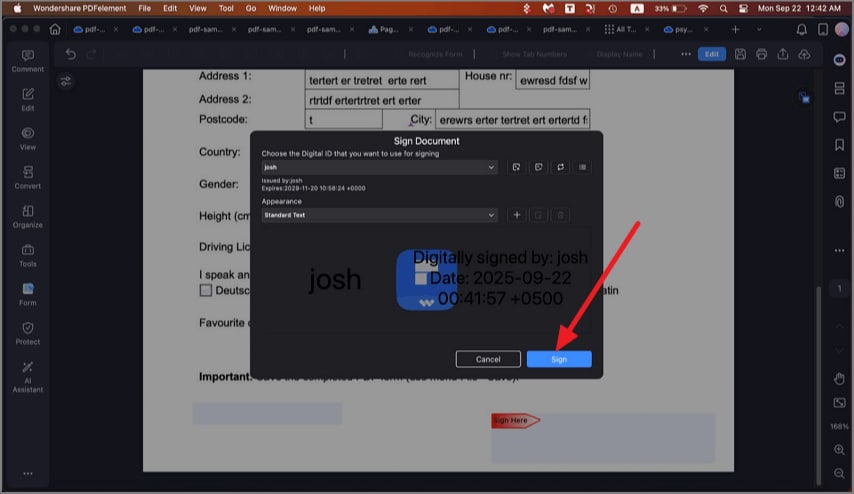
A screenshot of the digital signature appearance settings.
- Click the "Sign" button and save your file, the digital signature will be applied in it directly.

A screenshot of a PDF document with a digital signature applied.
9. Batch Modify Field Properties
PDFelement empowers you to efficiently adjust properties for multiple form fields in a single action on your Mac.
- Highlight and select multiple form fields on your PDF document. Perform a right-click. From the ensuing menu, opt for "Field Properties."

A screenshot showing multiple form fields selected.
- The comprehensive form field property panel will appear on the right, enabling you to simultaneously define the name, alignment, options, appearance, and actions of the selected form fields in one go.

A screenshot of the batch form field properties interface.