
How to Sign PDF on Mac
With PDFelement for Mac, you can sign a document to protect or approve its content with four kinds of signatures: image signature, handwritten signature, electronic signature, and digital signature. All the methods are discussed in detail in the following section:
1. Image signature
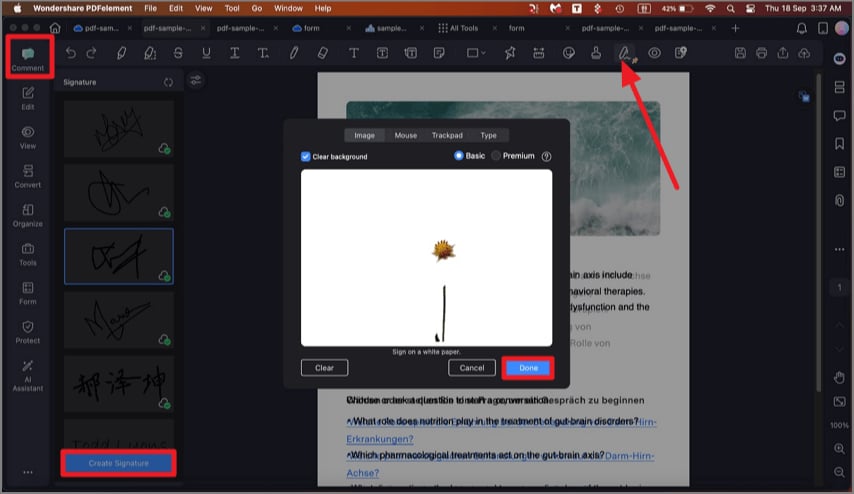
Start by adding the document for which you want to add the signature. Now, access the "Comment" section from the left and click the "Signature" icon from the toolbar. Click the "Create Signature" from the bottom left corner, enable the "Image" section in the following small window, and import your signature image. Click the "Done" button to confirm the selection.
2. Handwritten signature
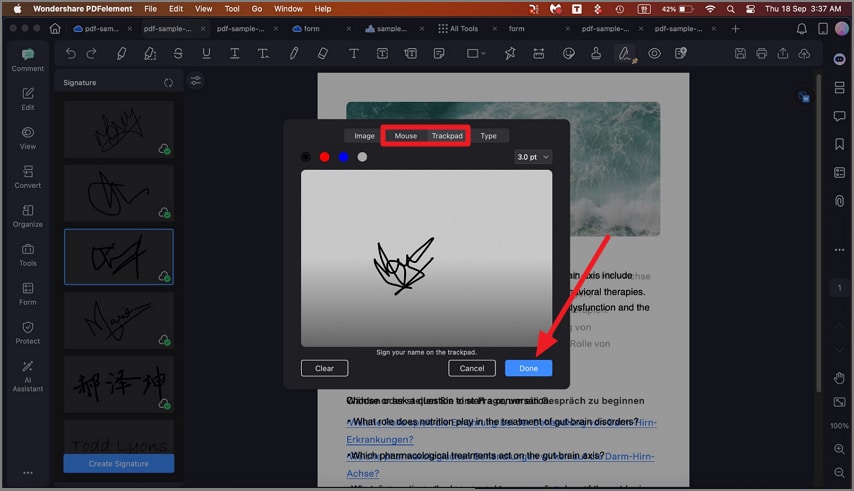
For a handwritten signature, enable the "Mouse" or " Trackpad" section and draw the signature using your mouse. Draw the signature on the trackpad after setting the color and thickness. Press the "Done" button to successfully save the signature you have created.
3. Electronic signature
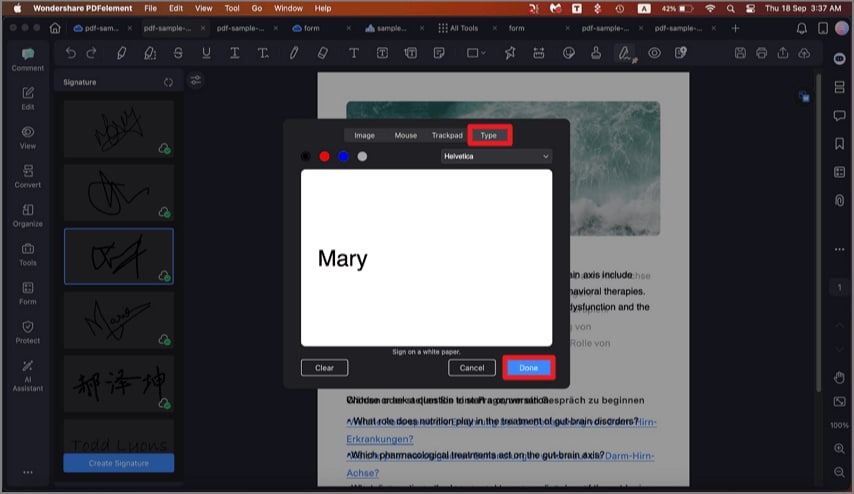
Add the digital signature by typing it using the "Type" section in the small window. Select the color and font, type the signature, and press the "Done" button.
4. Digital signature
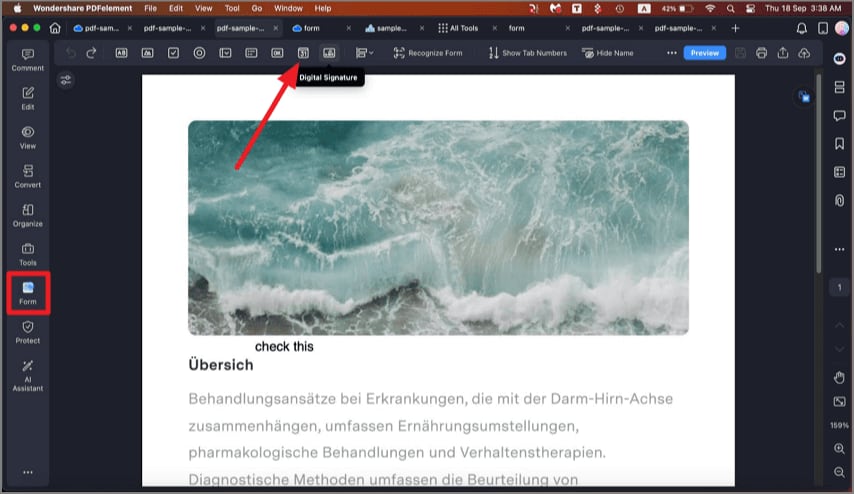
Step 1. After importing the document, head to the "Form" section from the left sidebar and click on the "Digital Signature" from the top toolbar. Now, place the signature template in the area of the page where you want to add the signature.
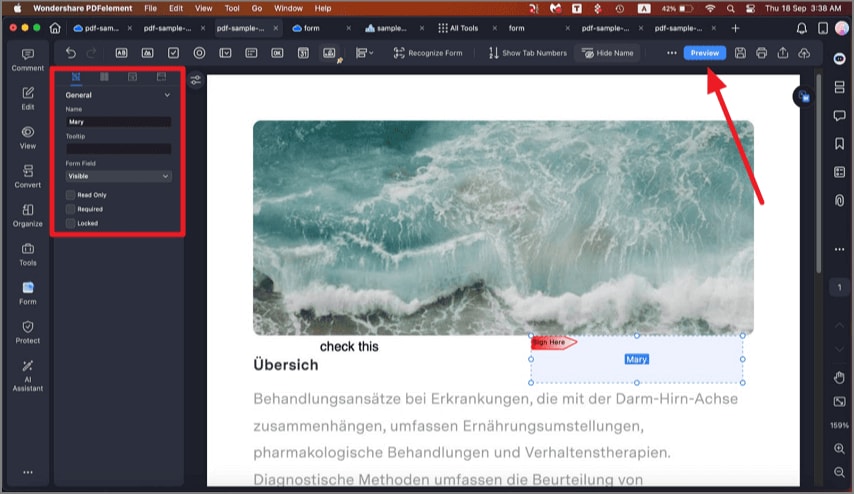
Step 2. Input the signature using the panel on the left and press the "Enter" key to save the results. You can also hide the signature by pressing the "Hide Name" option from the top toolbar.
5. Batch sign documents
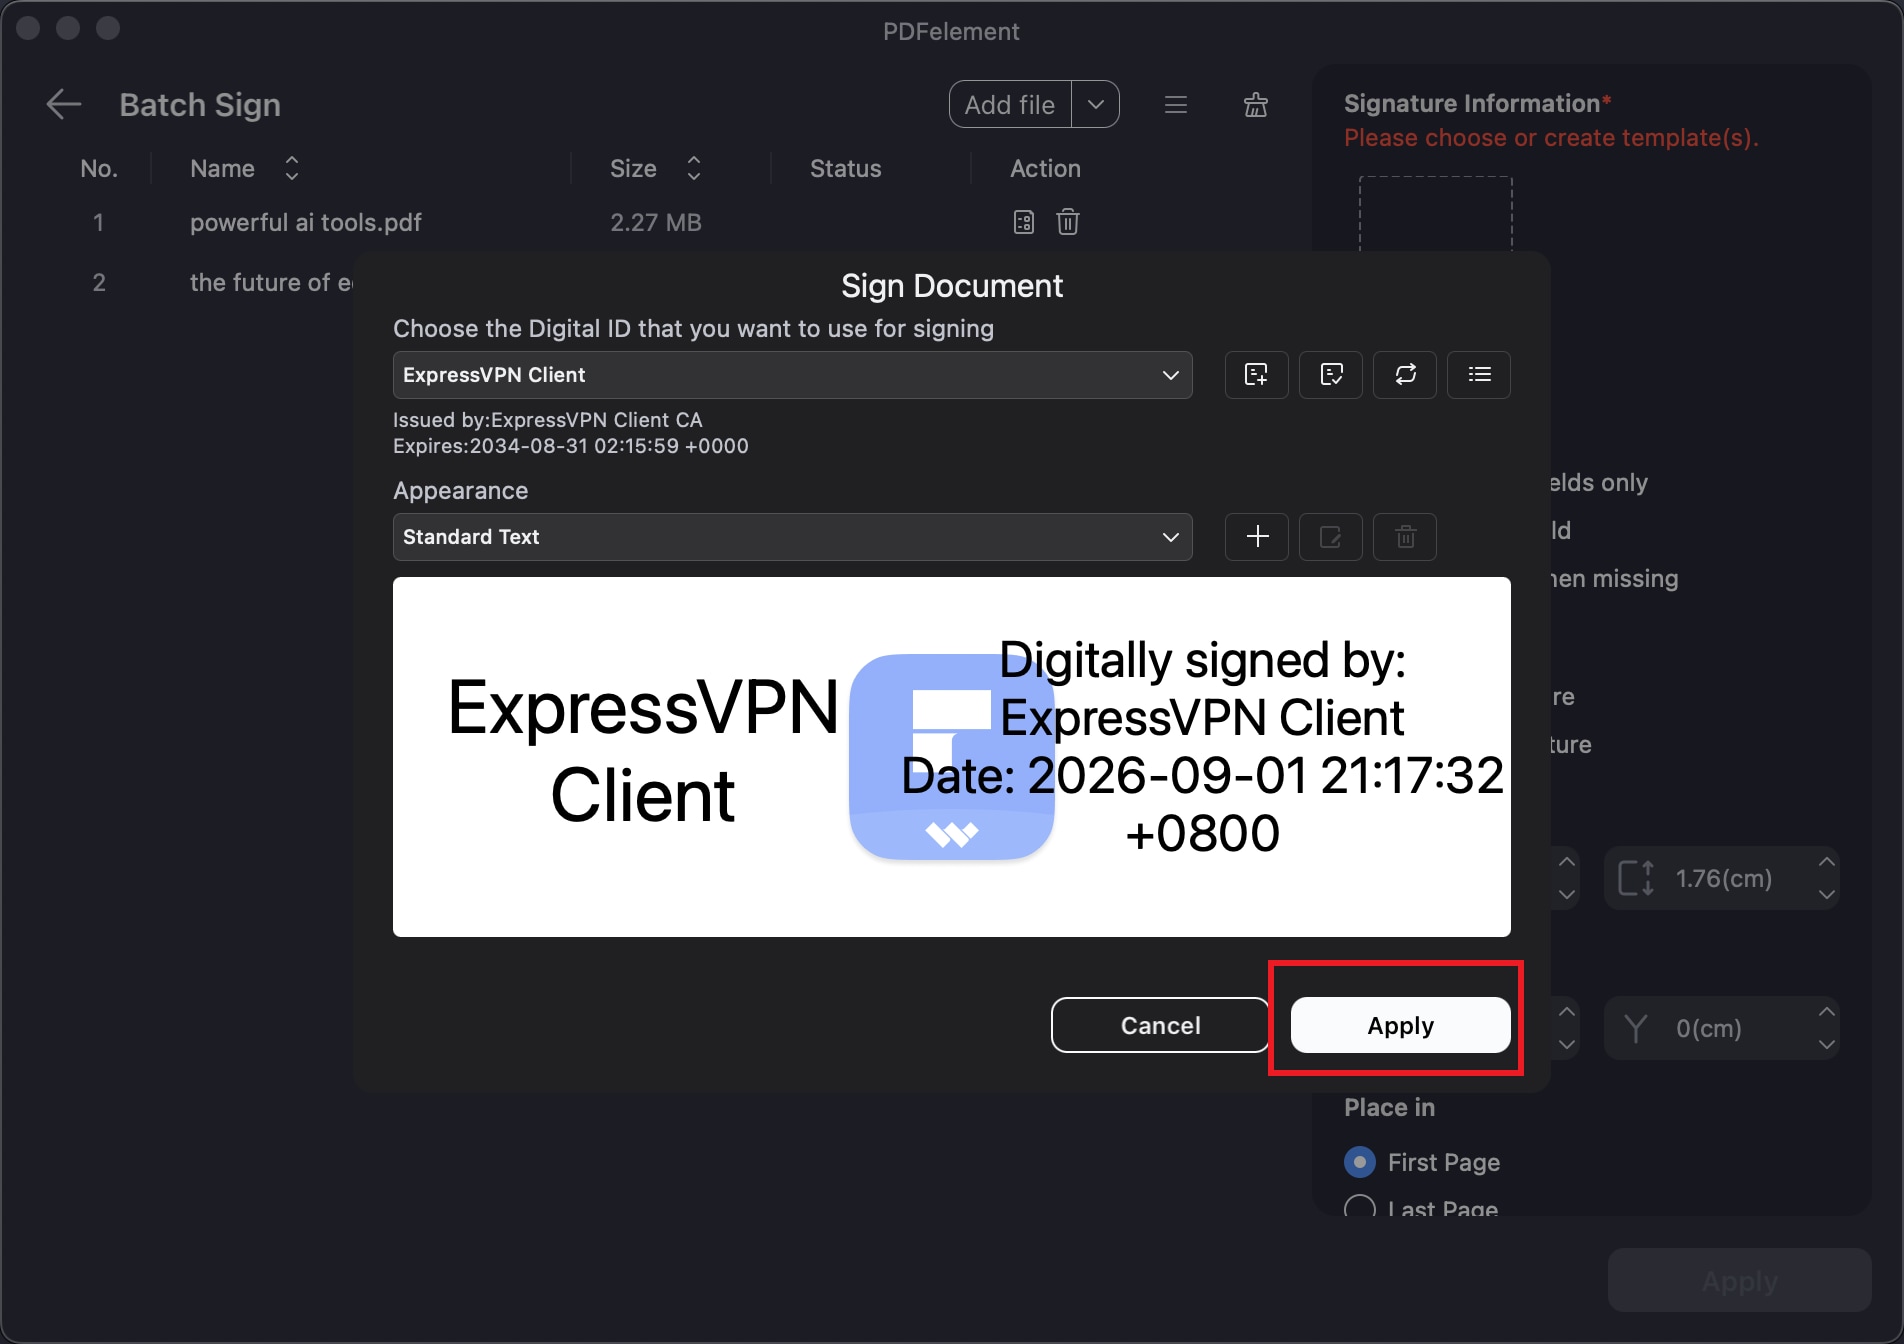
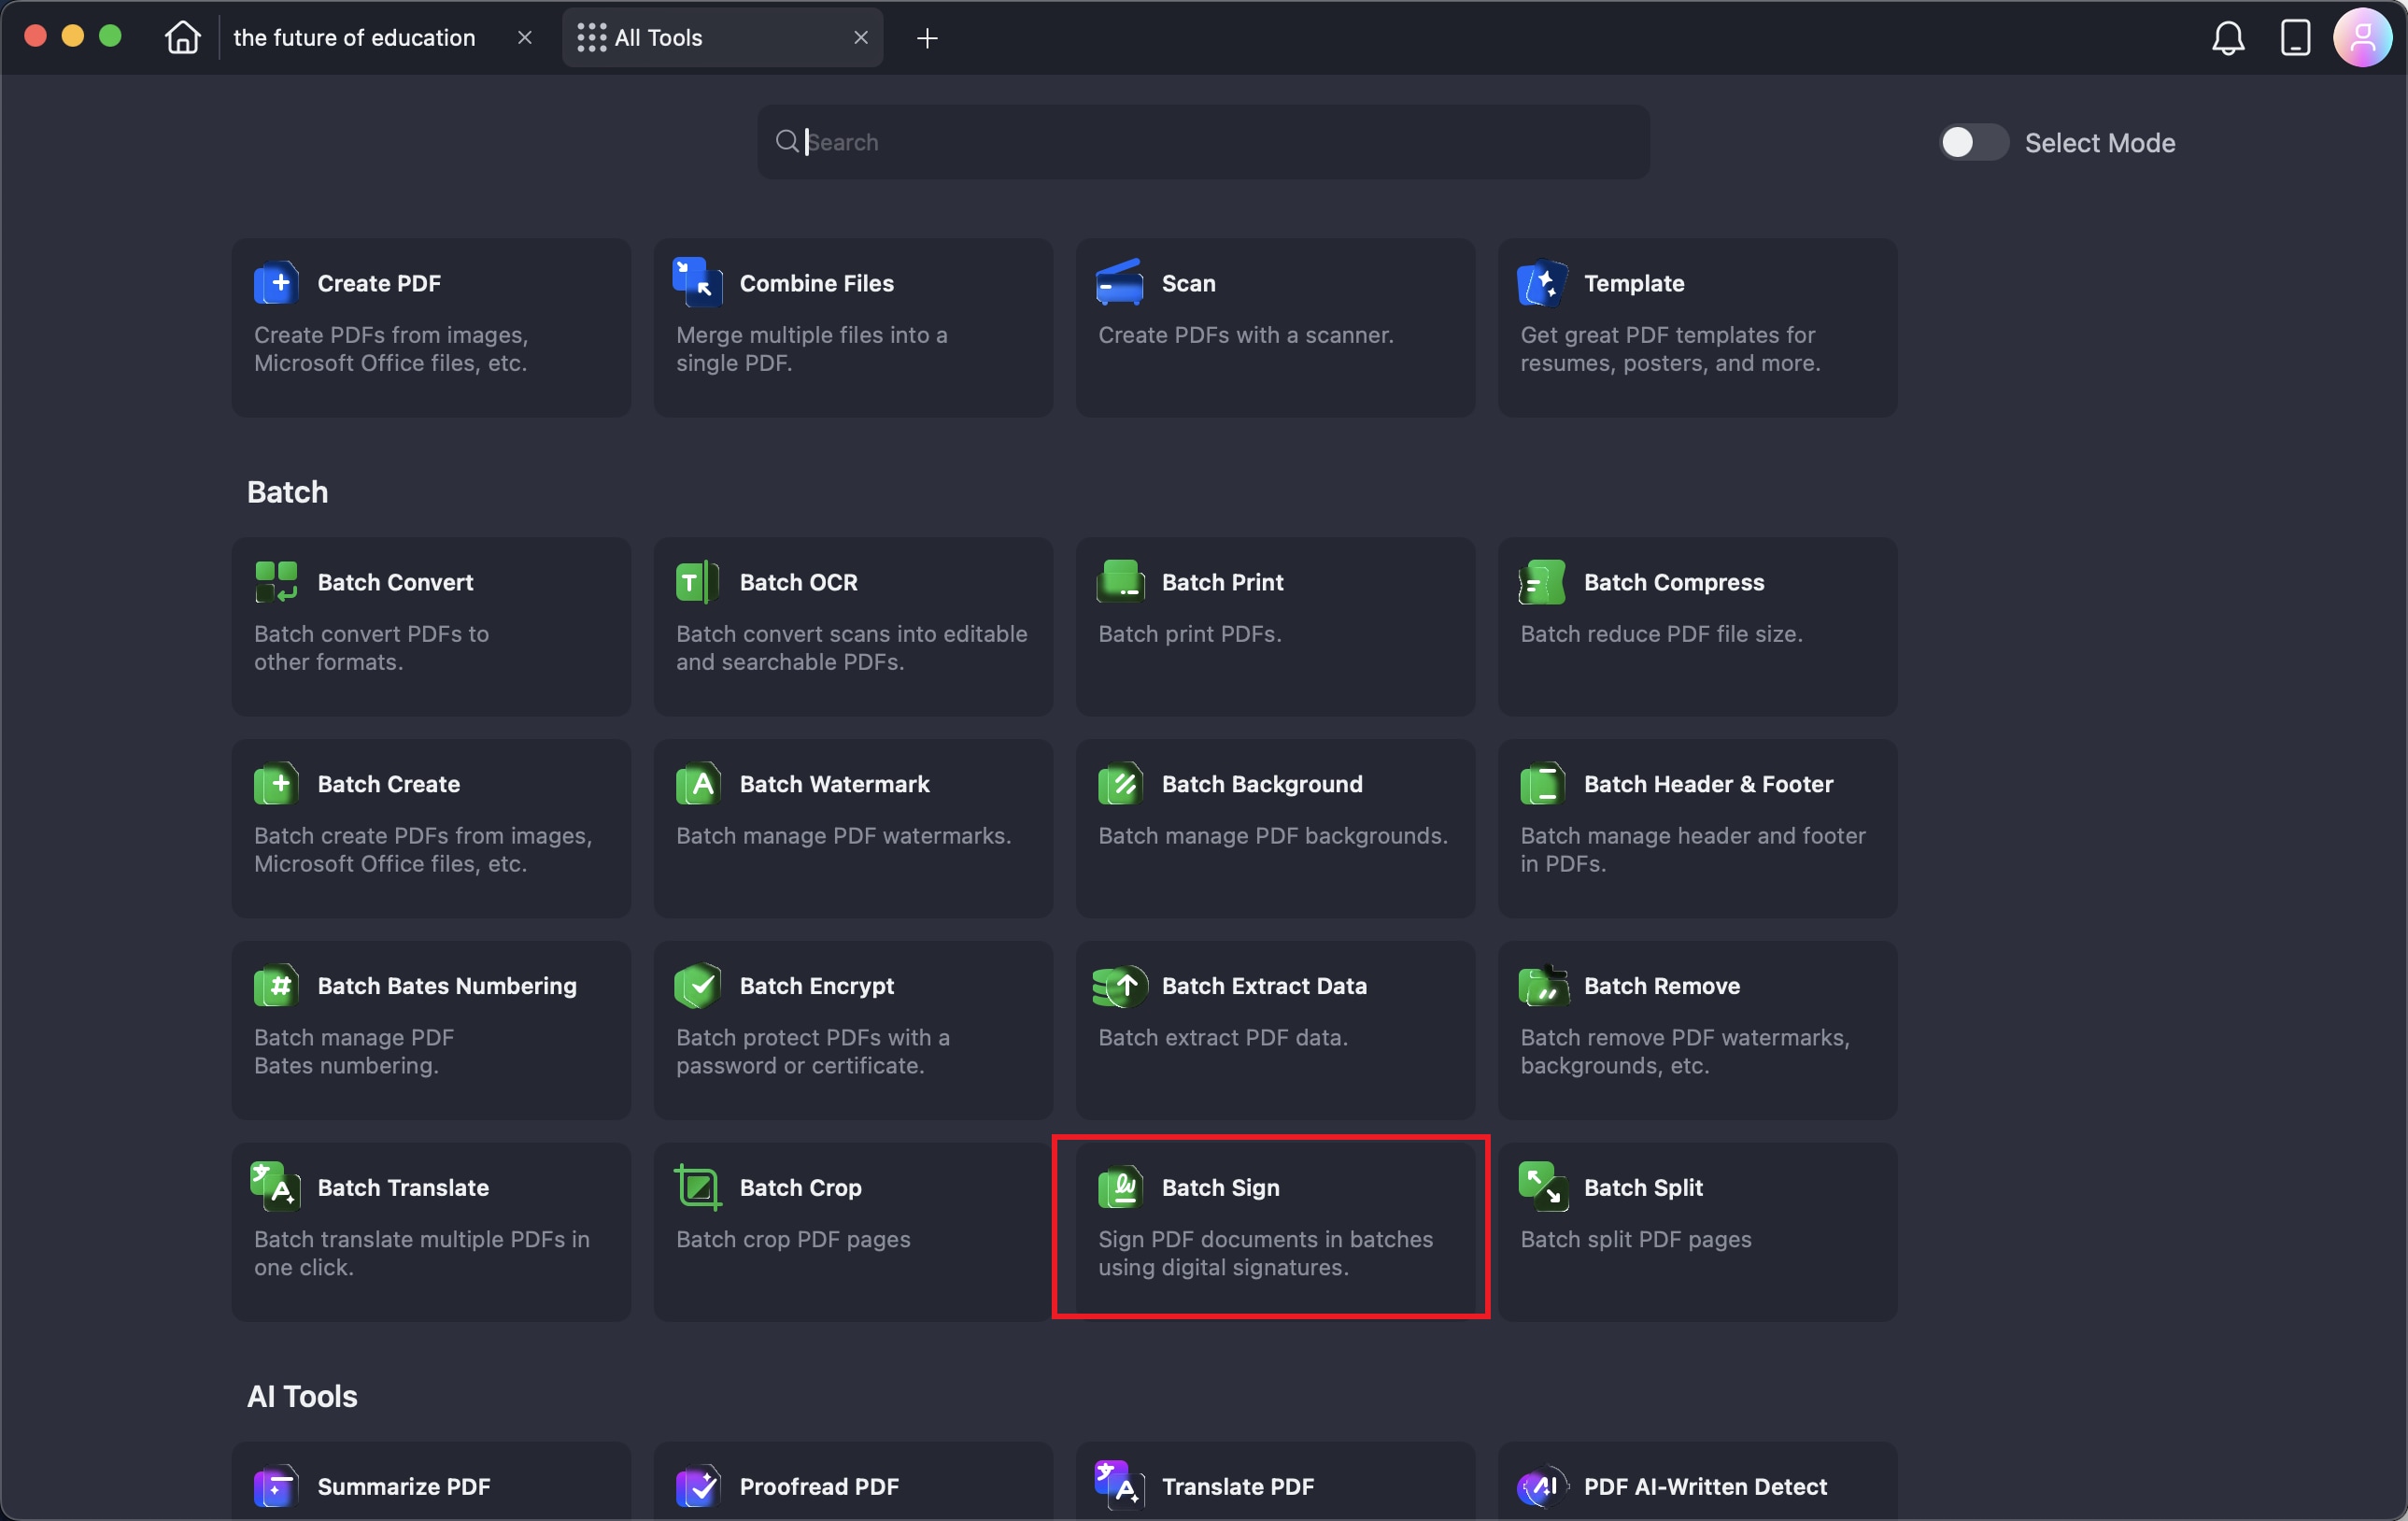
Step 1. After launching the tool on your device, head to the homepage and click on the "Batch Sign" option.
Step 2. Next, import your PDF files and press the "+" icon to add signature information. Choose the options such as "Create New Fields" to create new signature fields.
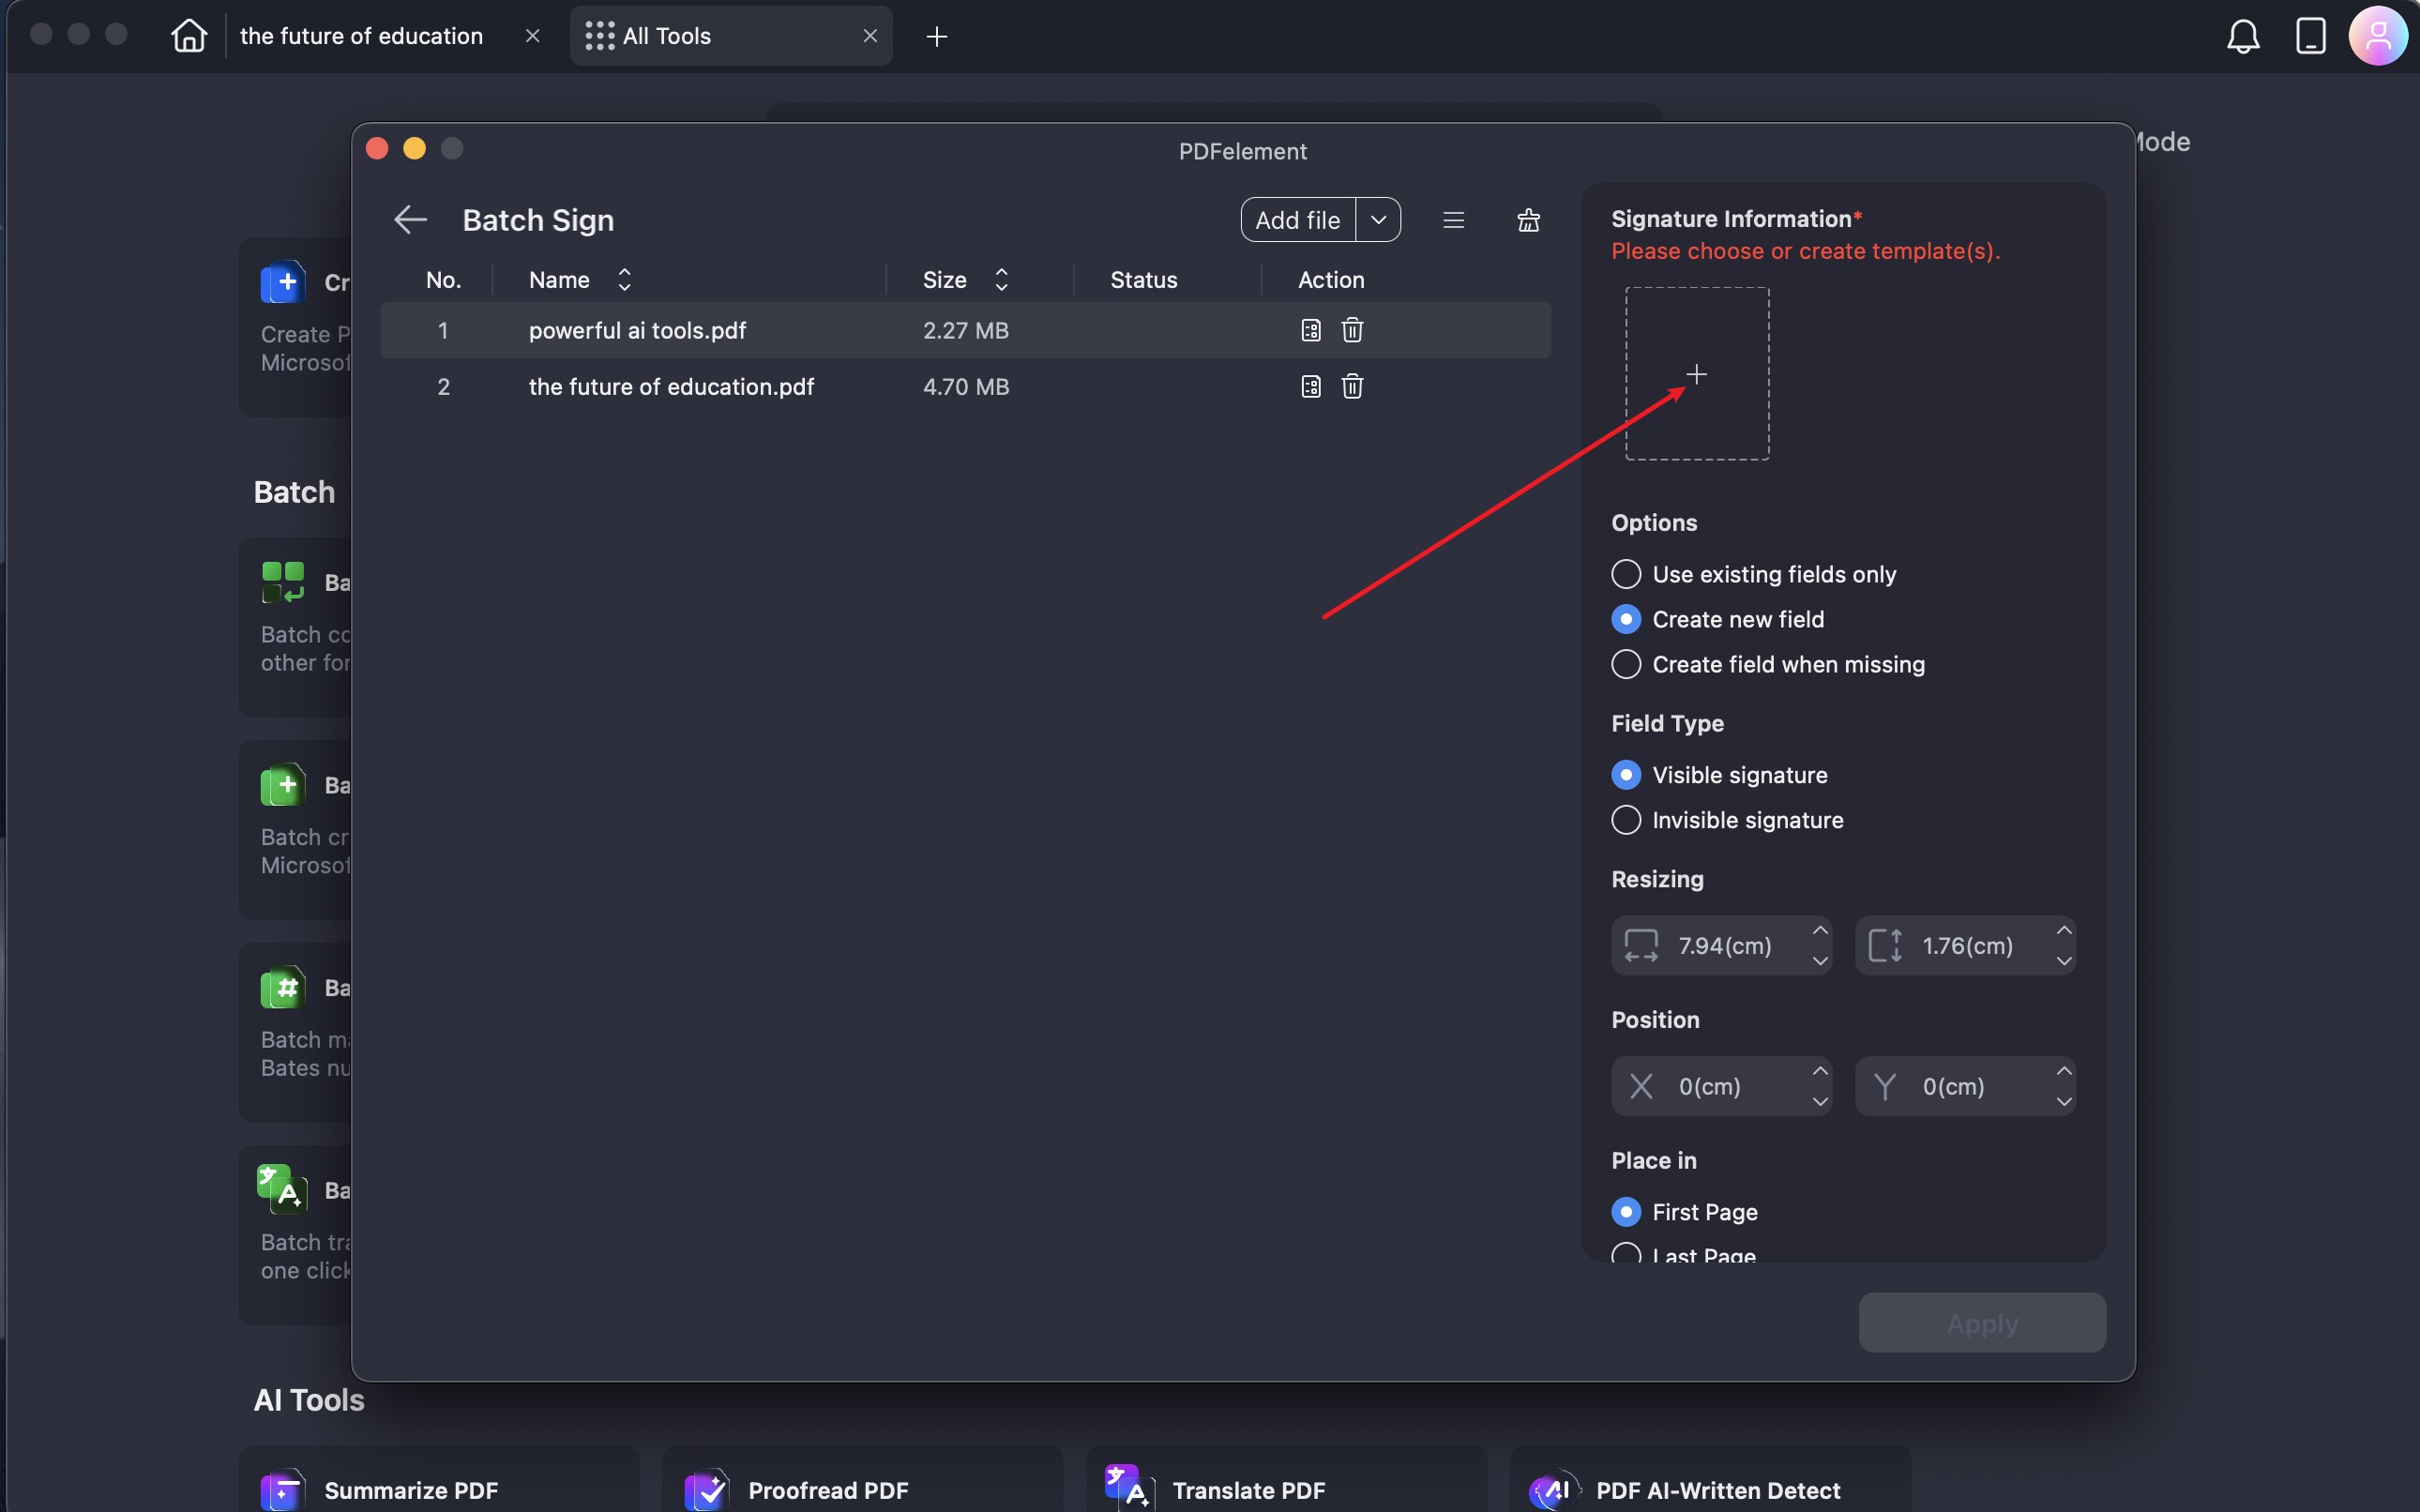
Step 3. Once the signature ID is created, click the "Apply" button to save the PDF with the signature added.