
PDFelement-Powerful and Simple PDF Editor
Get started with the easiest way to manage PDFs with PDFelement!
With PowerPoint, you can create a solid presentation packed with compelling images and eye-catching diagrams to cement your content. However, you can only use PPT if you have software that can open the document. This can be frustrating if you are in a hurry and need to access your content quickly. Your next best option is to convert it to a PDF format. This article will discuss six helpful tips for exporting PPT to PDF.
In this article
Part 1. Why Export PowerPoint to PDF?
As a student, teacher, or manager, you will probably interact with PowerPoint severally to create compelling presentations. However, the PPT format is a headache to deal with because it is not compatible with most devices. Here are some reasons why you should export your PowerPoint to PDF.
First and foremost, PDFs are universal digital documents compatible with almost all gadgets. On the other hand, you need to have PPT software to access the content in a PPT file. Converting your PPT to a PDF allows you to view the content hassle-free.
Secondly, PDFs always use the same format as the original document. However, when you attempt to open a PPT presentation on another software, you will discover that the format, fonts, and layout has completely changed and looks nothing like the original. Having a copy of your PPT in PDF form is always a great idea because you never know when it could come in handy. Unfortunately, everything has a downside to it.
While converting your PPTs to PDFs allows you to enjoy your content without restrictions and changes in the layout, you might not be able to see the animations and diagrams. This is the only advantage PPT has over PDFs. Nevertheless, PDFs still take the medal because they are universal, convenient, and practical.
Part 2. 6 Tips To Export PowerPoint to PDF
Now that you understand why you would want to export your PowerPoint to a PDF file, you might wonder how to achieve this task, especially if you are a beginner. Fortunately, this section will discuss six (6) tips to help you export PowerPoint to PDF.
Tip 1. Use Microsoft PowerPoint To Export PPTX to PDF on Windows
If you are using a Windows device, you can use Microsoft PowerPoint to convert a PPT to PDF. Here is a detailed guide to help you.
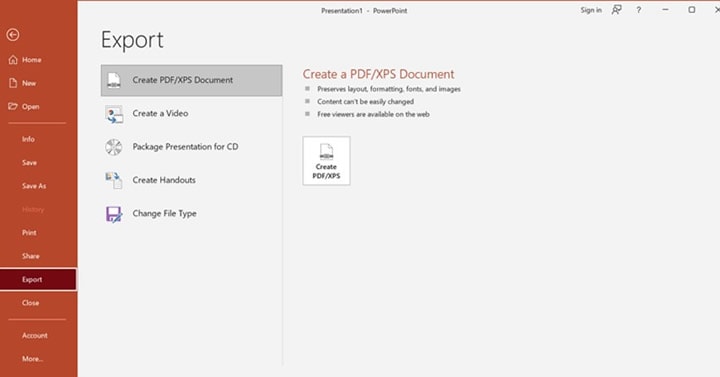
Step 1 Select the file you would like to export. Click on "Create PDF/XPS Document," then select "Create PDF/XPS."
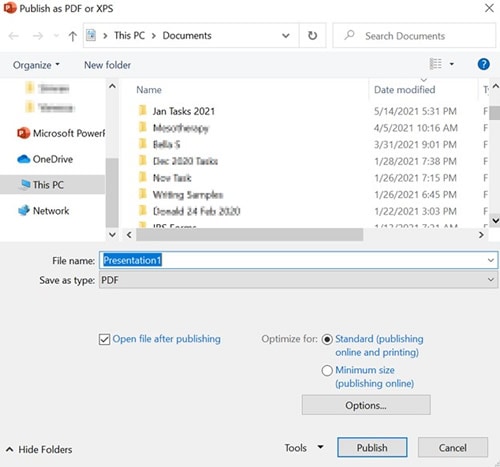
Step 2 Go to the "Publish as PDF or XPS" dialogue box and choose where you want to save your file. If you're going to save the file under a different name, select the "File name" box and type in the new name.
Step 3 Customize the final PDF to suit your needs and preference by doing the following:
Select "Optimize for" and click on "Standard" if you want to print your PDF in a higher quality. You can also click on "Minimize size" if you are sending the document via email and want to make it smaller.
Here is a list of tools under the "Options" button.
- Select "Range," then click on "Current slide" to save the current slide as a PDF.
- Click on "Slides," then use the "From" and "To" boxes to indicate the specific number of pages you would like to save as a PDF.
- Select the "Publish What" button and select whether you want to save only the comments, handouts or outline view and not the PDF itself.
- Click "OK" to save the changes to the file.
Step 4 Click "Publish" to complete the process and save your work.
Tip 2. Check Off-Slide Content Before Export
Unfortunately, any off-slide content within your PowerPoint slides will not be converted to PDF. Off-slide content includes diagrams and images you would like to transition and carry forward to your PDF document. Therefore, it would be wise to determine whether you would like any off-slide content in the new PDF.
Below is a step-by-step guide on how to check off-slide content.
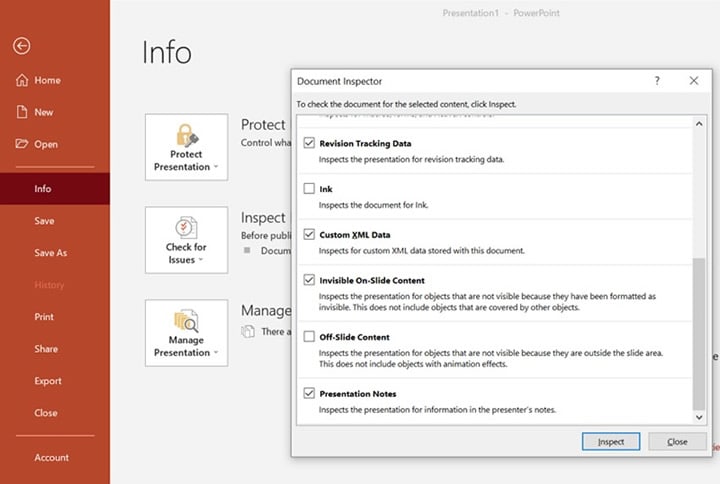
Step 1 Open the document you would like to inspect and select the "Info " button.
Step 2 Click on "Check for Issues," then select "Inspect Document."
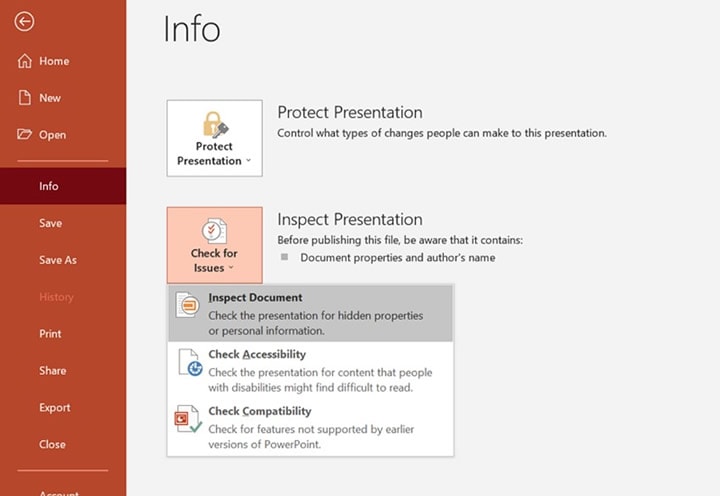
Step 3 Select the "Off-slide Content" button and wait for the process to complete. A report will appear that indicates the pages that won't show up on your PDF due to the presence of off-slide content.
Tip 3. Tick Bitmap Text When Fonts May Not Be Embedded Option
The fonts may vary from one document to another. If the font on your PPT cannot be embedded into the PDF you want to export, the process might be unsuccessful. To solve this predicament, PDFs use bitmap images of the text from your PPT to ensure the PDF looks exactly like the original document.
However, if you fail to enable this option, the PDF reader might substitute the font with something else, bringing about differences in the original and exported document. If the original document uses text that can be embedded in the PDF, then this step is unnecessary, and you are on the safe side.
Tip 4. Use a PDF Editor To Adjust the PDF Page Margin
Sometimes the converted PDF might have a large margin you want to reduce. This is a quick fix: you need a PDF editor to reduce the page margin to the preferred size. Wondershare PDFelement - PDF Editor Wondershare PDFelement Wondershare PDFelement is an excellent editing tool that can solve this predicament and allow you to enjoy your digital document.


 G2 Rating: 4.5/5 |
 100% Secure
Wondershare PDFelement is a user-friendly, intuitive, and fast tool you can rely on for all your PDF editing needs. You can use the platform online or download the app from Google Play Store or the App Store. Apart from adjusting the size of the pages and cropping unnecessarily large margins, here are some other nifty features you can expect when using this platform.
- Splitting PDFs into multiple files
- Deleting unwanted pages
- Inserting additional pages
- Rotating PDFs
- Extracting pages
- Rearranging pages on your PDF
- Replacing PDF pages
- Annotation
Check out the video below to learn how to work smart with PDFelement!
Here is a detailed guide on adjusting the page size using Wondershare PDFelement.
Step 1 Select "Home," then click on the "Crop" button.
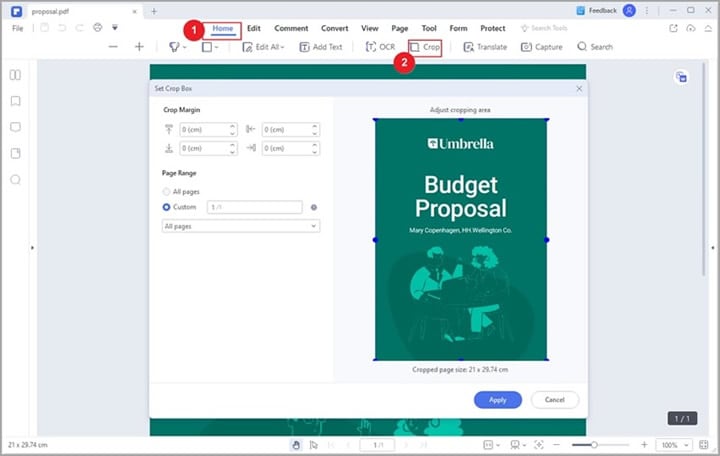
Step 2 Wait for the "Set Crop Box" dialogue box to appear. Adjust the cropping area by dragging the eight blue squares in the dashed box. Alternatively, you can enter the exact dimensions in the "Crop Margin" area.
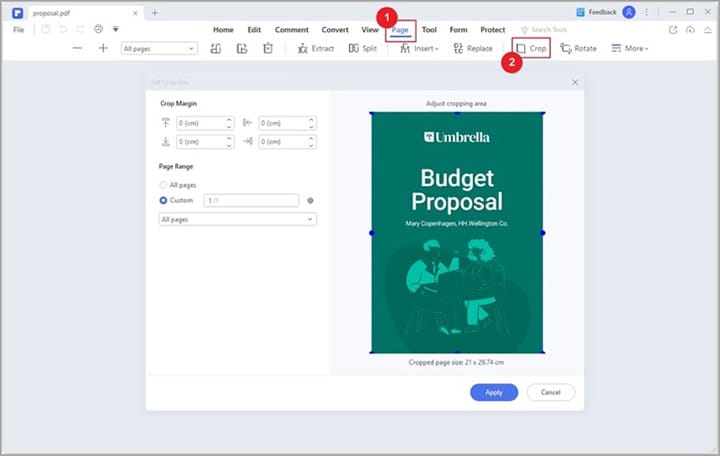
Step 3 Select Apply to save your changes and crop the page.
Tip 5. Use All-in-One Tools To Export PPT to PDF & Adjust the Output File Altogether
After exporting a PPT to PDF format, you may want to adjust or edit the output PDF as well. Then, you have to switch from Microsoft PowerPoint to a PDF editor, which is time-consuming and complicated. Fortunately, you can use all-in-one solutions to help you complete all PDF tasks in one program.
Wondershare PDFelement is such an excellent all-in-one PDF tool for your various needs. With this tool, you can export PPT documents to PDF files and crop PDF pages. Another perk of using Wondershare PDFelement is that it is across numerous devices, including Mac, iOS, and Windows. If you don't want to use the online version, you can always download the app offline and say goodbye to Internet connectivity restrictions.
Here are some of the advantages of PDFelement over Microsoft PowerPoint.
- It enables easy creation of industry-standard PDFs without hassles.
- It allows you to create a PDF from a PPT and adjust the page size without using different software.
- It is a fast and powerful generator and editing tool.
- It increases your efficiency.
Stick around to learn how to export a PDF to PPT using Wondershare PDFelement.
G2 Rating: 4.5/5 |100% Secure
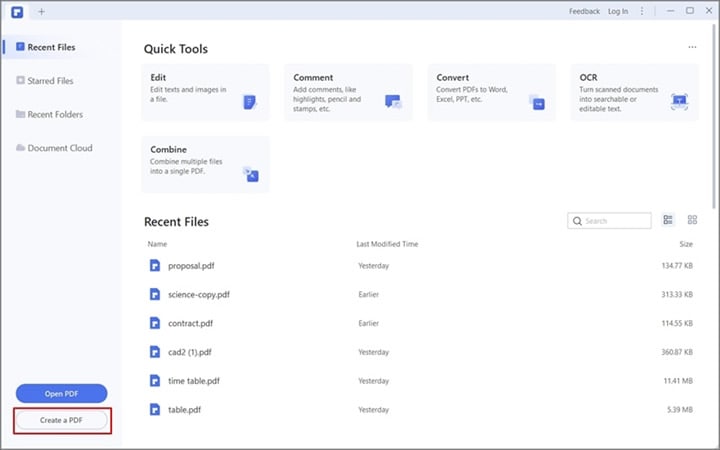
Step 1 Launch the Wondershare PDFelement program, go to the Home Window and click on "Create PDF." Open your PPT file in the space provided and wait for the program to detect it.
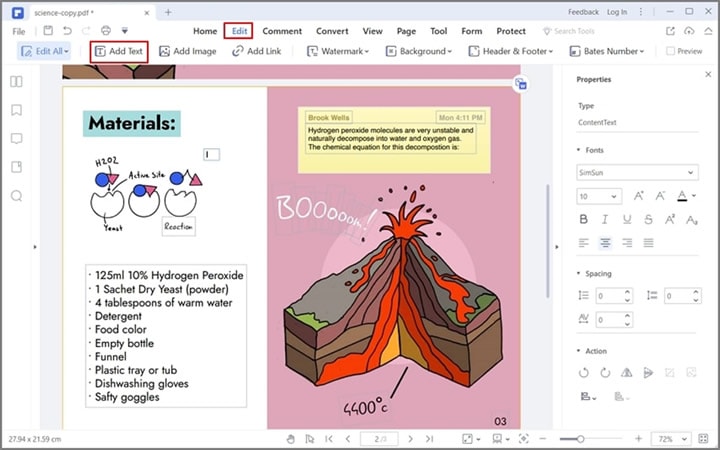
Step 2 If you want to edit your file before saving it, select the "Edit tab" to modify your content.
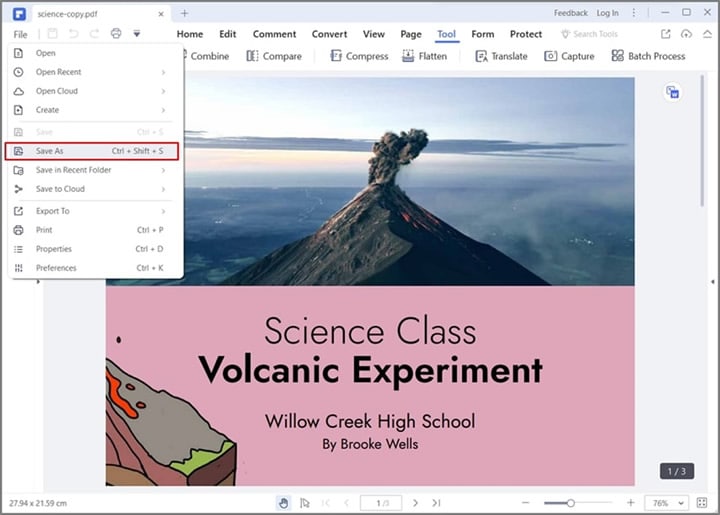
Step 3 Once you are happy with the changes, navigate to "File," then select "Save As" to save your file.
Tip 6. Export Multiple PPT Files to One PDF for Easy Share
The last tip we would like to discuss is exporting multiple PPT files to one PDF folder for easy sharing. It is pretty tedious exporting one PPT at a time, especially if you have more than three. However this might seem like a complicated process, but we assure you it is not. Wondershare PDFelement is an efficient tool that can help you with this task, and you won't even have to break a sweat.
Below is a guide on how to merge multiple PPT files into one PDF, making it easier to share.
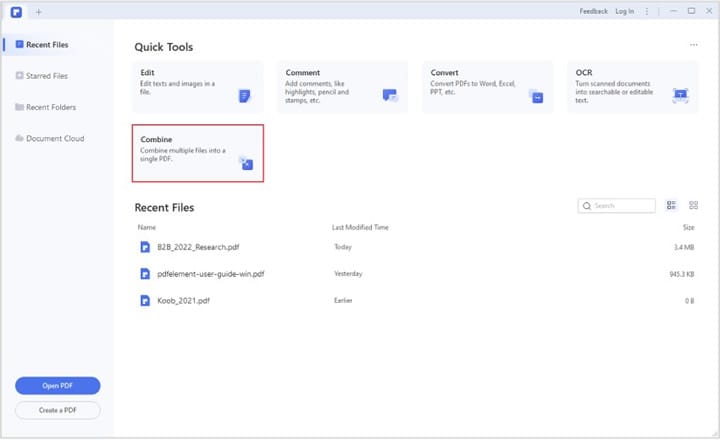
Step 1 Launch the program on your device. Under the "Quick Tool" tab, select the "Combine" box on the start page.
Step 2 A new Combine PDF window will appear where you can drag or drop the files you want to combine. Alternatively, you can click on the "Add Files" button. Another way to open files you want to combine is to select "Tool" and click the "Combine" button.
Step 3 Click on the "…" icon to indicate where to save the edited file.
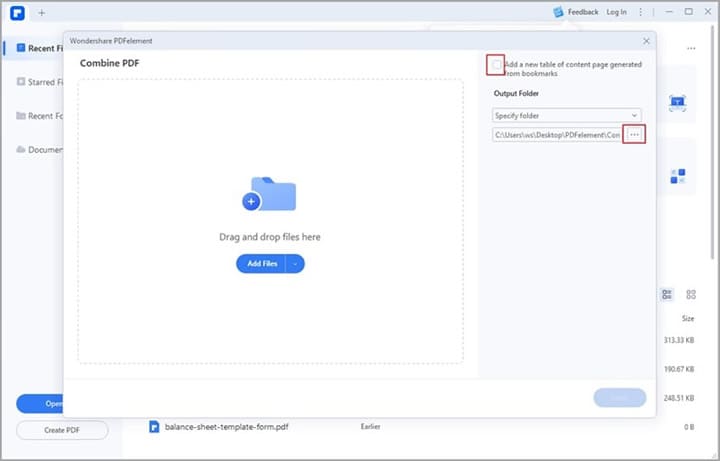
Step 4 Select the "Apply" button, and the program will combine the documents in seconds.
Conclusion
We hope this article has demystified exporting PPT to PDFs and shown you that it is indeed an easy process. The tools and tips make your work easier and make editing your PDFs as smooth as butter. Should you get lost, we hope the photos will provide more insight and show you what you need to do.

