
Table of Contents
Text boxes in Microsoft Word are useful when normal paragraphs are too rigid. You can place a callout in the margin, create a pull quote, label a diagram, add a form-like field, or position a short note exactly where you want it. The trick is knowing which text box option to use and how to format it so it looks intentional rather than pasted on top of the page.
This guide shows how to insert text box in Word, draw a custom one, remove the border, control text wrapping, and handle the document after exporting it to PDF. The steps apply to recent desktop versions of Word, including Word for Microsoft 365, Word 2021, Word 2019, and Word 2016. The exact ribbon labels may look slightly different on Mac or older versions, but the workflow is largely the same.


 G2 Rating: 4.5/5 |
 100% Secure
Why Use a Text Box in Word?
A text box gives you a separate container for text. Unlike a normal paragraph, it can be moved around the page, layered over or beside other content, styled with a border or background color, and resized without changing the main body text.
That makes it useful for design elements that need more control than ordinary typing. For example, you might use a text box for a sidebar note in a report, a highlighted quote in a newsletter, a label on a certificate, or instructions beside a form field. You can also place several text boxes on a page and align them to create a clean layout.
Text boxes are not always the best choice, though. If you are writing a long document with running body text, headings, and page breaks, standard paragraphs and styles are easier to maintain. Text boxes are best for short, positioned pieces of text. If you use too many of them in a long file, editing can become harder, especially when the document is shared or converted to another format.
For official Microsoft guidance on shapes and text boxes, you can also refer to Microsoft’s Word support resources.
How To Insert Text Box in Word
The fastest way to insert text box in Word is through the Insert tab. Word gives you two main options: choose a built-in text box design or draw one manually. Built-in designs are convenient for quick callouts, while drawing your own box gives you more control over size and placement from the start.
Insert a built-in text box
Open your Word document and click where you want the text box to appear. The exact position does not have to be perfect because you can move the box later.
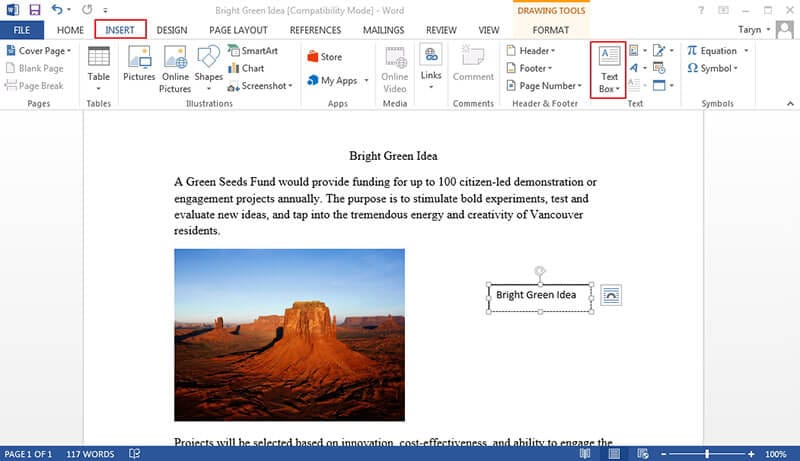
Go to Insert on the ribbon. In the Text group, click Text Box. Word will show a gallery of built-in text box styles, such as simple boxes, sidebars, and quote layouts. Choose one that fits your document. Word inserts the selected text box onto the page with placeholder text inside.
Click inside the box and replace the placeholder text with your own. If the text does not fit, drag one of the sizing handles on the corners or sides. Corner handles resize the box proportionally, while side handles make it wider or taller.
Built-in text boxes are helpful when you want a ready-made design, but they may include colors, borders, or spacing that do not match your document. After inserting one, use the Shape Format tab to adjust its appearance.
Draw your own text box
If you want a plain box or need a specific size, drawing is usually better than choosing a template.
Go to Insert > Text Box, then select Draw Text Box near the bottom of the menu. Your cursor changes to a crosshair. Click and drag on the page to draw the box. Release the mouse when it reaches the size you want.
After drawing the box, Word places the cursor inside it so you can start typing. If you need to adjust the size, click the border of the box and drag a handle. To move it, point to the border until the cursor changes to a four-sided arrow, then drag the box to a new location.
This is often the cleanest method for anyone searching for how to add text box in Word for a custom layout, because it avoids extra styling that you might need to remove later.
Add text and resize the box
Once the text box is on the page, click inside it and type normally. You can format the text using the Home tab just as you would format regular text: change the font, size, color, bolding, alignment, line spacing, or paragraph spacing.
If your text appears cut off, the box may be too small. Click the border and drag a sizing handle. If the box moves instead of resizing, make sure you are dragging one of the small circles or squares around the border, not the border itself.
You can also set a precise size. Click the text box, open the Shape Format tab, and look for the Size group. Enter exact height and width values if you need consistent boxes across a form, flyer, or template.
How To Insert Text Box in Word Without Border
Many users want to insert text box in Word without border because the text box is only being used for positioning. For example, you may want a label, signature instruction, floating note, or caption to appear in a specific spot without showing a visible rectangle around it.
Word adds an outline to many text boxes by default. You can remove that outline in a few clicks.
Remove the outline
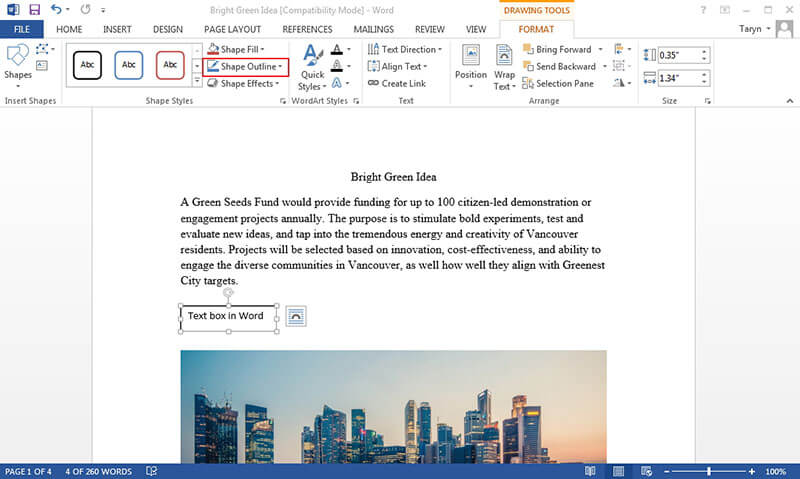
Click the text box. Make sure the border is selected; you should see sizing handles around the outside. Then go to Shape Format on the ribbon.
Click Shape Outline, then choose No Outline. The border disappears, but the text remains in place.
If you do not see the Shape Format tab, click the edge of the text box rather than the text inside it. Word only shows shape formatting tools when the text box object is selected.
Remove or change the fill
Some text boxes also have a background fill. If you want the text box to blend into the document page, remove the fill as well.
Select the text box, go to Shape Format, click Shape Fill, and choose No Fill. This leaves only the text. If you want a subtle callout instead, choose a light color such as pale gray or a brand color with low contrast.
A borderless, no-fill text box is useful when you want text to sit over a shape, image, form area, or blank space without affecting surrounding paragraphs. It behaves like a movable text layer.
Make the box blend into the page
Removing the border is only part of the job. A text box can still look awkward if the spacing, alignment, or wrapping does not match the rest of the document.
After you remove the outline, check the text box’s internal margins. Select the box, right-click its border, and choose Format Shape. In the formatting pane, open Text Options, then adjust the text box margins if needed. Reducing left and right margins can help when you need a label to align precisely with other page elements.
If the box is on top of a colored area, you may need to set Shape Fill to match that area rather than using No Fill. If it sits on a white page, No Fill usually works best.
How To Make Text Boxes in Word Easier To Control
Learning how to make text boxes in Word is not only about inserting them. The more important part is controlling how they behave with the rest of the document. Most text box problems come from wrapping, anchoring, or accidentally selecting the text instead of the box.
Move a text box freely
To move a text box, click its border. When your cursor becomes a four-headed arrow, drag the box to a new location. If the box refuses to go where you want, the text wrapping setting may be limiting it.
Click the Layout Options button that appears near the selected text box. Choose a wrapping style such as Square, Tight, Through, Top and Bottom, Behind Text, or In Front of Text. For the most flexible positioning, In Front of Text often works well, but use it carefully because it can cover body text. Square is usually better for callouts that should sit beside paragraphs.
For precise placement, select the text box and use the arrow keys to nudge it. Hold Ctrl while pressing an arrow key for smaller movements in many Word setups. You can also use Shape Format > Align to line up several boxes.
Wrap text around a text box
Text wrapping controls how the surrounding document text reacts to your text box. This setting matters most when the box sits near paragraphs.
A few common choices are:
Square: Body text wraps around the rectangular boundary of the text box. Good for side notes and callouts.
Top and Bottom: Text stays above and below the box, leaving the sides clear. Useful for wide callouts.
In Front of Text: The box floats over the document text. Best for labels or design elements, but easy to misuse.
Behind Text: The box sits behind the document text. Useful for background labels or watermark-like effects.
If text is jumping unexpectedly when you move the box, try changing the wrapping option. You can also open More Layout Options from the layout menu for exact horizontal and vertical positions.
Copy, align, group, or delete text boxes
After you have styled one text box, you do not need to rebuild the next one from scratch. Select the border of the text box, press Ctrl + C, then press Ctrl + V to copy and paste it. Replace the text in the duplicate. This is a good way to create consistent labels, form hints, or repeated callouts.
If you have multiple text boxes that should line up, select them together by holding Ctrl while clicking each border. Then go to Shape Format > Align and choose an alignment option such as Align Left, Align Center, or Distribute Vertically. The align tools are much more accurate than dragging by eye.
You can also group multiple text boxes or shapes so they move together. Select the objects, go to Shape Format > Group, and choose Group. This is helpful when you have a label and icon that should stay together.
To delete a text box, click its border and press Delete. If only the text disappears, you probably clicked inside the box instead of selecting the border. Undo with Ctrl + Z, click the border, and try again.
Fix common text box problems
A few small issues cause most frustration with text boxes in Word. If your text box is hard to select, zoom in and click directly on the border. If it keeps shifting position, check the layout options and consider setting a fixed position from More Layout Options. If the text inside looks too close to the edges, adjust the internal margins in the Format Shape pane.
If a text box disappears behind an image or another object, select the visible object, open Shape Format, and use Bring Forward or Send Backward. Word layers objects, so the order matters. A text box can be present on the page but hidden behind a picture, shape, or another text box.
If the text box changes the line spacing around it, switch the wrapping style. In Line with Text makes the box behave like a large character inside a paragraph, which is sometimes useful but often awkward for design layouts.
Working With Text Boxes After Converting Word to PDF
Word text boxes are editable in Word, but once a document is converted to PDF, the workflow changes. A PDF is designed to preserve the page layout, so the text box may no longer behave like a Word object. Depending on how the PDF was created, the text may be editable text, flattened page content, or part of an image.
This matters if you send a document for review, collect comments, or need to make last-minute edits after exporting.
Why Word text boxes can behave differently in PDFs
When you save or export a Word file as a PDF, Word tries to preserve the visual appearance of the page. That usually means the text box will look correct in the PDF. However, editing it later may not work the same way.
If the PDF keeps the text as editable content, a PDF editor may let you select and change the text. If the PDF has been flattened or scanned, the text may act like an image. In that case, OCR may be needed before editing. Comments and annotations also work differently from original page text: a PDF text box comment is an annotation layer, not the same as a Word text box.
The practical rule is simple: do major layout work in Word before exporting. Use a PDF editor for review, annotation, signing, OCR, or small post-export corrections.
How PDFelement helps with PDF text boxes and annotations
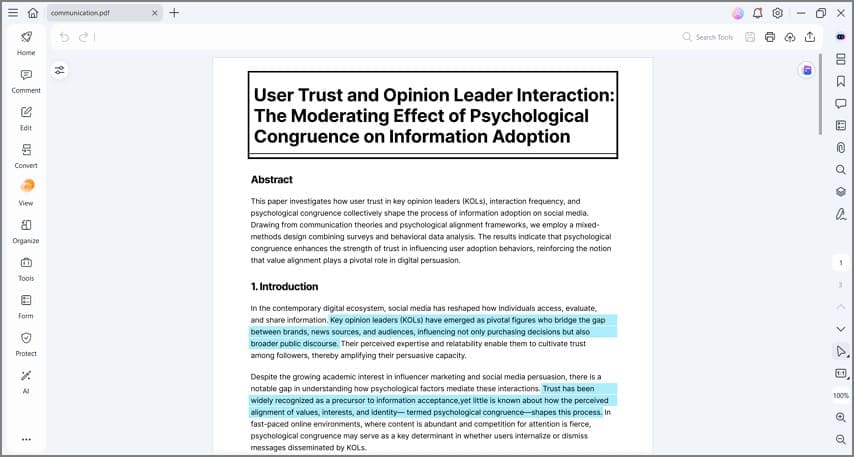
PDFelement is useful after the Word document becomes a PDF and you still need to work with text, comments, or form-like notes. For example, if you inserted text boxes in Word to create callouts or instructions, exported the file, and then noticed a typo, PDFelement can help you edit PDF text where the file structure allows it. If the PDF came from a scan or image-based document, its OCR feature can recognize text so the document becomes searchable and easier to work with.
G2 Rating: 4.5/5 |100% Secure
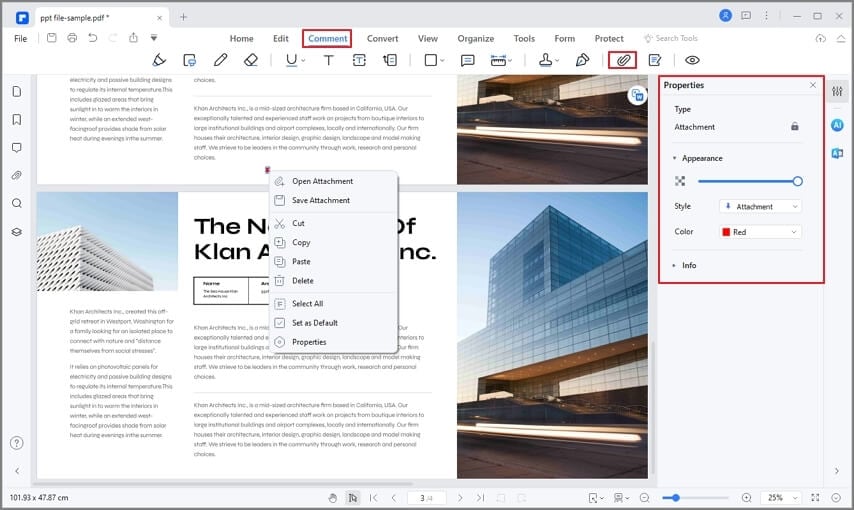
For review workflows, PDFelement’s comment tools are especially relevant. Instead of changing the original PDF content, you can add a text box annotation, leave a note for another reviewer, or mark an area that needs attention. This is a cleaner approach when you do not want to alter the source document but still need visible feedback on the page.

To add text directly to a PDF in PDFelement, open the file and use the text editing tools. If you need a comment-style box, use the comment or annotation tools instead. A comment text box can be useful for review notes, while direct text editing is better for correcting actual document content.

If your goal is to maintain a polished document workflow, use Word for building the layout and PDFelement for the PDF stage: checking the exported file, adding comments, applying OCR when needed, signing, compressing, or preparing the PDF for sharing.
G2 Rating: 4.5/5 |100% Secure
Best Practices for Using Text Boxes in Word Documents
Text boxes can make a document clearer, but they can also make it messy if they are used as a workaround for every layout problem. Use them deliberately.
For short callouts, labels, quotes, and design accents, text boxes are a good choice. For long sections of content, use normal paragraphs, columns, tables, or styles instead. Those tools are easier to edit and more reliable when the document reflows across pages.
Keep formatting consistent. If your document uses several text boxes, match their font, spacing, border weight, and fill color. A single mismatched text box can make a report or proposal look less polished. Copying an existing formatted box is usually faster than recreating each one manually.
Pay attention to accessibility, too. Text boxes can sometimes affect reading order, especially when documents are converted to PDF or read with assistive technology. If the document is formal, legal, academic, or public-facing, avoid placing critical information only in floating boxes unless you have checked the final reading order. Microsoft provides general guidance on making Word documents accessible.
Before sharing the file, review it in the format your audience will use. If you send the Word document, check that the text boxes do not shift when reopened. If you send a PDF, export it and inspect the page layout carefully. Text boxes that look fine while editing can sometimes overlap nearby content after font substitution, page size changes, or conversion.
People Also Ask
-
How do I insert a text box in Word quickly?
Go to Insert > Text Box and choose a built-in style, or select Draw Text Box to create your own. Click inside the box and type your text. You can then resize, move, and format the box from the Shape Format tab. -
How do I insert text box in Word without border?
Select the text box border, go to Shape Format, click Shape Outline, and choose No Outline. If the box also has a background color, click Shape Fill and choose No Fill to make it fully blend into the page. -
Why can’t I move my text box freely in Word?
The text box may be set to In Line with Text, which makes it behave like part of a paragraph. Select the box, click the Layout Options icon, and choose another wrapping style such as Square or In Front of Text. After that, you should be able to drag it more freely. -
How do I delete a text box but keep the text?
Click inside the text box, select the text, and copy it with Ctrl + C. Paste it into the main document where you want it. Then click the text box border and press Delete. Word does not have a single “remove box but keep text in place” command for every layout situation, so copying the text first is the safest method. -
How do I delete a text box completely?
Click the border of the text box so the whole object is selected, then press Delete. If only the words inside are removed, undo the action and click the border instead of the inside text area. -
Can I rotate a text box in Word?
Yes. Select the text box and use the circular rotation handle above it. You can also go to Shape Format > Rotate for preset rotation options. Rotated text boxes are useful for labels, sidebars, and design layouts, but avoid rotating long text because it can be harder to read. -
Can I put a text box over an image in Word?
Yes. Insert the image, then insert or draw a text box on top of it. Set the text box wrapping to In Front of Text if needed. To remove the visible rectangle, use Shape Outline > No Outline and Shape Fill > No Fill, or choose a semi-transparent fill if you want the text to stand out. -
Why does my text box move to another page?
A text box is usually anchored to a paragraph. If that paragraph moves, the text box may move with it. Select the text box, open Layout Options or More Layout Options, and check its positioning settings. Keeping the anchor near the related content helps prevent unexpected movement. -
Are Word text boxes preserved when saving as PDF?
Usually, yes—the visual layout is preserved when you export from Word to PDF. However, the text box may not remain editable as a Word-style object inside the PDF. For PDF-stage edits, annotations, OCR, or review comments, use a PDF editor such as PDFelement. -
What is the difference between a Word text box and a PDF text box comment?
A Word text box is part of the Word document layout. A PDF text box comment is usually an annotation placed on top of the PDF page. The first is best for designing the original document; the second is better for reviewing, commenting, or marking up a finished PDF.

