The issue of using Linux to sign PDFs: When users need to sign PDFs in Linux, they typically use open-source tools like LibreOffice Draw. The problem is, it doesn’t allow you to send a document for multiple signatures from different signers. There’s also no option to track the signing status. In addition, they will each have to have a PDF editor installed on their desktops or mobile in order to sign the document. All of this is very time-consuming and inconvenient. But there’s a solution to the ‘sign PDF file on Linux’ problem!
Introducing Wondershare PDFelement Cloud: Sign PDF on Linux
PDFelement Cloud is the latest cloud-based software platform from one of the most prominent companies in the PDF space - Wondershare Technologies. It is essentially a cloud storage solution with a built-in electronic signature tool for personal use and capturing signatures from other individuals, with a tracking dashboard to show you the signing status of all your uploaded documents. When a document is sent for signing, the recipient will get an email with a link. This link will take them to a secure web location for them to sign the document. They do not have to install anything, which makes it extremely useful in a variety of business scenarios, such as signing contracts or agreements and acknowledging the receipt of official notices.
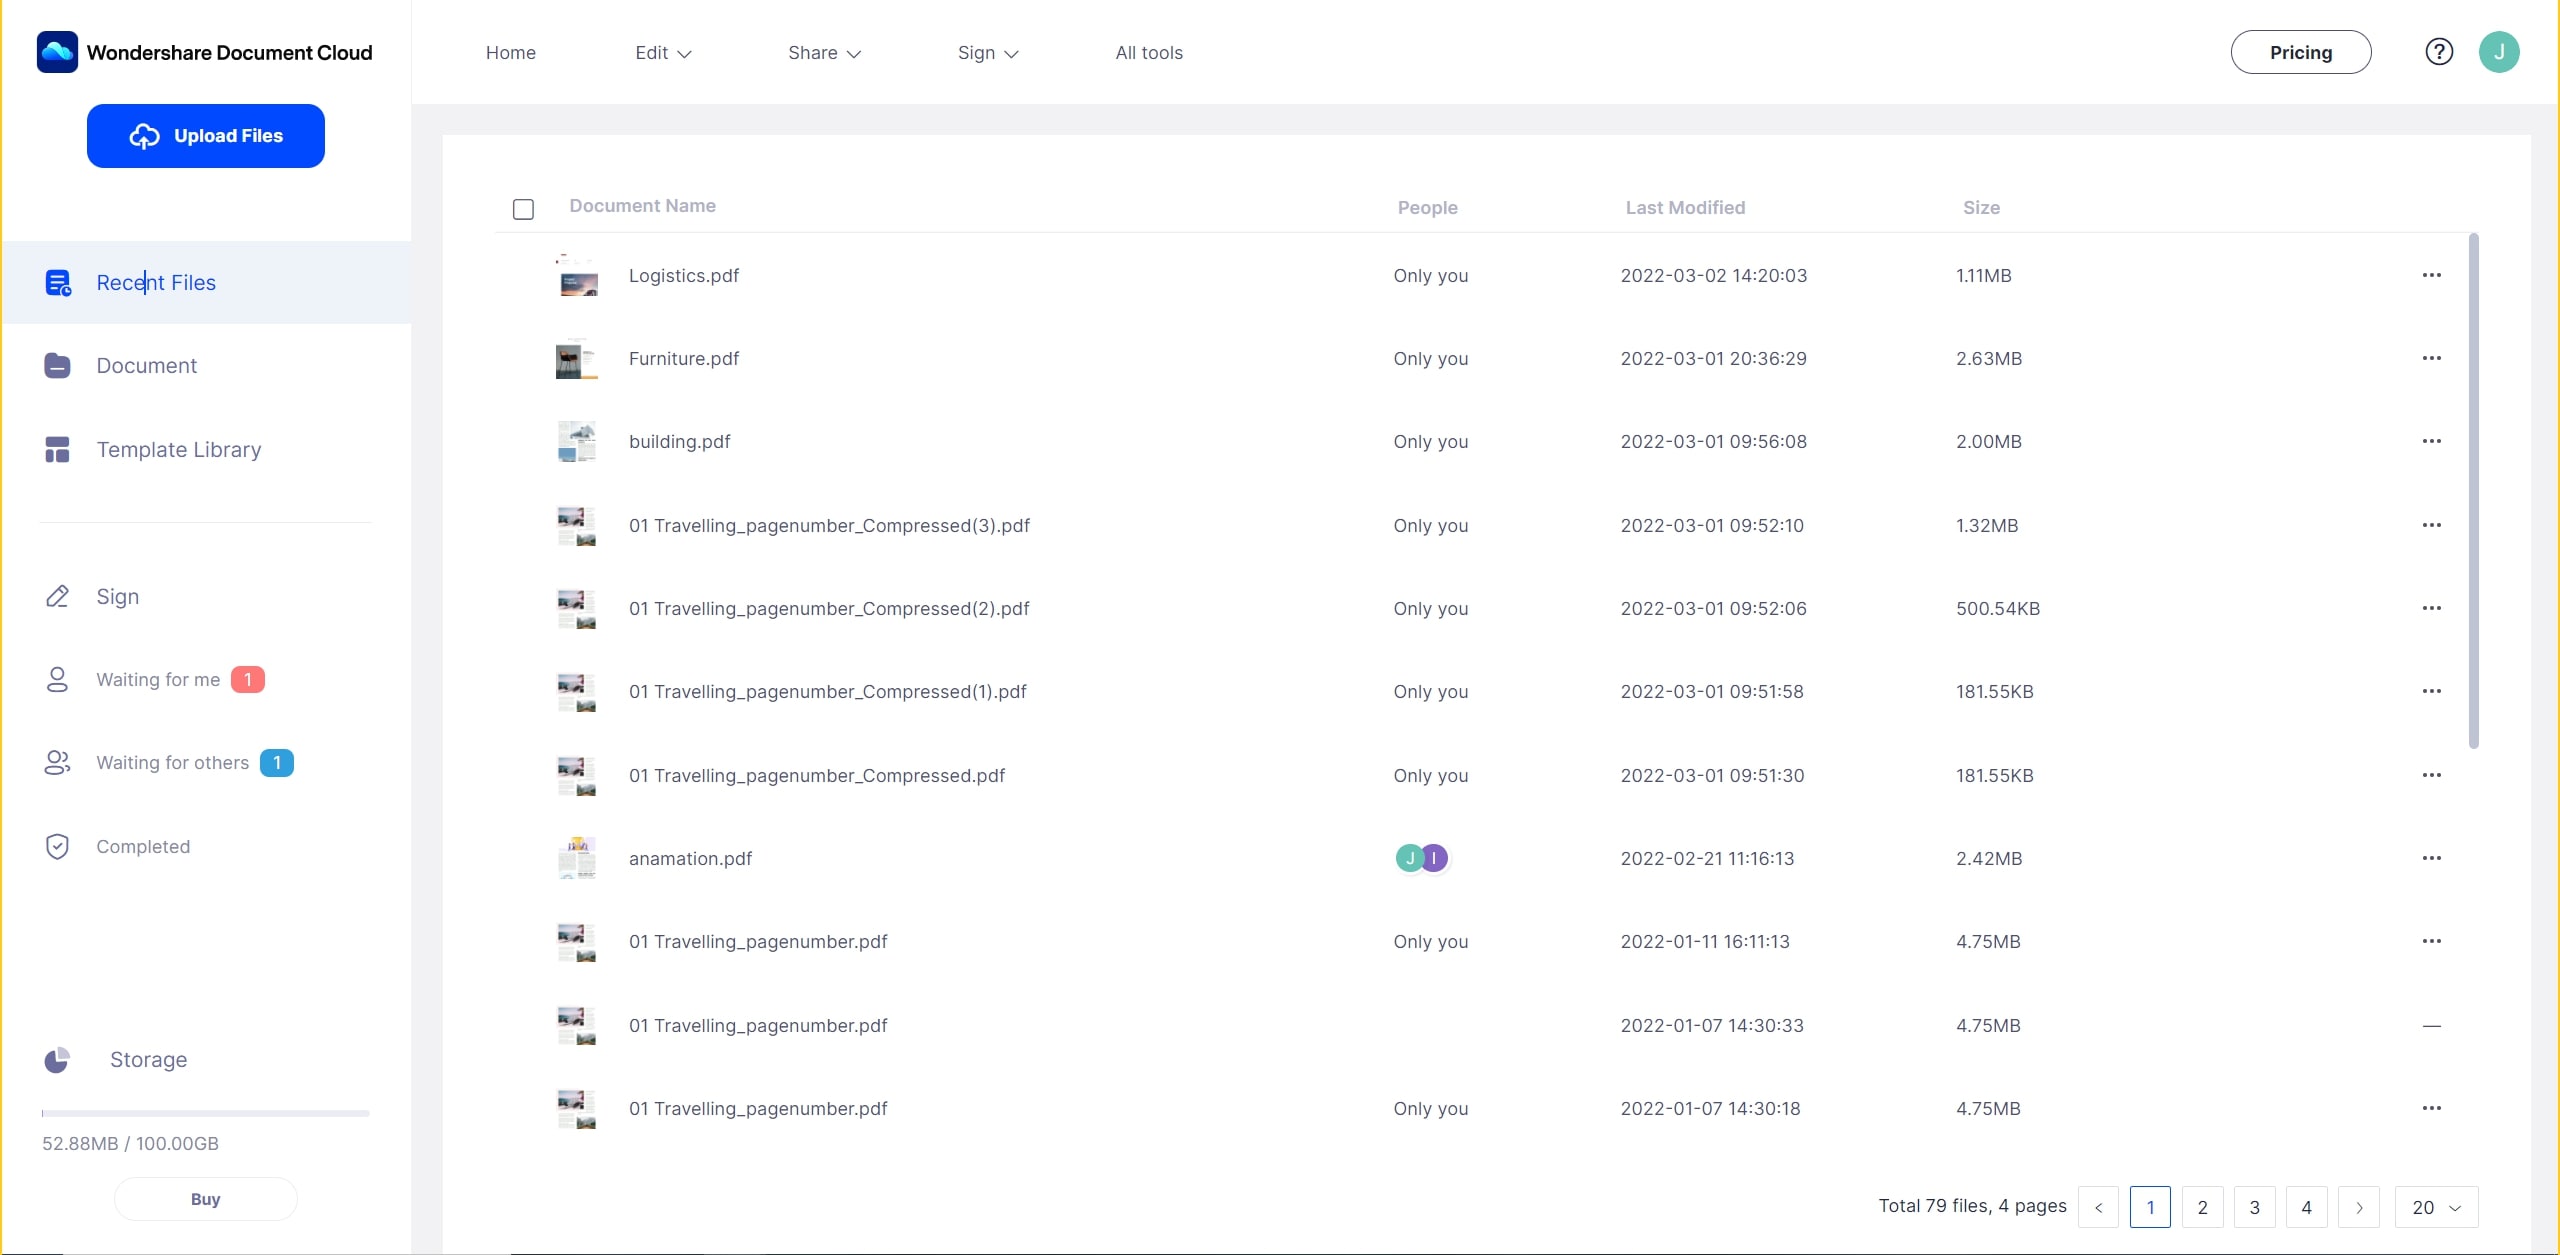
The product is available as a free version with paid upgrades. The free plan allows you to store up to 1GB of documents and send documents for signatures up to 5 times. The paid version increases the limit to 100GB and removes the limit on the number of document sends.
Below is a step-wise description of how to sign PDF in Linux using a modern browser like Mozilla Firefox:
1. Set up a login on the Wondershare website.

If you currently use PDFelement or any of Wondershare’s other products, you can use the same Wondershare ID here. If not, it only takes a few seconds to set up a new account.
2. Upload the document that requires a signature.

Once you log in, you’ll see an Upload File button. Click on it, select your PDF, and click Open to upload the file. You will be able to see it in the Home or Document tab once it’s imported.
3. Next, choose your signing option
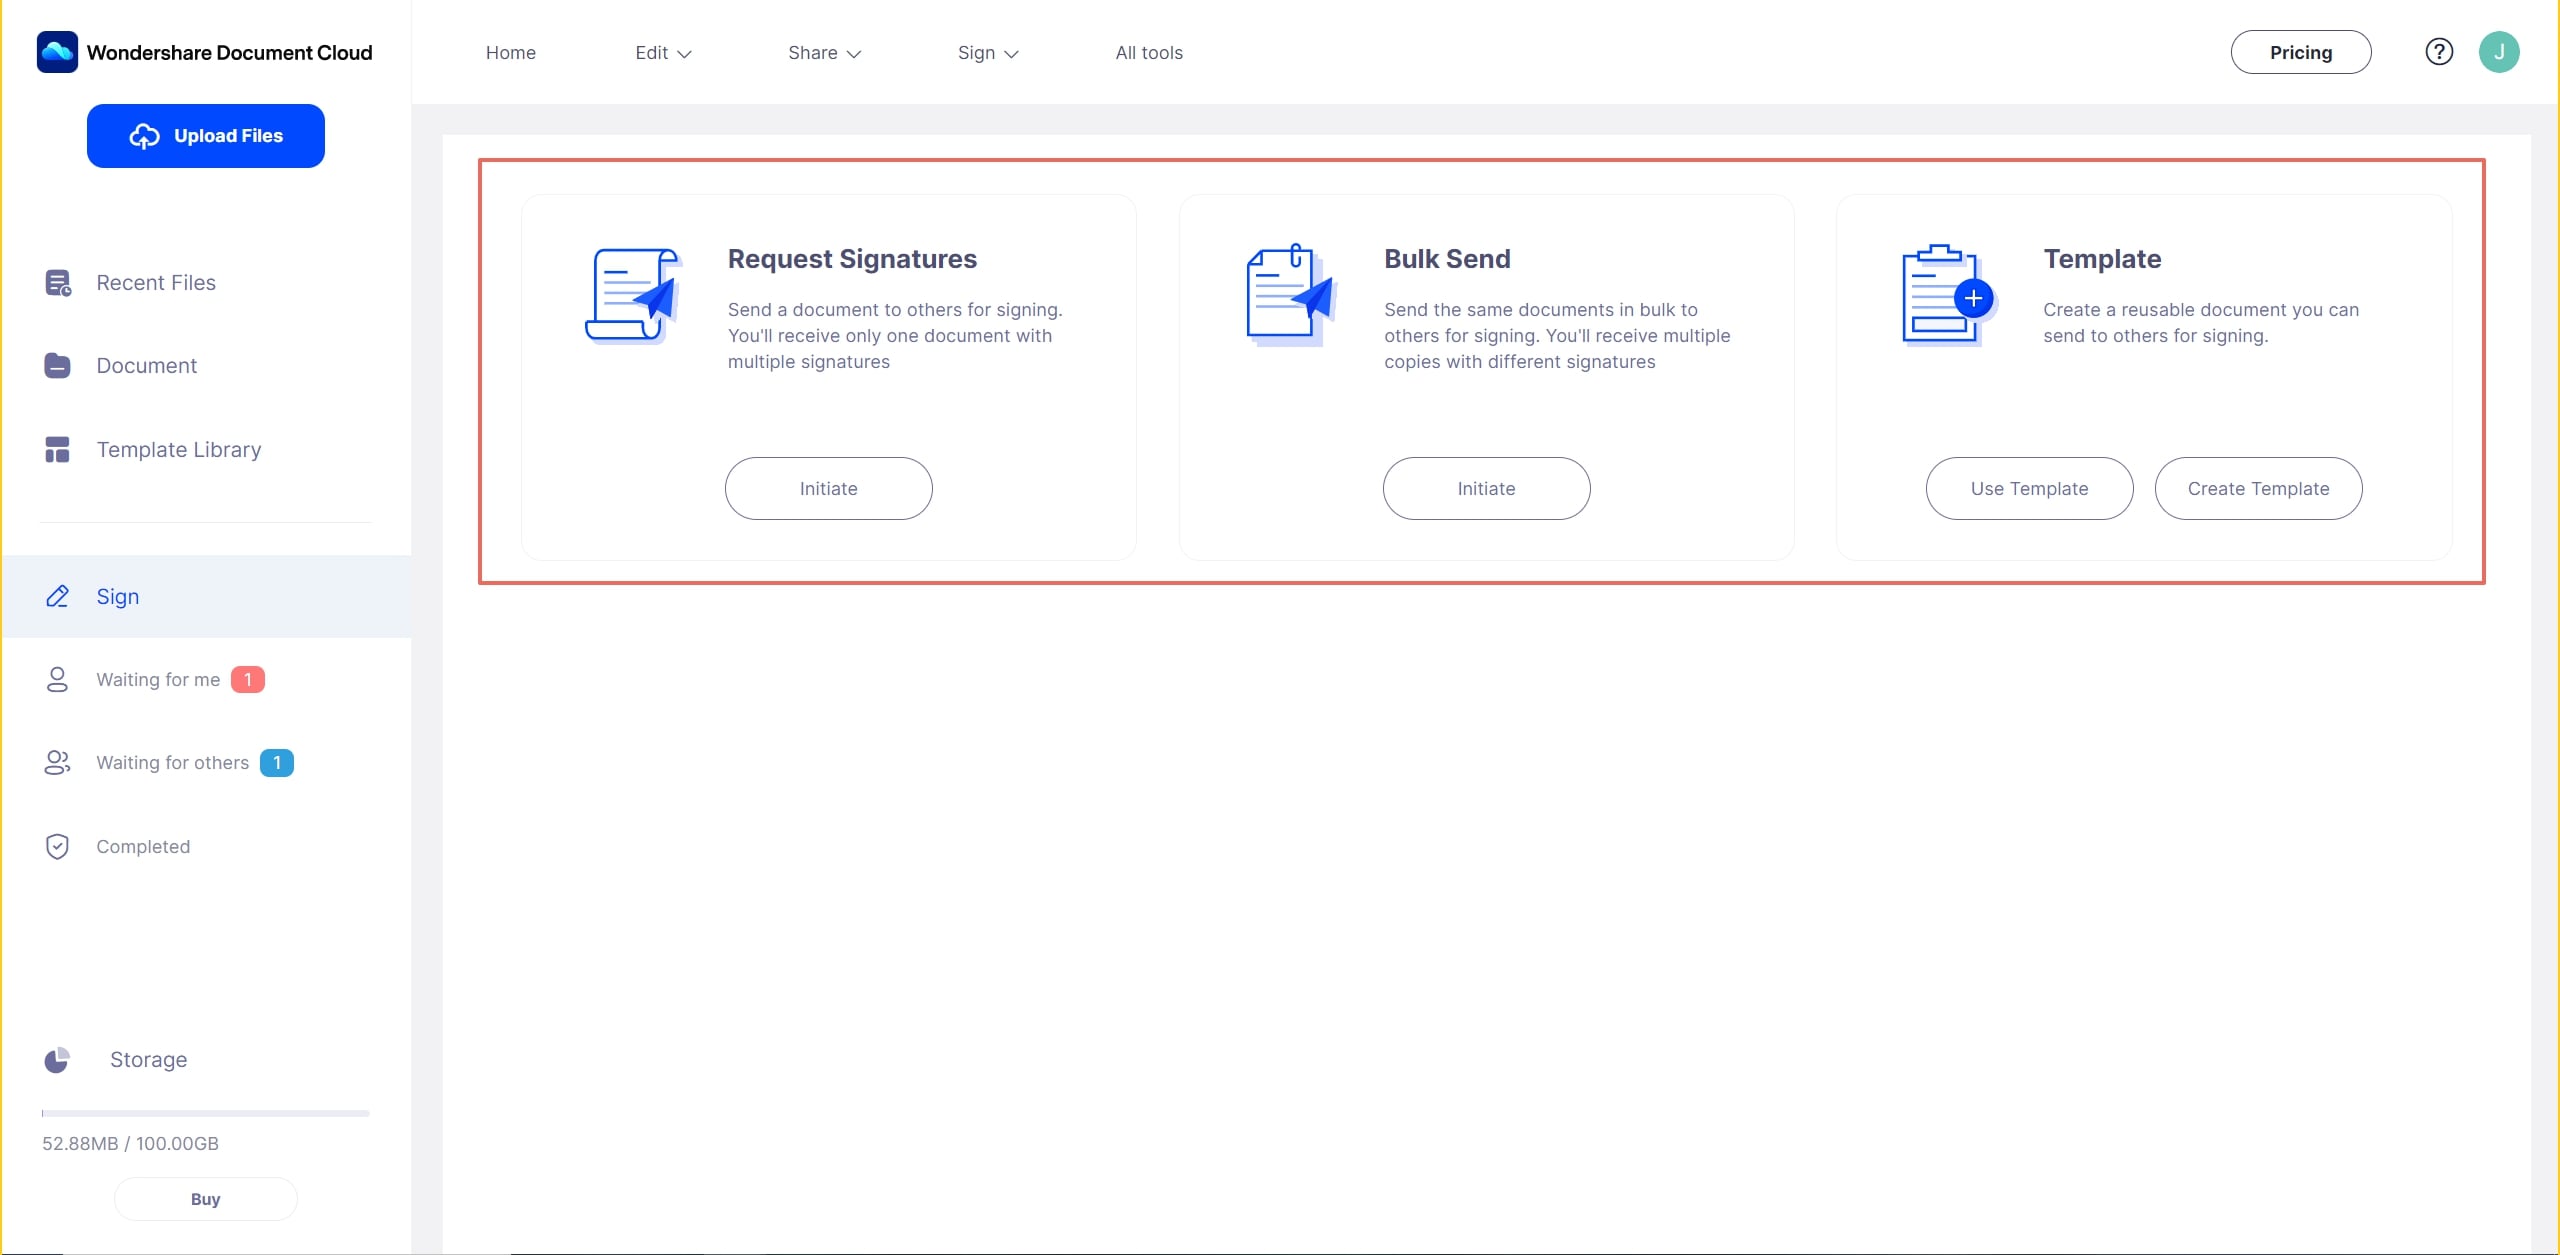
In the Sign tab, you’ll see three options and select one of the options, as follows:
- Request Signatures - This option is used when you need multiple signers to sign the same copy of the document.
- Bulk Send - This option is for getting signatures from several users, but with each signature on a separate copy of the document.
- Template - You can use this option to create templates that can be reused at a later time.
4. Add the document to the queue.
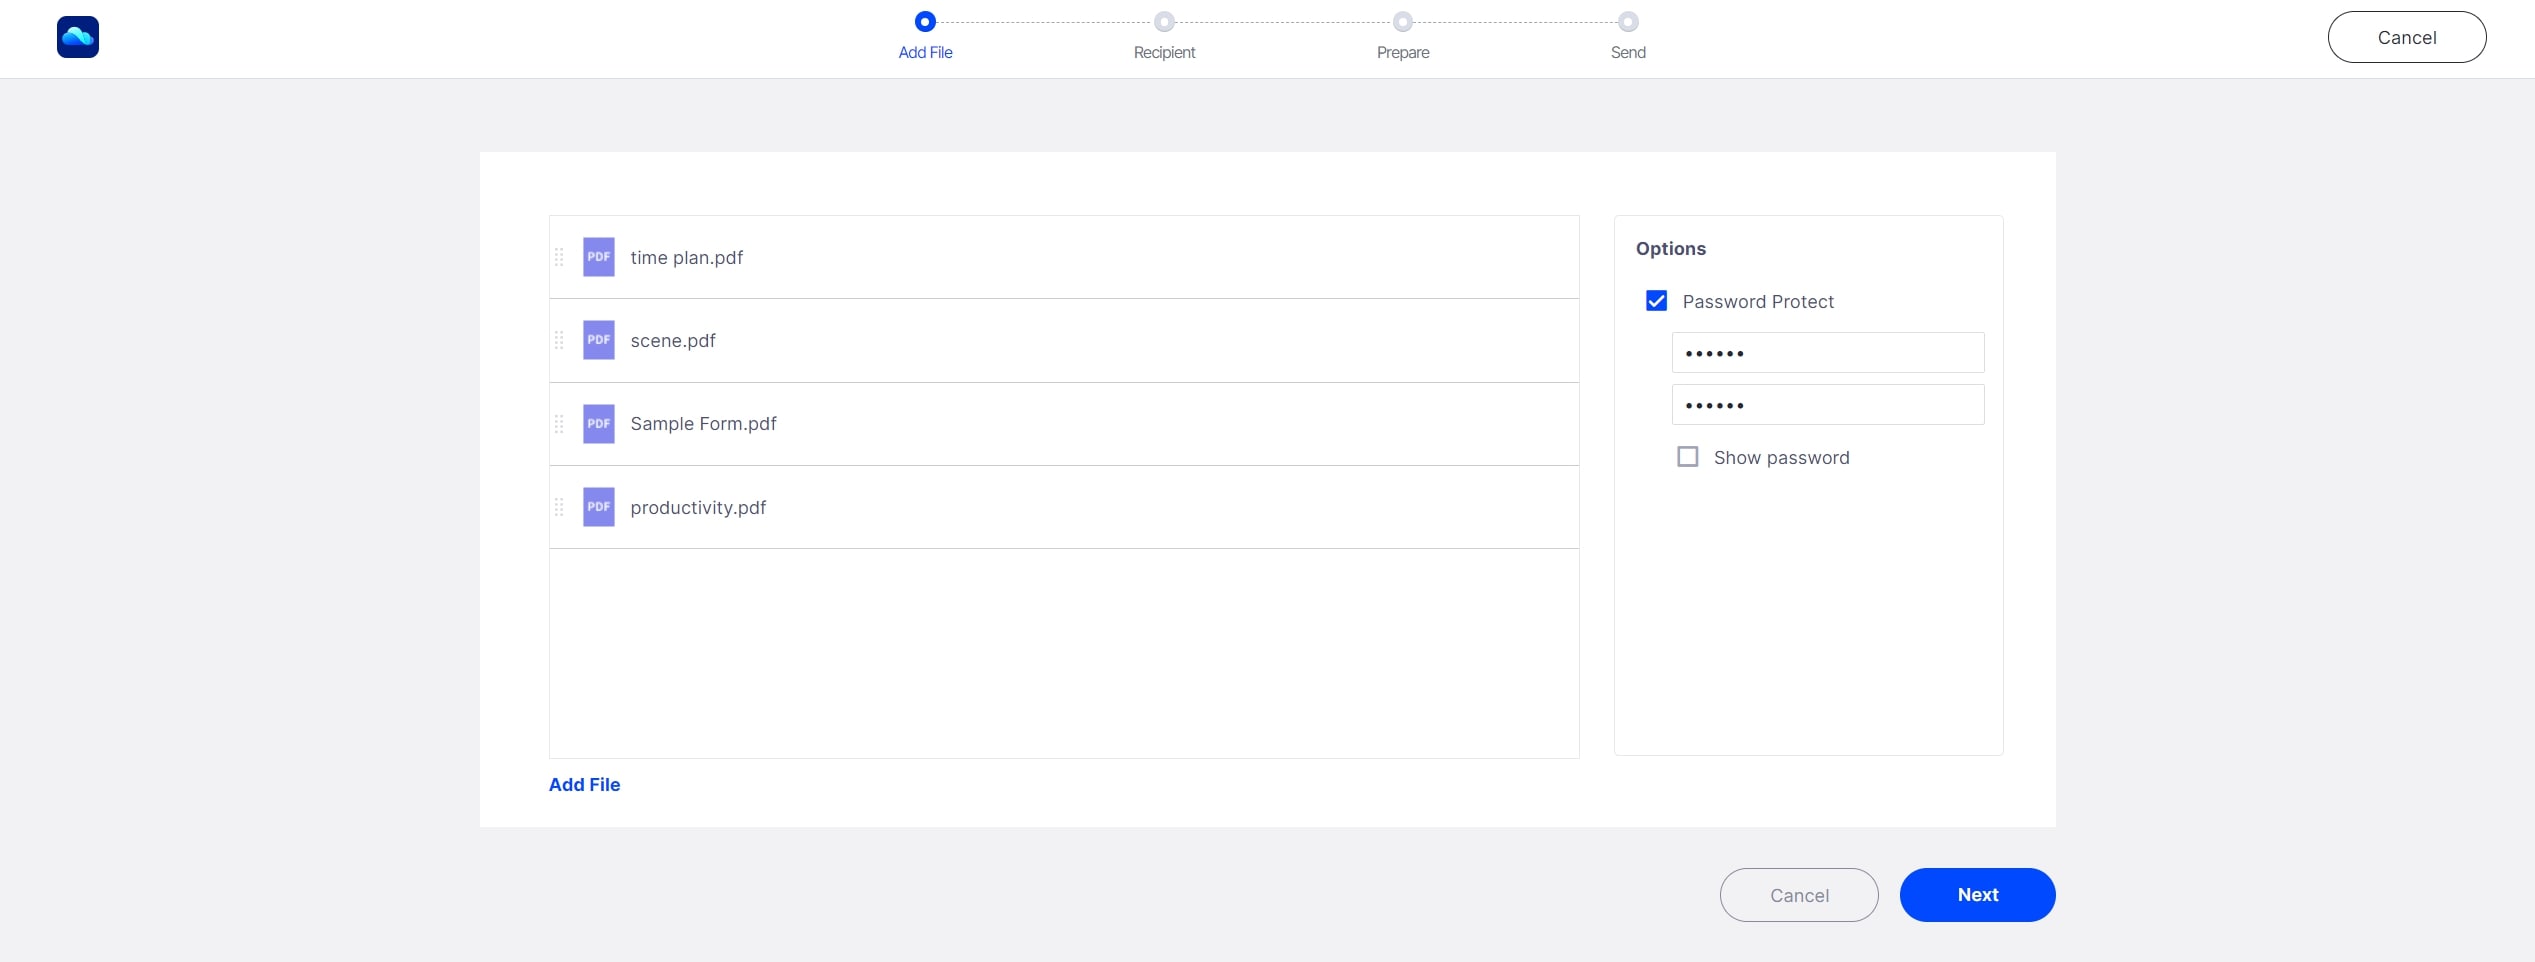
Clicking one of the options will open a new window, where you can either select PDFelement Cloud to choose the document you just uploaded, or upload a new one with the My Computer option. You can simply drag a new document from a local folder location and drop it into the interface to upload it. At this point, you can set a security access code that others will need to enter in order to see and sign the document. This can be sent to them separately.
5. Follow the process to add signers and placeholders to the document.
The next is a series of steps that will set up the document with all the required information required for the signers to put their electronic signatures and other relevant information.
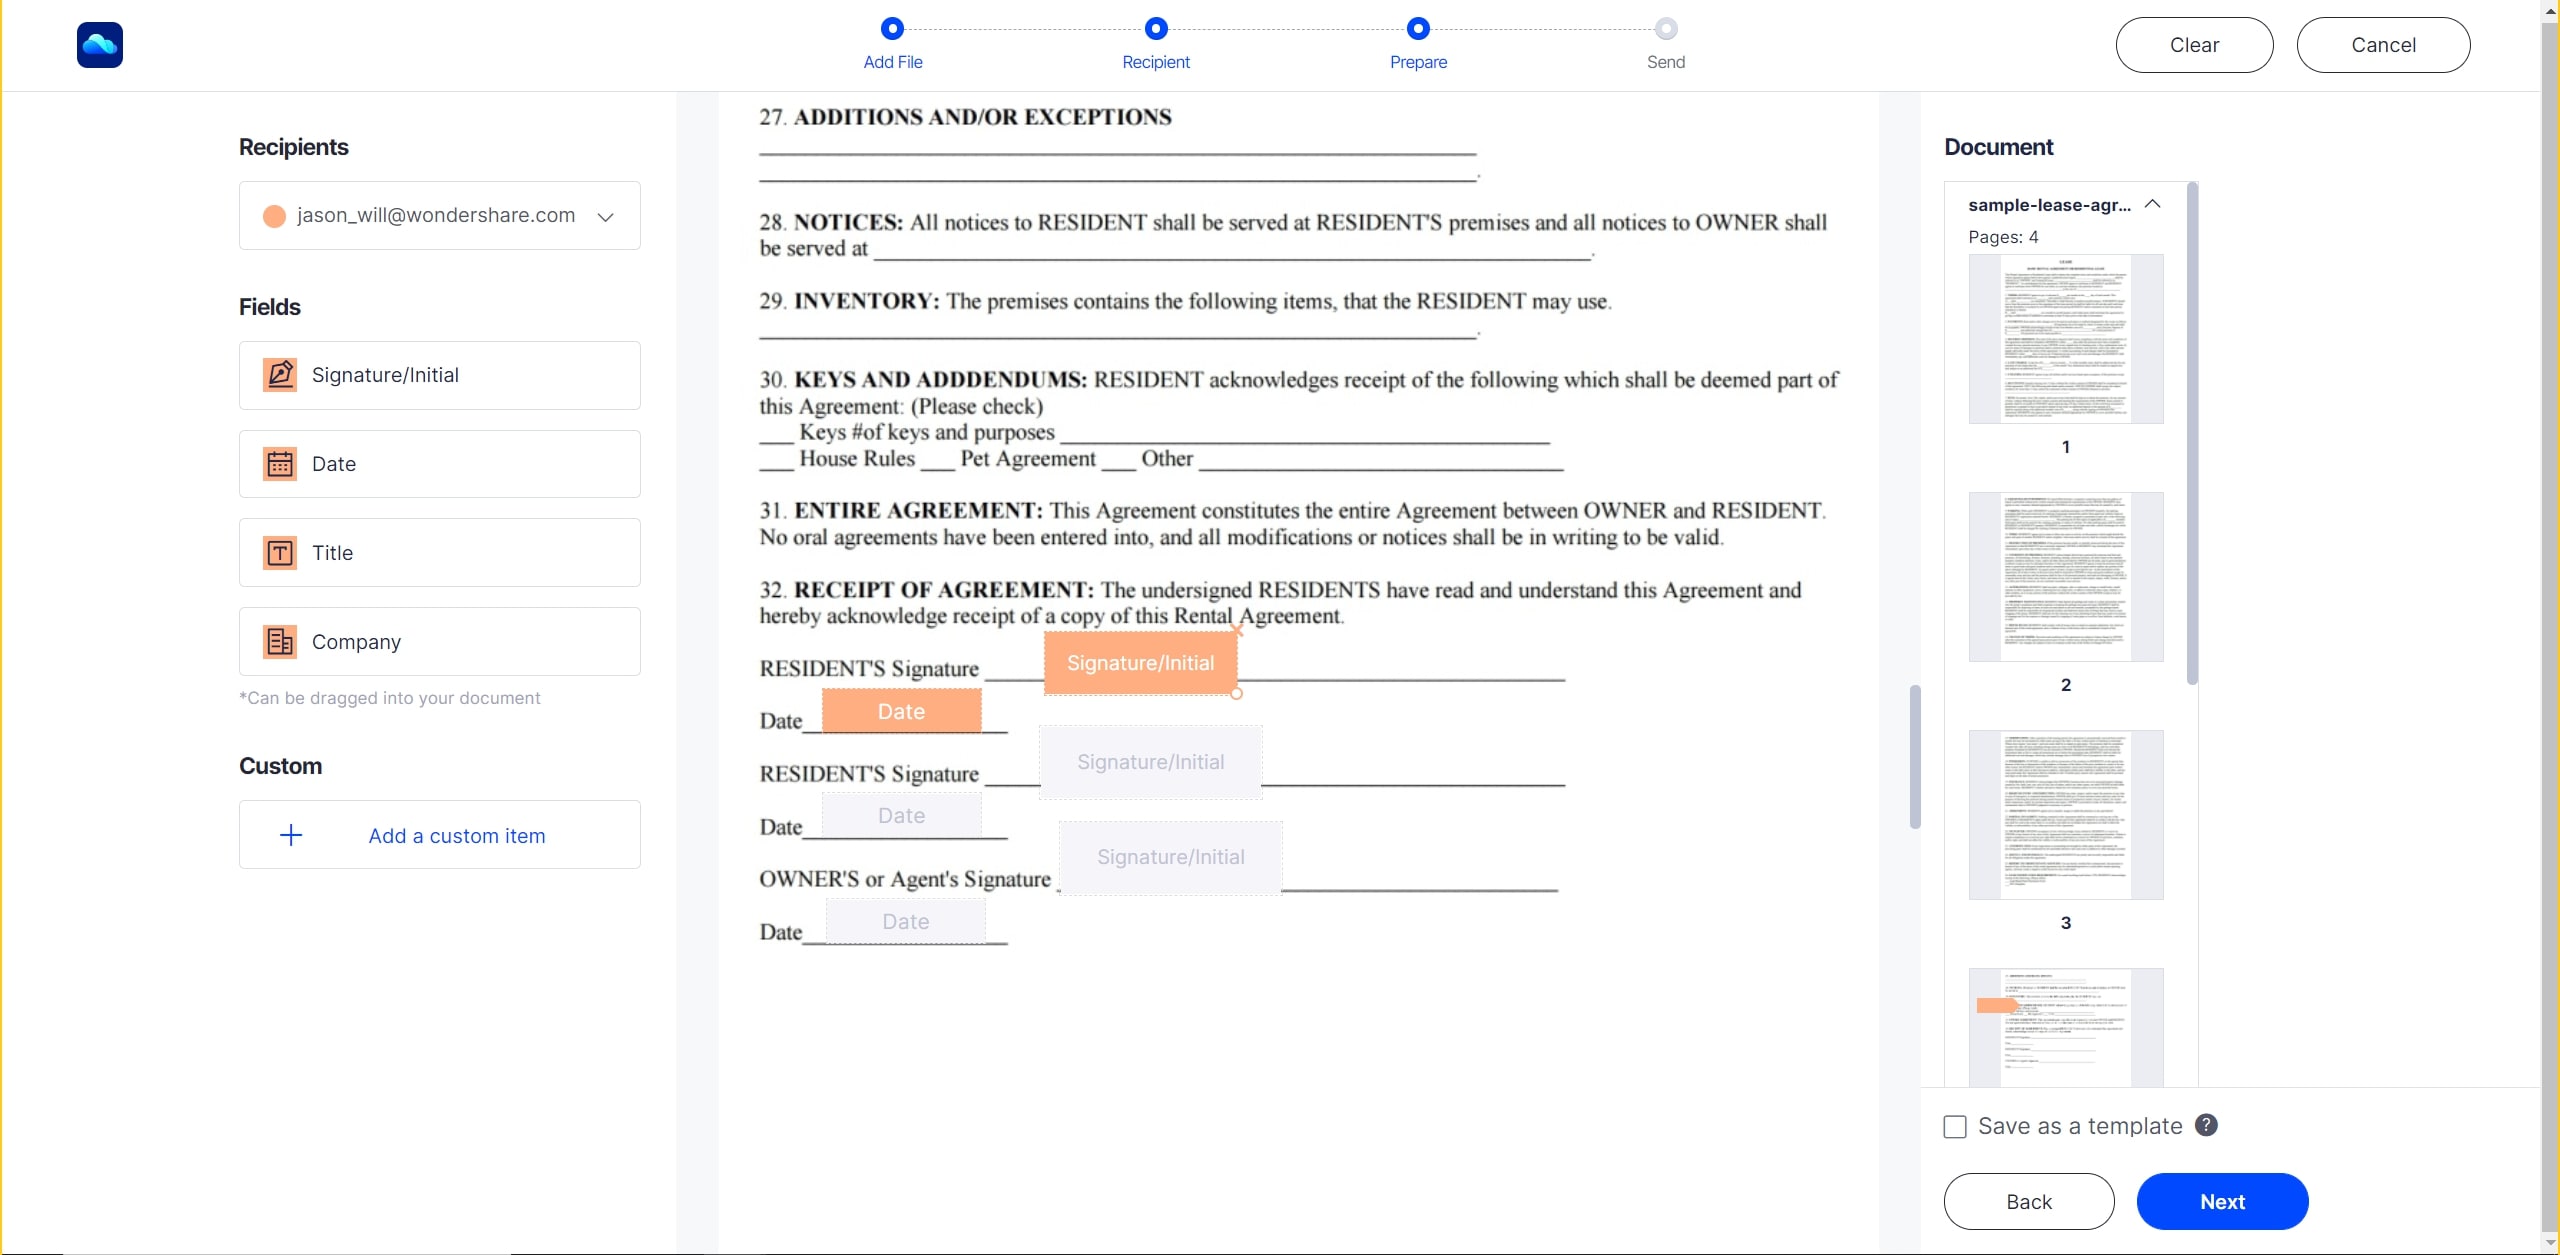
First, create a list of signers (you can import a CSV file for this), set the signing order, and add you as the first or last signer on the list if you need to.
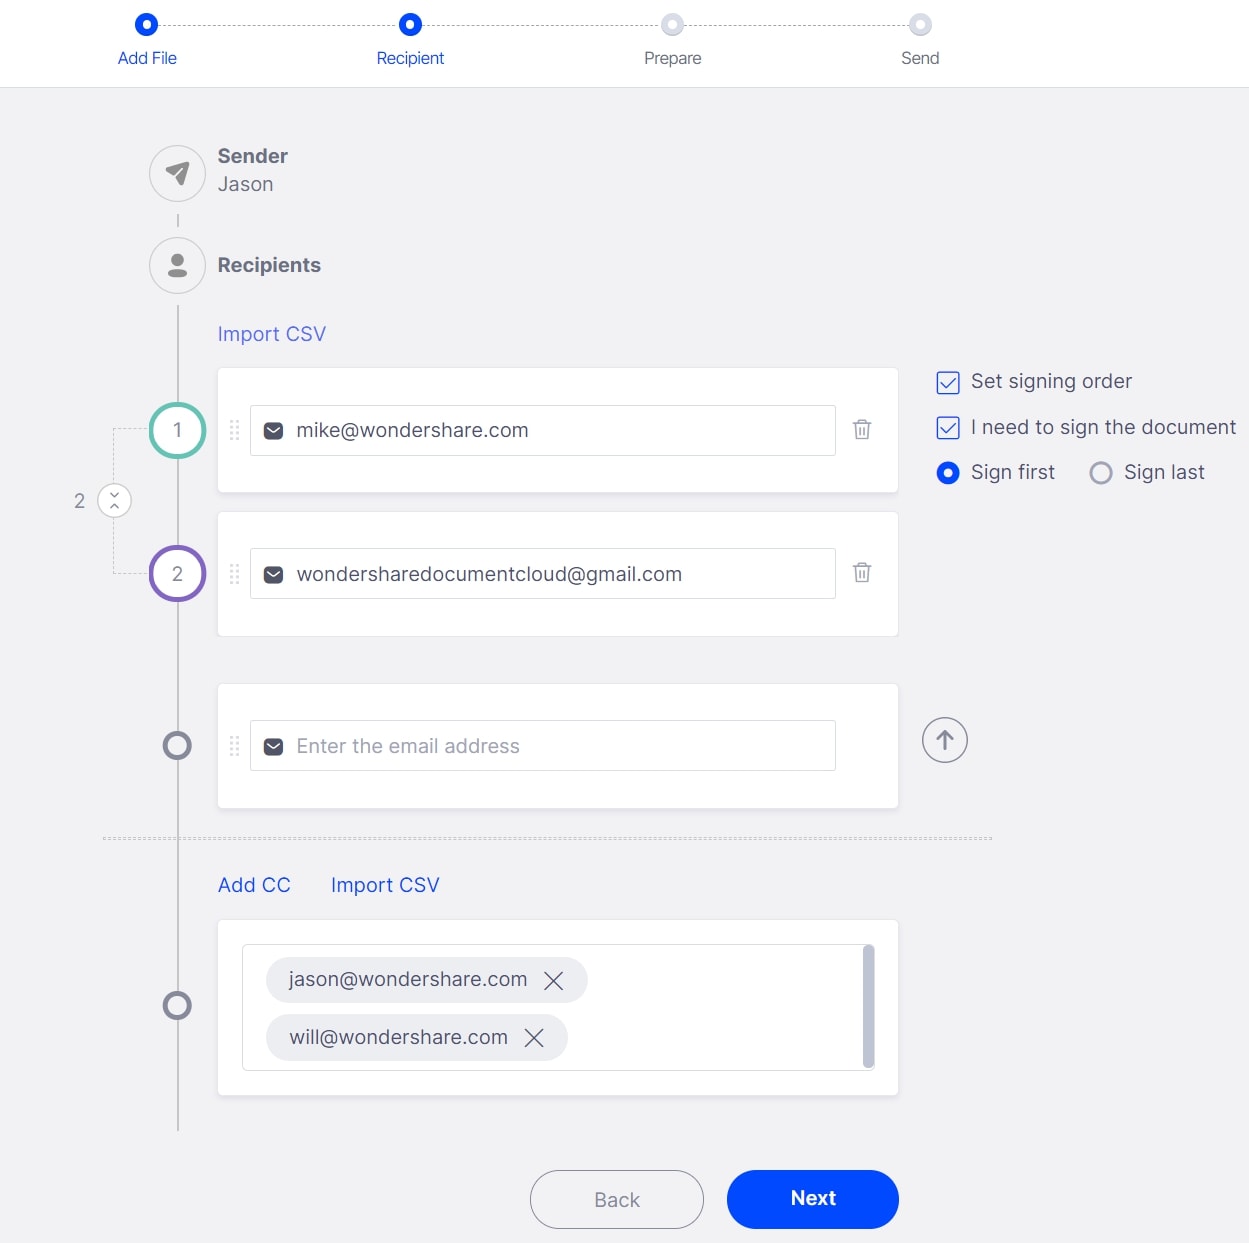
You can set special fields in addition to the signature field, such as date signed, the title of the signer, etc. Hit Send for signing when you’re done.
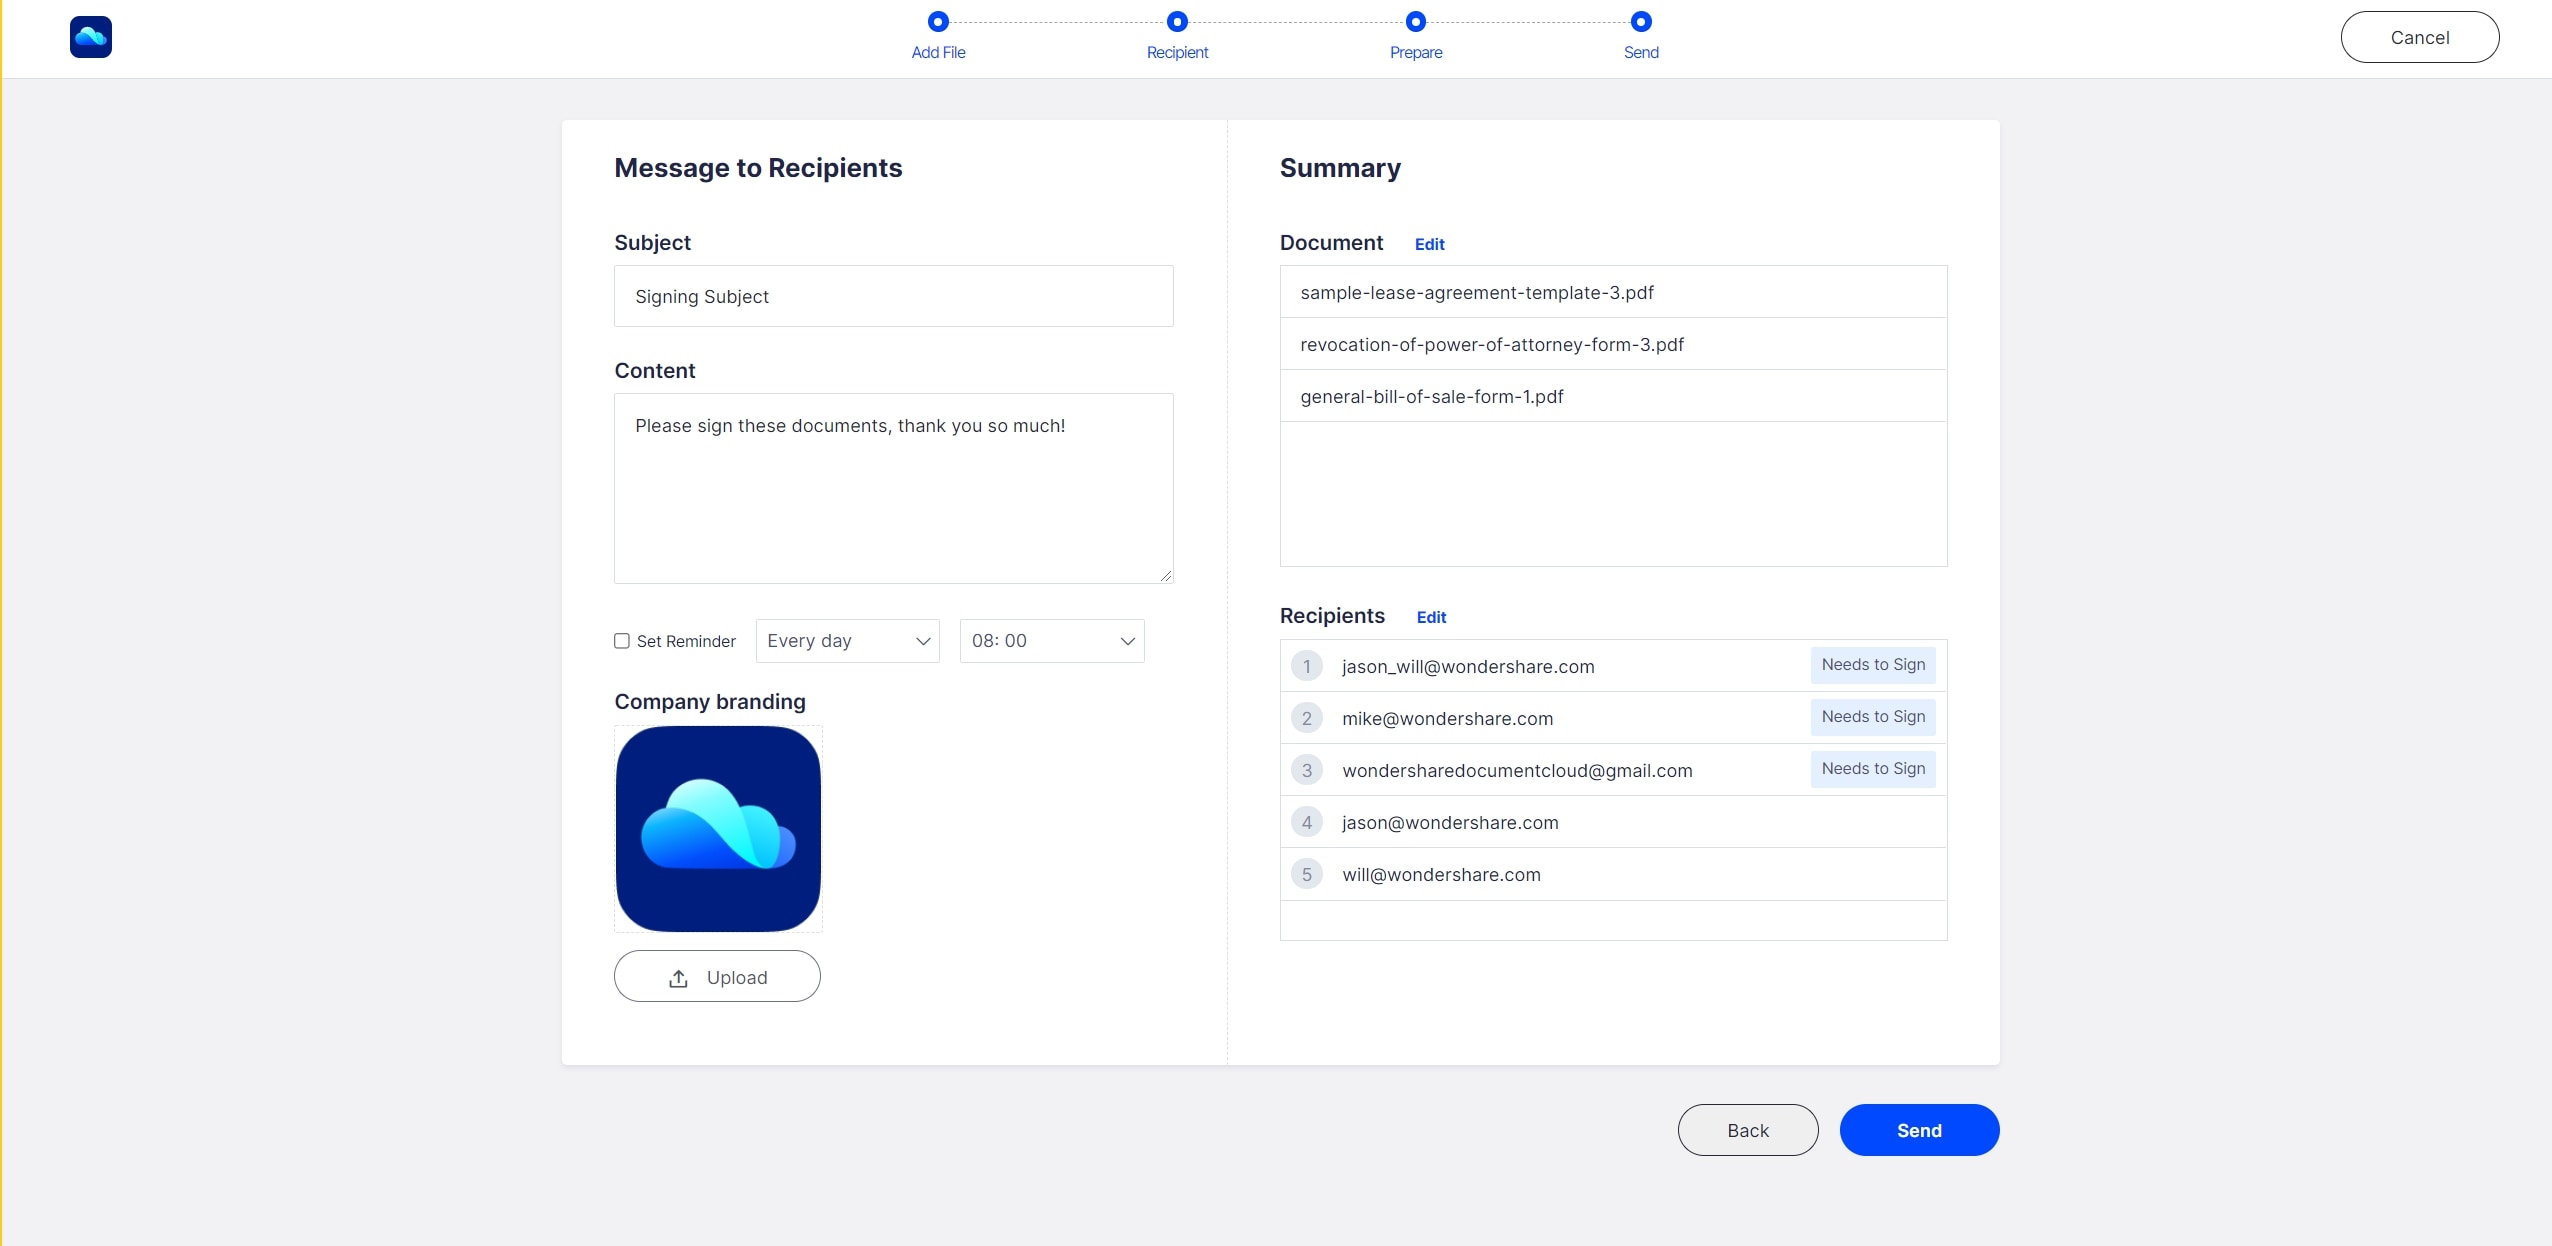
Finally, you can also send a custom message with your email notification.
6. Track signing status.
You can now go to the Home tab and see the real-time status of all documents that you’ve sent. It will show you how many documents are in the queue and how many have been signed. You can then download the signed documents once the signing is done by all required users.
How to sign PDF on other systems - Wondershare PDFelement Pro DC
PDFelement Cloud is ideal to sign a PDF document in Linux, but if you’re using a Mac or Windows computer, you can also consider using PDFelement, which is available for both platforms. This is very useful when you have a document that needs to be edited on a different computer before being uploaded back to PDFelement Cloud.
1. Import a document to PDFelement Cloud.
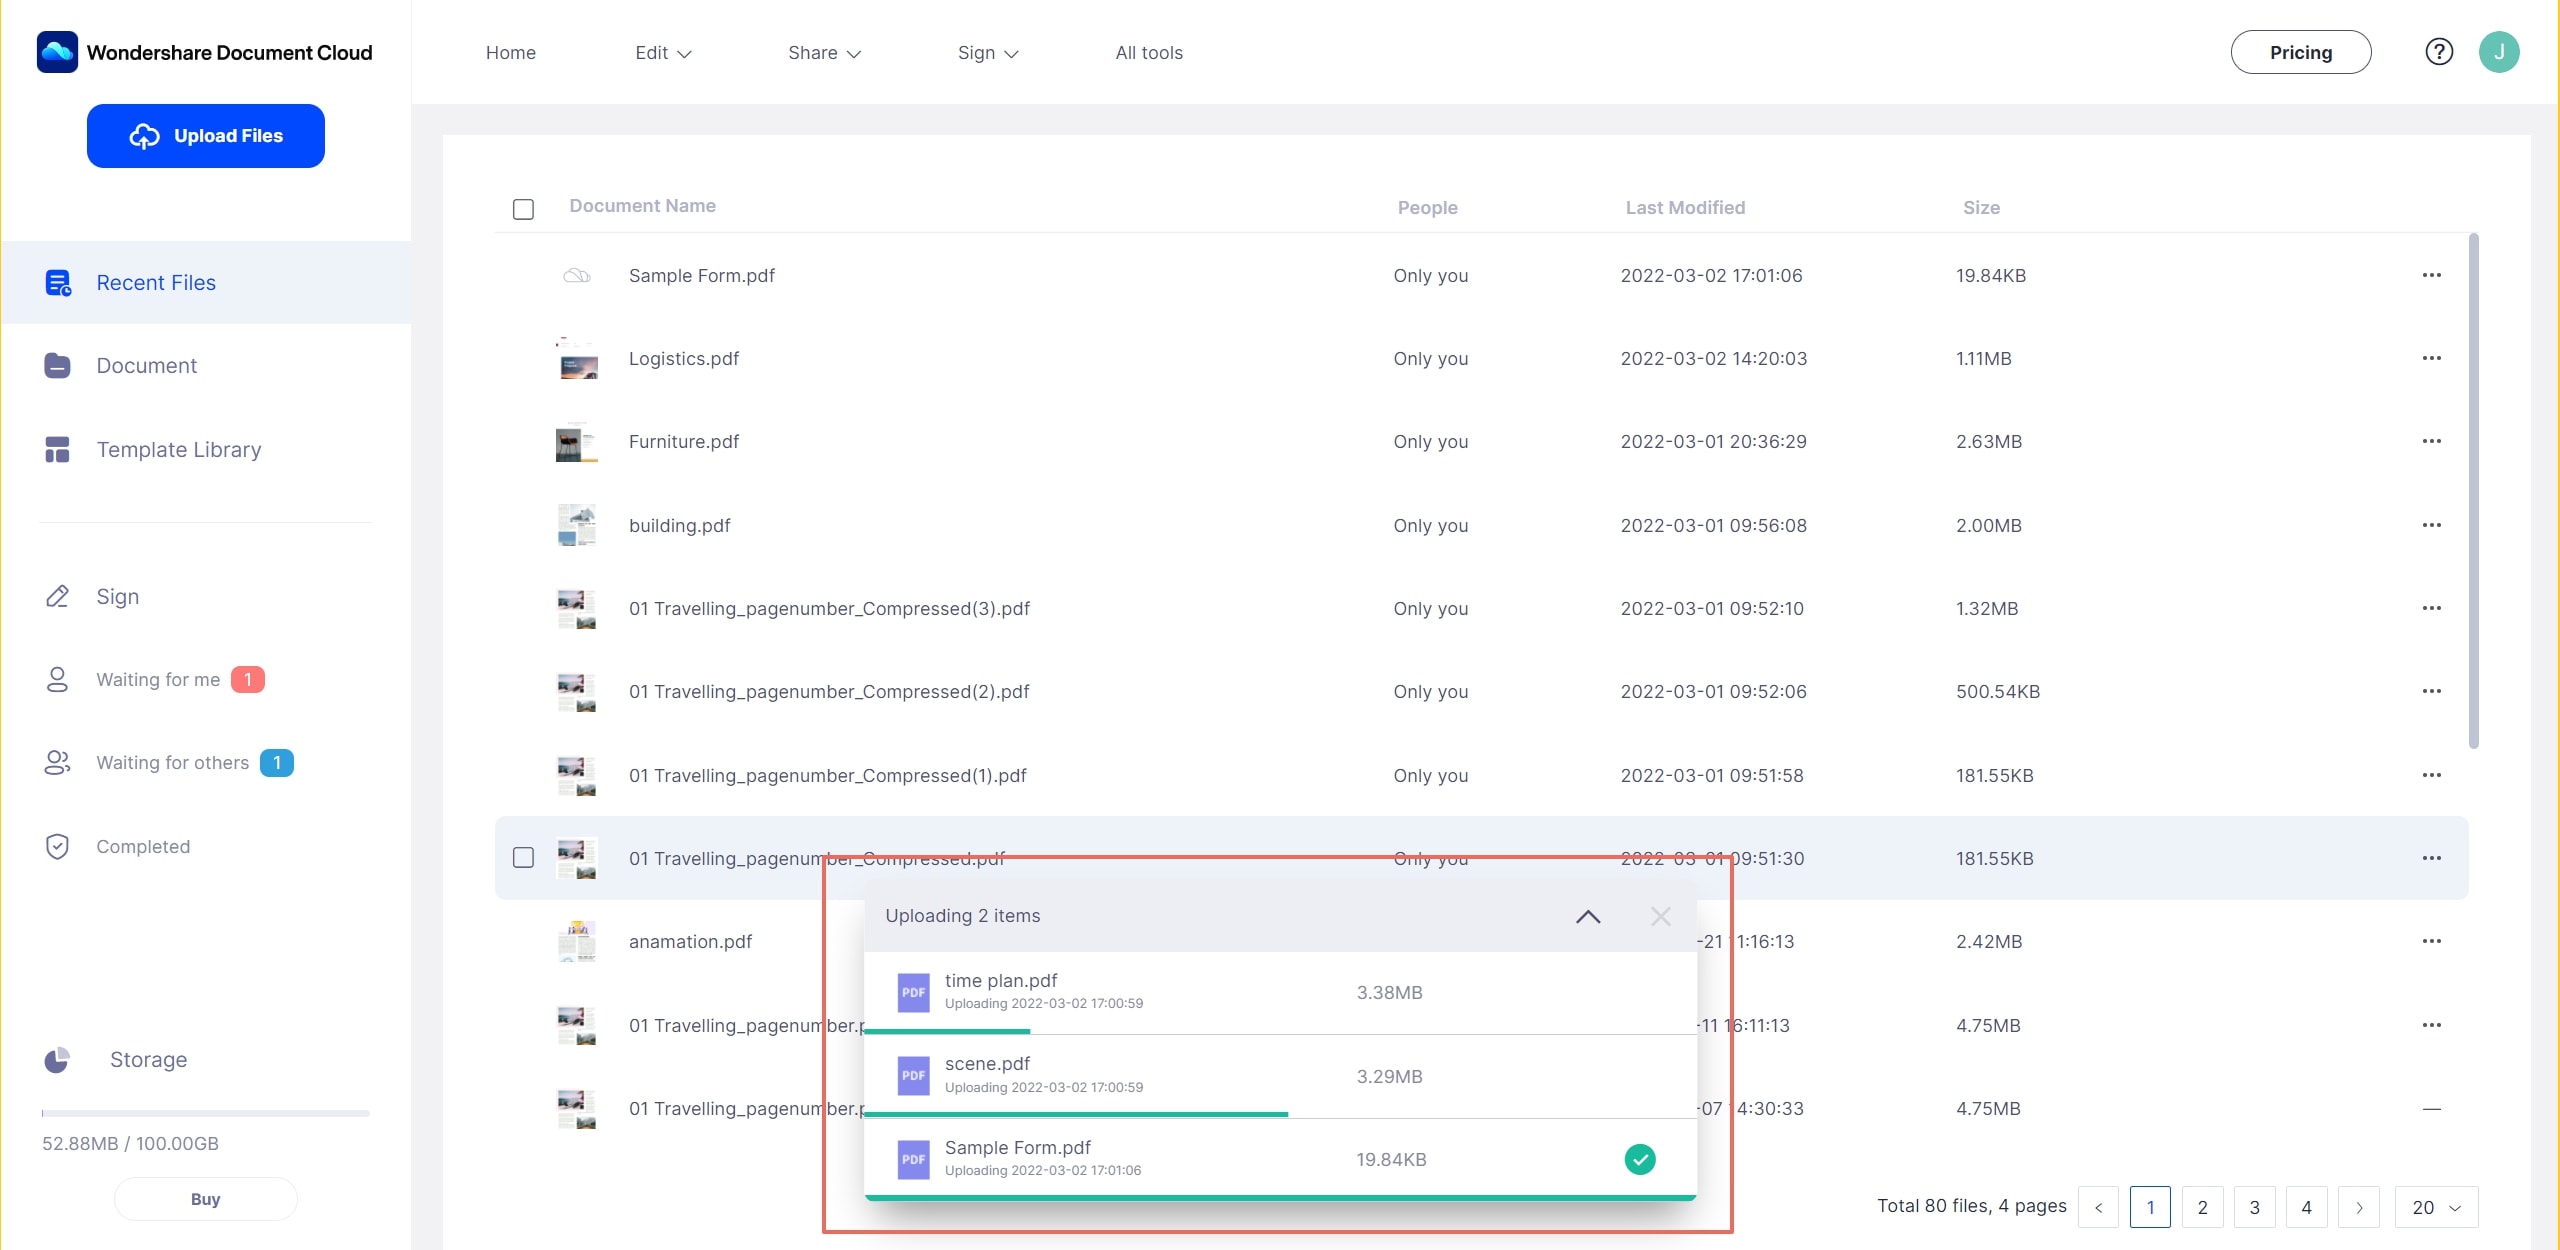
Simply follow the first two steps in the previous process to set up your Wondershare ID and upload your PDF file to the cloud.
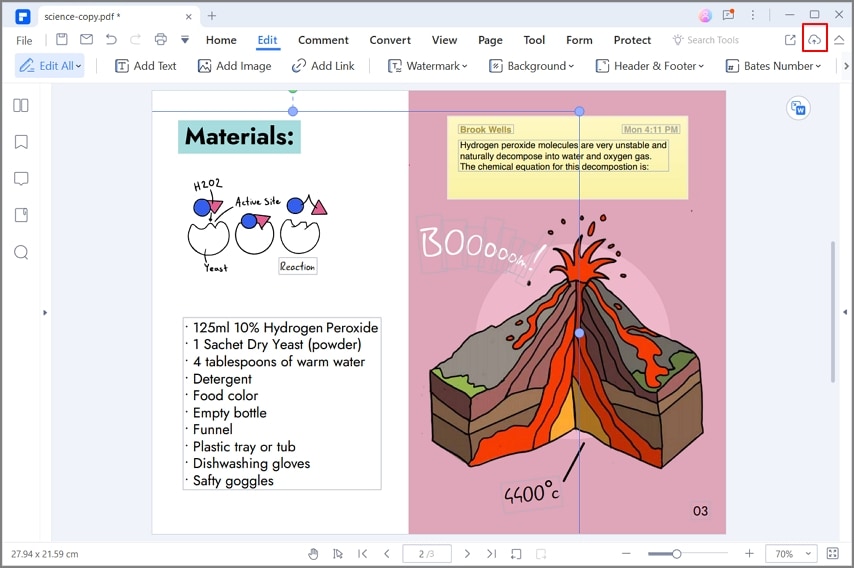
In the new PDFelement Pro DC for Windows, you’ll have an option to save documents directly to the cloud, as shown here:
2. Download the PDF and open it with PDFelement Pro.
Wondershare PDFelement Pro DC
Simplify your Workflow with the PDFelement Cloud.

Head over to the PDFelement website and download the installation package for the corresponding operating system, and install PDFelement Pro.
Next, go to your browser, log in to your Wondershare account on the PDFelement Cloud portal, and download your PDF file.
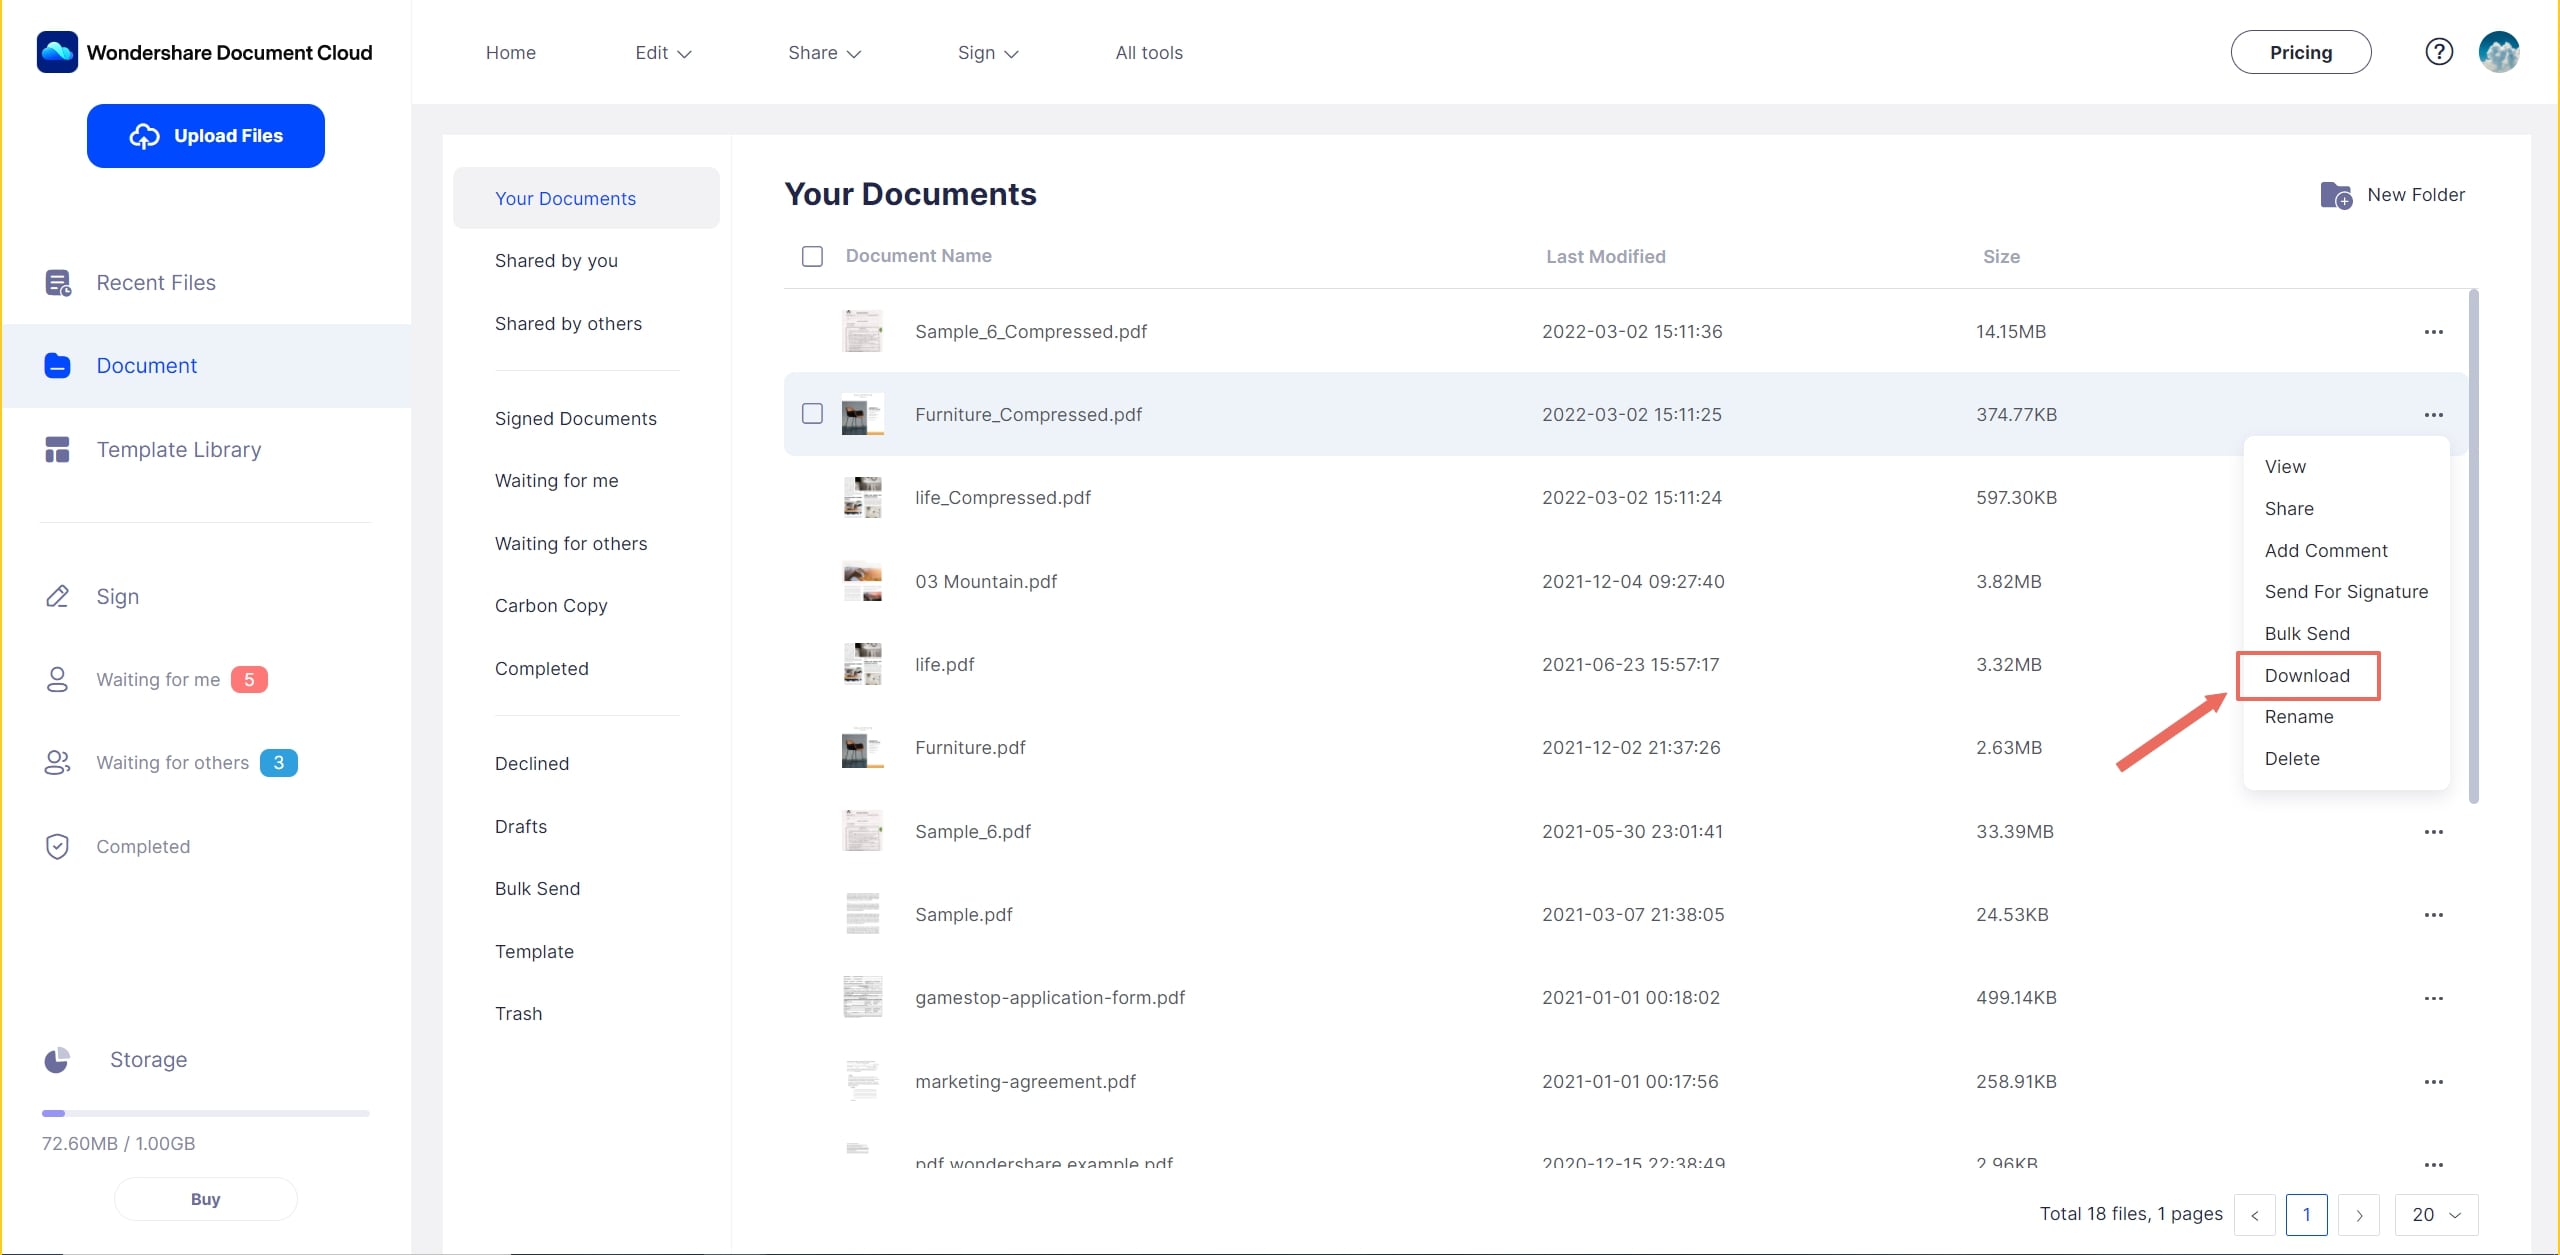
Note: In the Windows version of Wondershare PDFelement DC, this can be done directly from the software interface, as shown in the screenshot below:
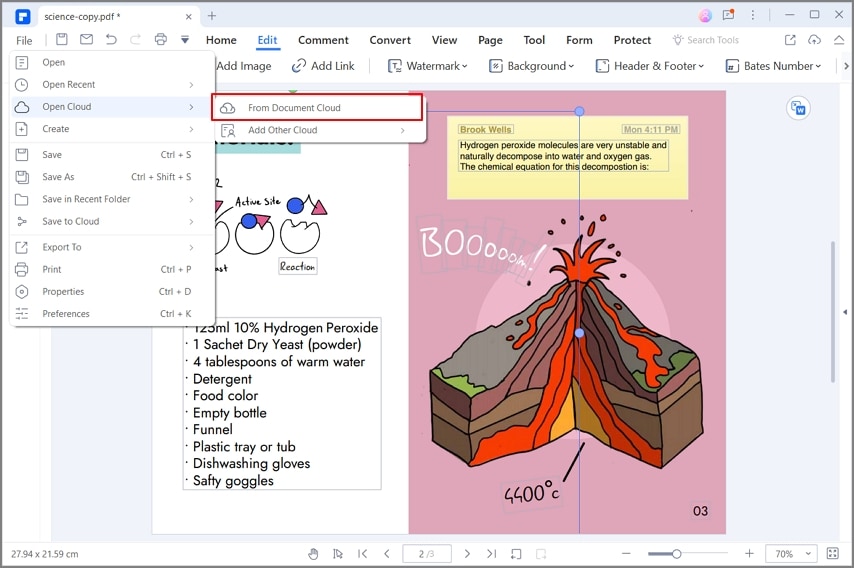
Use PDFelement Pro to open and edit the file. You can edit any element on the document using the Text and Image editing options on the left sidebar menu. You will also see a host of other features listed there, as well as a Tools section with additional modules for file conversion, PDF security, file organization, page management, form-filling and data extraction, OCR text recognition, batch processes, and much more.

After editing the file, save it.
3. Upload the file to PDFelement Cloud and send it for signing.
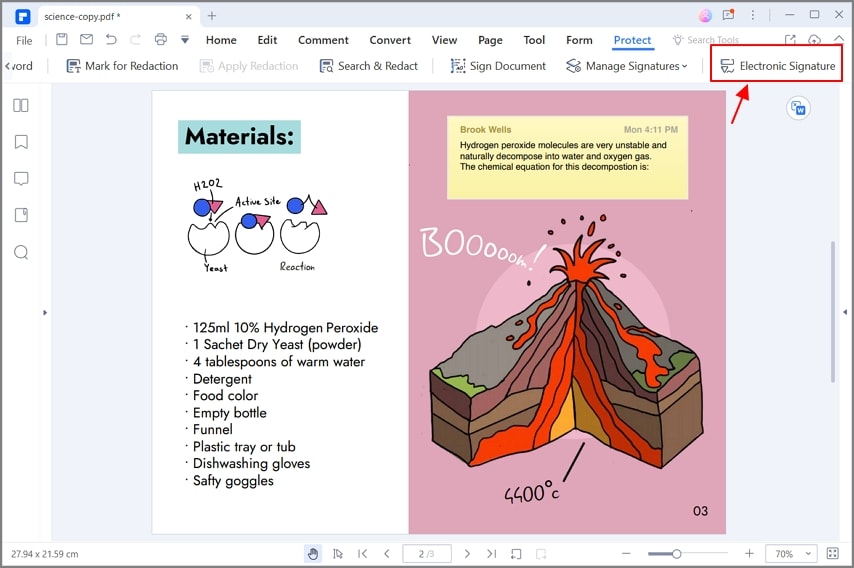
As mentioned before, in the Windows version of PDFelement Pro DC, you’ll be able to save directly to the cloud. If you’re on another OS, you can import the file to PDFelement Cloud from the browser and send it for signing as described in the previous process. Again, if you’re running the Windows version of Wondershare PDFelement Pro DC, this feature is available under the Protection tab in a button called Electronic Signature. Click it and follow the process as before to send the document to be signed by others.
How Does This Benefit Your Organization?
PDFelement Cloud will shortly be integrated into a product called PDFelement Pro DC, which offers the best of Windows PDF editing and the best of cloud storage and cloud-based electronic signatures. The advantages are many:
- Work on multiple platforms to create your PDF contract or agreement
- Use the power of the cloud by uploading the document for secure global access by authorized users/signers
- Circulate documents to signers using secure protocols
- Track the progress of contracts and agreements as they make their way from one signer to the next
- Have a real-time view of all documents in circulation
- Standardize your digital signatures across all the devices you use
With such a powerful tool in your hands, you can be far more productive than before. Moreover, your contracts will be signed quickly and that means a faster time to start projects and start generating revenues. PDFelement Pro with PDFelement Cloud could be a game-changer for your business.


