 Home
>
Word Tips and Tricks
> How to Make a Flowchart in Word
A detailed and illustrative explanation of the steps of a task, procedure, or any official operation is represented through flowcharts. People prefer to make a flowchart in Word; however, they usually find it difficult to locate the options present within Word that would help them make a very intuitive flowchart for official purposes. This article provides a detailed step-by-step guide on how to make a flowchart in Word.
Method 1. How to Make a Flowchart in Word
With a very impressive predefined set of flowcharts present in SmartArt templates on Microsoft Word, you can easily produce a very magnificent flowchart with the help of the basic templates and pictures. However, the options in Word are not limited to any extent; thus, it cordially allows you to improvise and create a flowchart with a custom layout. This article presents its users with the perfect guidelines for how to make a flowchart in MS Word.
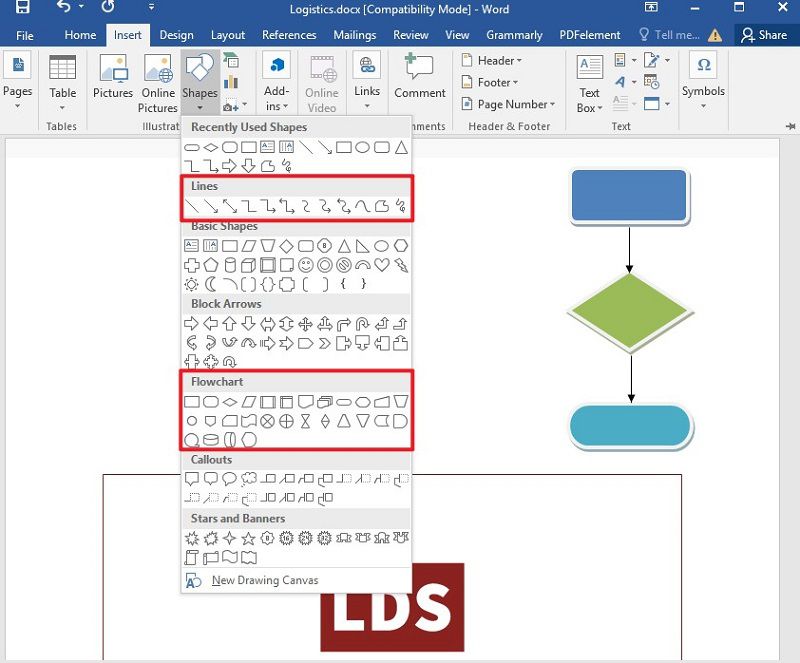
Step 1. In order to make a flowchart, you need to click the "Insert" button and then select the "Shapes" option.
Step 2. Now under the drop-down menu, you can select the best shape suiting your flowchart from the "Flowchart" section.
Step 3. Click on the "Shapes" list and then select one of the line connectors from the "Line" group to connect the shapes.
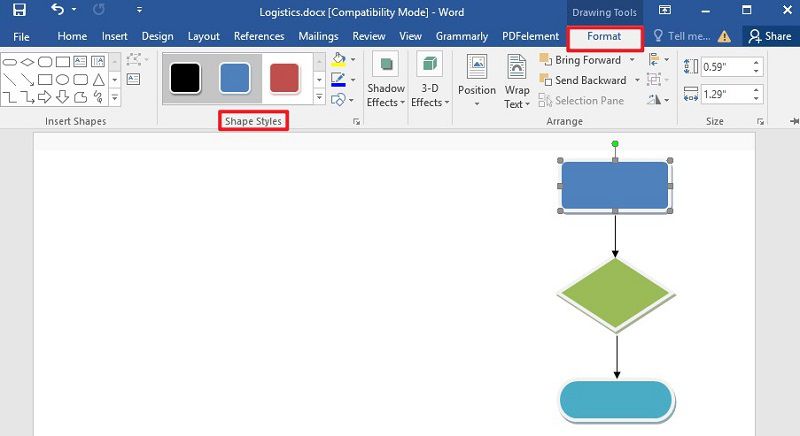
Step 4. Next, you can add text in these shapes. Besides, you can also change the shape's style by clicking the "Format" option.
Method 2. How to Make a Flowchart with SmartArt
There is another method that can be practiced for adding Flowcharts within a Word document. You can efficiently use SmartArt by working through the following steps.
Step 1. Add the SmartArt
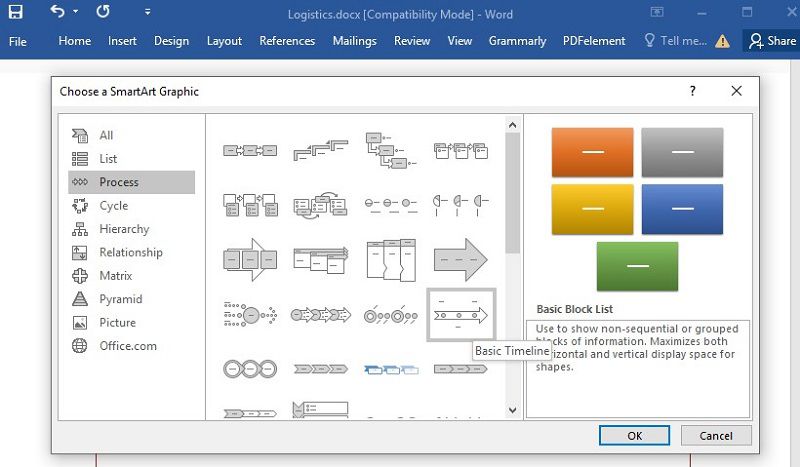
Click the "Insert" > "SmartArt" button. Then you can select the "Process" option, and choose one of the processes as you want to.
Step 2. Add and Edit Text
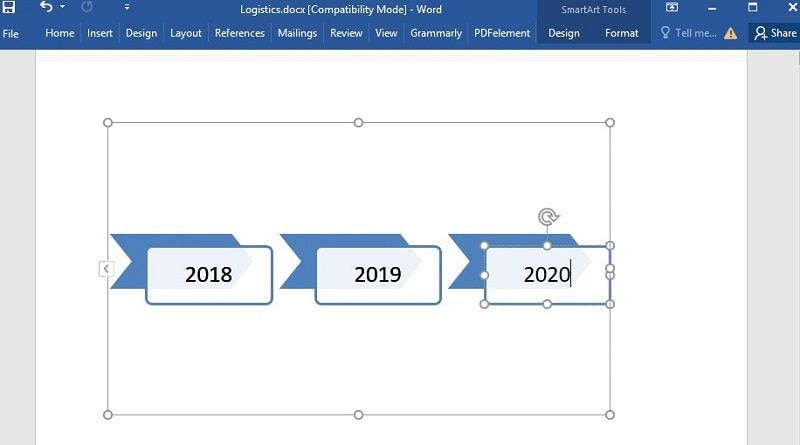
For adding text within the chart, select a shape by clicking on it or selecting the option of "Edit Text" after right-clicking on the shape. The format and font of the text can be changed by the pop-menu accessed by right-clicking on the shape.
Step 3. Adjust the Flowchart
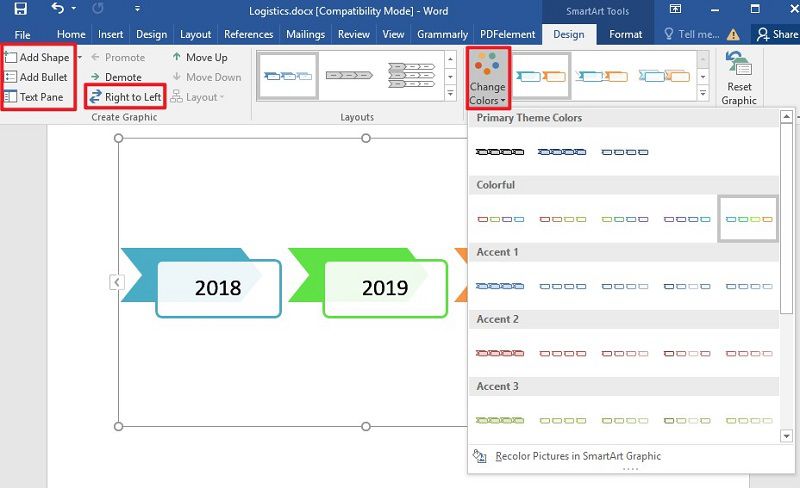
To add more shapes within the flowchart, you can select the "Design" > "Add Shapes" button. By selecting the option, you can add the selected shape in any direction as desired. In addition, you have the autonomy to change the direction of the arrows in the flowchart with the option of "Right to Left". Simultaneously, the colors of the chart can be amended by selecting a different theme from the "Change Color" menu.
The Best PDF Software
Generally, we do not find PDF readers to be highly efficient in editing and improving PDF documents. With limited features, most users feel the need to convert the documents and re-vamping the whole document to their desired situation. Wondershare PDFelement - PDF Editor Wondershare PDFelement Wondershare PDFelement exempts all the needs of unnecessary conversions by providing a much-extended list of features to its users that range from editing, annotating, protecting, and signing official documents.
Editing and converting PDF documents while retaining its format structure has never been easier than in PDFelement. With effective toolsets for improving the PDF documents, you can change the PDF document into any basic MS Office file format while retaining its primary structure.
Following the need to edit PDF documents, commenting, and reviewing them is another exquisite feature introduced by PDFelement. Where people have to convert PDFs into Word files to add comments or reviews, PDFelement eliminates all the unnecessary conversions and provides a very effective set of features for reviewing and commenting on the files within a unified pane. It even allows you to validate the document by applying digital signatures.
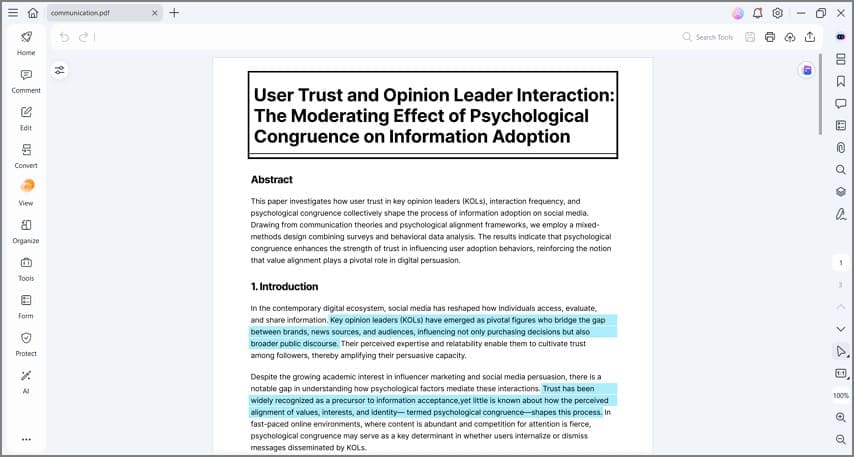
PDFelement comes with an additional and impressive feature of creating one-click forms that are fillable and editable from the product itself. It allows you to edit the forms with style and helps them collect form data through electronic means. Everything created or imported on PDFelement can be made password protected. You can add different permissions and encryptions to your file to protect it from third-party usage and save sensitive information by having it redacted from PDFelement.
How to Insert Shape to Annotate PDF Files
Step 1. Open PDF with PDFelement
Drag or drop down a PDF onto the program or open a PDF through the option of "Open File".

Step 2. Insert a Shape in PDF
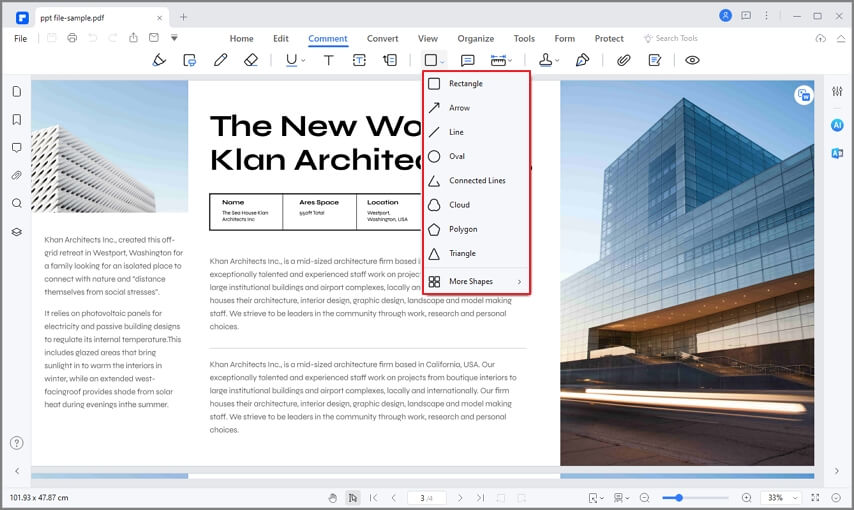
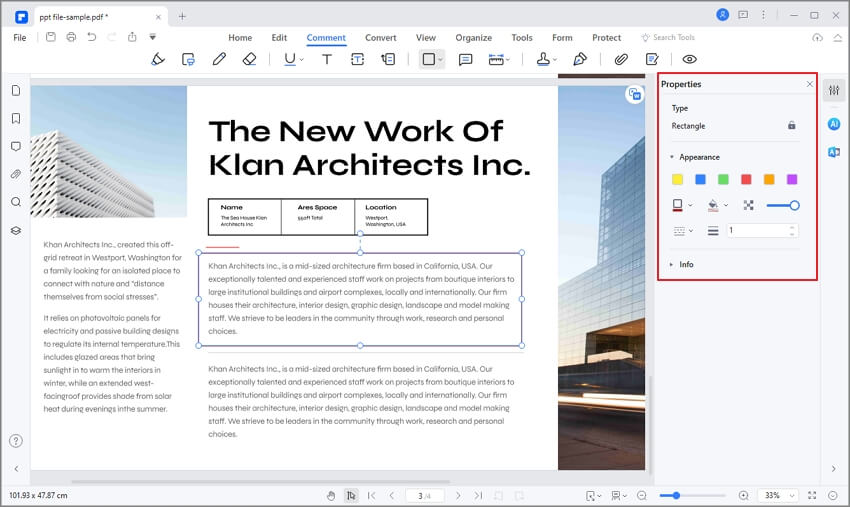
From the "Comment" tab present on the program's toolbar, you can select the button showing different shapes to have them added on the PDF page.
Step 3. Add Notes
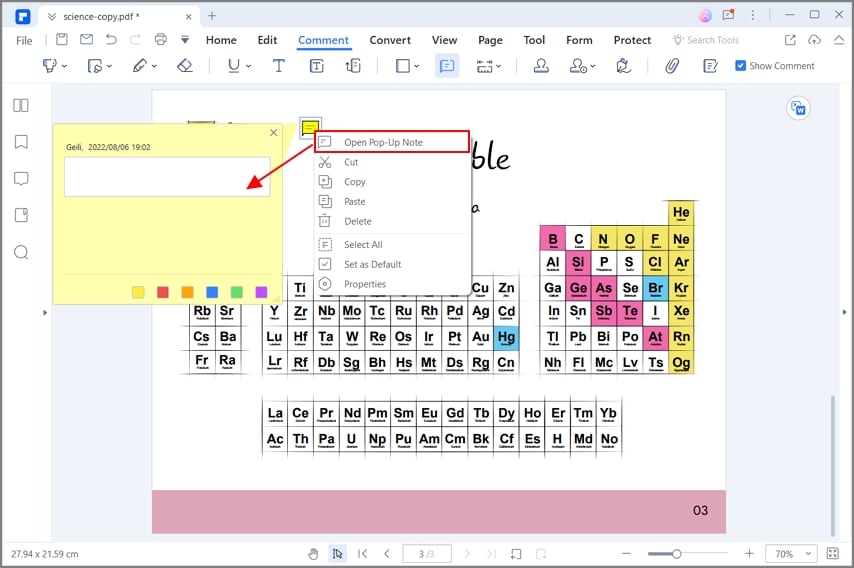
Right-click the shape and select the "Open Pop-up Note" option to insert the annotations.
Step 4. Set the Properties of the Shape
Besides, you can also set the properties of the shape by right-clicking the shape, such as its style, thickness, color, and opacity.
Free Download or Buy PDFelement right now!
Free Download or Buy PDFelement right now!
Try for Free right now!
Try for Free right now!
 100% Secure |
 G2 Rating: 4.5/5 |
  100% Secure


Elise Williams
chief Editor