
Table of Contents
If a photo, logo, icon, scanned graphic, or decorative shape is facing the wrong direction in Microsoft Word, you do not need a separate image editor. Word includes a simple flip tool that can reverse a picture horizontally or vertically in a few clicks. The only tricky part is knowing where Microsoft has placed the option, because it appears only after you select the image.
This guide explains how to reverse an image in Word on Windows and Mac, what to do if you are using Word Online, and how to fix the layout problems that sometimes happen after flipping an image. It also covers a practical PDF workflow for users who need to send, archive, annotate, or edit the final document after the Word layout is finished.


 G2 Rating: 4.5/5 |
 100% Secure
How Image Reversing Works in Microsoft Word
In Word, “reverse” usually means flip. If you flip a picture horizontally, Word creates a mirror image from left to right. If you flip it vertically, the top and bottom are swapped. This is different from rotating, which turns the image by degrees without mirroring it.
For example, if a person in a photo is facing left and you want them to face right, use Flip Horizontal. If a reflection, diagram, or design element needs to be turned upside down, use Flip Vertical. If the image is simply sideways, use Rotate Right 90° or Rotate Left 90° instead.
Word’s picture reversing tools are useful for many everyday document tasks. You might use them to:
Make a profile photo face toward nearby text instead of away from it.
Mirror an arrow, icon, or diagram element.
Prepare a design for transfer printing, labels, or craft templates.
Correct a scanned image that was inserted in the wrong orientation.
The feature is available in modern desktop versions of Microsoft Word, including Microsoft 365 versions of Word for Windows and Mac. Microsoft’s interface changes slightly between versions, but the command is normally under Picture Format or Picture Tools Format. If you want Microsoft’s official reference for picture editing tools, the Microsoft Support guide to rotating or flipping objects is a useful companion.
How to Reverse an Image in Word on Windows
The quickest way to reverse image in Word on a Windows PC is to select the picture, open the Picture Format tab, and choose a flip option from the Rotate menu. The steps below work for most recent versions of Word, including Word in Microsoft 365, Word 2021, Word 2019, and Word 2016.
Step 1: Insert the image into your Word document
Open your Word document and place the cursor where you want the picture to appear. Go to Insert > Pictures, then choose the source of your image. You may see options such as This Device, Stock Images, or Online Pictures, depending on your Word version.
Choose the file and click Insert. Word will place the picture in the document, usually in line with the text by default.
If the picture is already in the document, you can skip this step. Just click the image once to select it. You should see small handles around the edges, which means Word is ready to apply picture formatting changes.
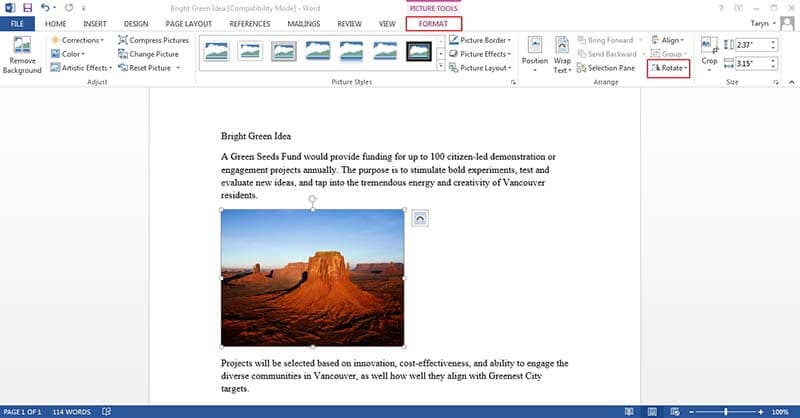
Step 2: Open the Picture Format tab
After selecting the image, look at the top ribbon. Word should display a tab called Picture Format. In older versions, it may appear as Picture Tools Format.
If you do not see this tab, the picture is probably not selected. Click directly on the image again. If the image is behind text, try clicking near its edge or use Home > Select > Selection Pane to choose it from the object list.
Step 3: Use Rotate to flip the picture horizontally
In the Picture Format tab, find the Arrange group. Click Rotate, then choose Flip Horizontal.
This is the option most people need when searching for how to reverse an image in Word. It mirrors the image from left to right. A person looking left will now look right. An arrow pointing right will now point left.
If the image contains readable text, remember that the text will be mirrored too. That may be exactly what you need for transfer paper or certain design layouts, but it is usually not suitable for normal documents.
Step 4: Use Flip Vertical when the image needs to be upside down
If the picture needs to be reversed from top to bottom, choose Rotate > Flip Vertical instead. This is less common than horizontal flipping, but it can help with reflections, symmetrical designs, or images that were inserted upside down in a specific layout.
If the picture is merely sideways, do not use Flip Vertical. Choose Rotate Right 90° or Rotate Left 90°. A flip changes the image’s mirrored direction; a rotation changes its angle.
Step 5: Adjust the layout after reversing
Flipping a picture does not usually change its size, but it can make the document feel visually unbalanced. For instance, a person in a photo may now face the document margin instead of the paragraph. A callout arrow may point away from the item it is meant to highlight.
Click the picture and check the Layout Options button beside it. If you need to move the image freely, choose a text wrapping option such as Square, Tight, or In Front of Text. If the picture should behave like a character in a sentence, keep In Line with Text.
After reversing the picture, check nearby captions, arrows, text boxes, and page breaks. A reversed image can look correct on its own but wrong in context.
How to Reverse a Picture in Word on Mac and Word Online
The basic idea is the same on every platform: select the image, open the picture formatting tools, and choose a flip command. The exact menu path can differ, especially between desktop Word and browser-based Word.
How to reverse a picture in Word for Mac
In Word for Mac, insert or select your picture first. Then open the Picture Format tab on the ribbon. Click Rotate, then select Flip Horizontal or Flip Vertical.
If your ribbon is collapsed, expand it first by clicking the ribbon display controls near the top-right area of the Word window. In some Mac layouts, the rotate command may be represented by an icon rather than a large text button.
The Mac version also lets you rotate a picture manually using the circular rotation handle above the selected image. That handle is useful for angled designs, but it is not the same as reversing the image. For a true mirror effect, use the Flip Horizontal command.
Can you reverse an image in Word Online?
Word Online is more limited than the desktop app. Depending on your account, browser, and Microsoft’s current feature rollout, you may not see the same full picture editing options that appear in desktop Word.
If you can select the picture and see a Picture or Picture Format tab with rotation controls, look for Flip Horizontal or Flip Vertical. If those commands are not available, use one of these workarounds:
Open the file in the desktop version of Word, flip the image, and save it back to OneDrive.
Flip the image in another editor first, then insert the reversed version into Word Online.
Use PowerPoint or another Microsoft app with stronger image editing controls, then copy the flipped image back into Word.
For browser-only users, the fastest workaround is often to reverse the image before uploading it into Word. But if you regularly format documents with images, the desktop version of Word gives you more reliable control over layout, wrapping, and object positioning.
Common Problems When You Reverse Image in Word
Most image flipping problems in Word are not caused by the flip tool itself. They usually come from object selection, text wrapping, grouping, or the type of image you are editing. Here are the issues people run into most often.
The Rotate or Flip option is missing
If the Rotate button is greyed out or missing, first make sure the image is selected. A single click should show resize handles around the picture.
If the image is inside a text box, shape, header, footer, or table, click carefully until the actual picture is selected rather than the container. You can also use the Selection Pane to pick the picture directly. On Windows, go to Home > Select > Selection Pane. The pane lists objects on the page and can help you select items that are layered behind text.
If the file is opened in Protected View, click Enable Editing if you trust the document. Some editing tools remain unavailable until the document is editable.
The image moves after flipping
Flipping should not change the image’s anchor point, but the visual content may appear to shift if the subject inside the picture is not centered. This is common with photos where the main subject is on one side.
If the image no longer lines up with the page, select it and check the wrapping setting. In Line with Text makes the image move with the paragraph. Square and Tight allow more flexible placement. If exact positioning matters, open Layout Options > See more and adjust the horizontal and vertical position settings.
Be careful with dragging after flipping. Word may snap the picture to margins, columns, or nearby objects. If you need precise movement, use the arrow keys after selecting the image.
Text in the image is backward
When you reverse a picture in Word, every part of the image is mirrored, including text, numbers, logos, labels, and screenshots. Word is not separating the objects inside the image; it is flipping the whole image as a single visual layer.
If you need the graphic reversed but the text readable, you have a few options. The cleanest method is to edit the original design file, flip only the graphic element, and keep the text layer normal. If you only have a flat image, you may need to recreate the text in Word using a text box placed over the picture.
For diagrams and screenshots, it is usually better not to mirror the whole image unless the final use specifically requires it.
The reversed image prints the wrong way
If the document looks correct on screen but prints incorrectly, check both Word and printer settings. Some printer drivers include options such as mirror printing, reverse page orientation, or transfer paper mode. These settings can flip the output again, which cancels or changes the result you created in Word.
Before printing a large batch, print one test page. This is especially important for iron-on transfers, stickers, labels, and templates where direction matters. If you need a mirrored print, decide whether the mirroring should happen in Word or in the printer driver—not both.
The image quality looks worse after editing
Flipping an image usually does not reduce quality by itself. However, quality can suffer if you resize the picture too much, compress images during saving, or repeatedly export the document.
If the final document needs to look sharp, start with the highest-quality source image you have. Avoid enlarging small images beyond their original resolution. You can also review Word’s image compression settings under File > Options > Advanced > Image Size and Quality on Windows. Microsoft provides more background on image compression and document size in its Office support resources.
Working With Reversed Images Before Saving as PDF
Many Word documents with images eventually become PDFs. You may reverse a picture in Word for a report, proposal, worksheet, product sheet, instruction manual, or printable design, then export the file to PDF for sharing. That workflow is sensible because Word is better for document layout, while PDF is better for preserving the finished result.
Export the finished Word document carefully
After reversing the image and checking the layout, save the Word file first. Then create the PDF using File > Save As or File > Export > Create PDF/XPS, depending on your Word version.
Before sending the PDF, open it and review the page where the reversed image appears. Check the image direction, captions, margins, and page breaks. A PDF export usually preserves Word’s image orientation accurately, but reviewing the output helps catch layout shifts before someone else sees the file.
G2 Rating: 4.5/5 |100% Secure
Where PDFelement fits into this workflow
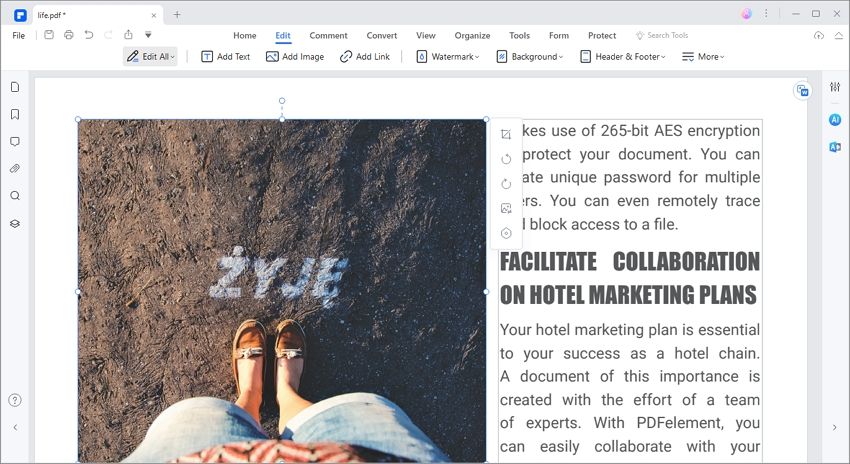
PDFelement is useful after your Word layout is finished and the document has been converted to PDF. It should not be positioned as the main tool for flipping a picture inside Word; Word already handles that task directly. The practical use case is what happens next: reviewing, editing, organizing, annotating, protecting, or preparing the PDF version for distribution.
For example, if you reverse a picture in Word and export the file as a PDF brochure, you may still need to add comments, replace a page, compress the file for email, apply OCR to scanned pages, or add a signature before sending it. PDFelement supports those follow-up PDF tasks in one place, which can save time when a Word document becomes part of a larger review or approval process.

A common workflow looks like this: finish the image placement in Word, export the document as PDF, open the PDF in PDFelement, then make PDF-specific adjustments such as annotations, page organization, form filling, password protection, or compression. If the PDF includes scanned pages, OCR can help make text searchable and editable, which is useful for archived documents or mixed scanned-and-digital files.
Can you reverse an image directly in a PDF?
If the image is already inside a PDF, the process is different from Word. PDF editors can often rotate pages and sometimes edit image objects, but the available controls depend on how the PDF was created. A scanned PDF is usually one flat image per page, while a PDF exported from Word may contain separate text and image objects.
In PDFelement, you can open a PDF, enter edit mode, and select editable objects when the PDF structure supports it. For scanned PDFs, OCR may be needed before deeper editing is possible. If your goal is simply to reverse a picture in a Word document, do it in Word before exporting. If the document is already finalized as a PDF, use a PDF editor for the follow-up adjustments.
G2 Rating: 4.5/5 |100% Secure
Practical Tips for Better Results
Reversing a picture is easy, but getting a polished page takes a little more care. The following tips help avoid common layout and quality problems.
Duplicate the image before flipping it
If you are experimenting with direction, copy and paste the image before applying the flip. Keep the original off to the side or on a temporary page until you are sure the reversed version works. This is helpful when the image has been cropped, resized, or positioned carefully.
Word’s undo command can reverse a mistake, but keeping a duplicate is safer if you are making several edits in a row.
Use crop and alignment after reversing
A flipped image may reveal awkward empty space on the opposite side. Select the image and use Picture Format > Crop to trim unnecessary edges. Then use Word’s alignment tools to line it up with margins, columns, or other objects.
For documents with several images, use Picture Format > Align to keep spacing consistent. A reversed image that is one or two pixels out of alignment may not matter in a casual memo, but it can stand out in a polished report or marketing document.
Watch out for logos and brand marks
Do not mirror a logo unless you have a specific reason and permission to do so. Reversing a brand mark can make it look incorrect or unprofessional. The same applies to certification icons, product labels, maps, interface screenshots, and any image where direction carries meaning.
If only one part of the visual needs to face the other way, consider editing the original graphic rather than flipping the whole image in Word.
Check accessibility and captions
If your document includes alt text, make sure it still describes the reversed image accurately. For instance, “arrow pointing right” should become “arrow pointing left” after a horizontal flip. If a caption refers to direction, update that too.
This is a small detail, but it matters in instructional documents. A mismatch between the caption and the image can confuse readers, especially in manuals, worksheets, and step-by-step guides.
Use the right tool for the right stage
Word is the right place to reverse a picture while the document is still being designed. A dedicated image editor is better if you need pixel-level changes, background removal, layer editing, or selective flipping. A PDF editor such as PDFelement is useful after export, when the document needs PDF-specific handling.
This division keeps the workflow cleaner: edit images before or inside Word, finalize the layout in Word, then manage the finished PDF in a PDF tool.
People Also Ask
-
How do I reverse an image in Word?
Select the image, go to Picture Format, click Rotate, and choose Flip Horizontal. This creates a left-to-right mirror image. If you want to reverse it from top to bottom, choose Flip Vertical instead. -
What is the difference between rotating and reversing an image in Word?
Rotating turns the image by an angle, such as 90 degrees left or right. Reversing usually means flipping the image so it becomes mirrored. Use Rotate for sideways photos and Flip Horizontal for mirror-image effects. -
How do I reverse a picture in Word on Mac?
Click the picture, open the Picture Format tab, select Rotate, and choose Flip Horizontal or Flip Vertical. If you do not see the formatting tab, make sure the picture itself is selected. -
Can I reverse an image in Word Online?
Sometimes, but Word Online has fewer picture editing tools than the desktop app. If the flip option is not available, open the file in the desktop version of Word or flip the image in another editor before inserting it into Word Online. -
Why is the Rotate button greyed out in Word?
The image may not be selected, the document may be in Protected View, or you may have selected a container such as a text box instead of the picture itself. Click the actual image, enable editing if needed, or use the Selection Pane to choose the correct object. -
Will reversing an image in Word reduce its quality?
Flipping an image does not normally reduce quality. Quality loss is more likely to come from enlarging a small image, compressing pictures, or exporting repeatedly. Start with a high-resolution image and avoid unnecessary resizing. -
How do I mirror an image for transfer paper in Word?
Insert the image, select it, then use Picture Format > Rotate > Flip Horizontal. Print a test page before using transfer paper, and check your printer settings to make sure mirror printing is not also turned on unless you need it. -
Can I reverse only part of an image in Word?
Not directly. Word flips the entire selected image. To reverse only one part, edit the image in a graphic editor first, or recreate the separate element in Word as a shape, icon, or text box and flip that object independently. -
Can I reverse text in Word the same way as an image?
Plain typed text does not flip like a picture. If you need mirrored text, place it inside a text box or WordArt object, then use rotation or 3D rotation options. For most documents, mirrored text should be used carefully because it is hard to read. -
Should I reverse the image in Word before converting to PDF?
Yes, if the image belongs to a Word document layout. Reverse and check the image in Word first, then export the document as a PDF. After that, you can use a PDF tool such as PDFelement to review, annotate, compress, protect, or organize the PDF before sharing it.

