How to Make a Table of Contents in PowerPoint
Are you struggling with creating a table of contents in PowerPoint? Don't worry. There are a couple of ways to insert a table of contents in PowerPoint。
 100% Secure |
 Home
>
PowerPoint Tips
> How to Make a Table of Contents in PowerPoint
Home
>
PowerPoint Tips
> How to Make a Table of Contents in PowerPoint
It is known that using Microsoft Word can automatically create a table of contents. All you need is to head to the "References" tab and click a button for "Table of Contents", later it will be finished. It is one of the most trivial things in Microsoft Word. On the other hand, PowerPoint doesn’t give you the option for automatic creation of tables. There is, however, a workaround for a PowerPoint table of contents. There are a couple of ways to insert a table of contents in PowerPoint. Let’s check them out.
Part 1. How to Make a Table of Contents in PowerPoint
There are four methods to create a table of contents and each of the ways for creating a table of contents in PowerPoint has its benefits. Some are easier to make, while some look more streamlined. Here are the guides for each of them.
Method 1. Using Outline View to Create a Table of Contents
You can try using Outline View. This is one of the fastest ways to insert a table of contents in PowerPoint.
- Step 1. Go to the "View" tab, and turn on "Outline View."
- Step 2. You will see a list of slide titles in the thumbnails pane on the left.
- Step 3. Right-click in the thumbnails pane, and select "Collapse" > "Collapse All."
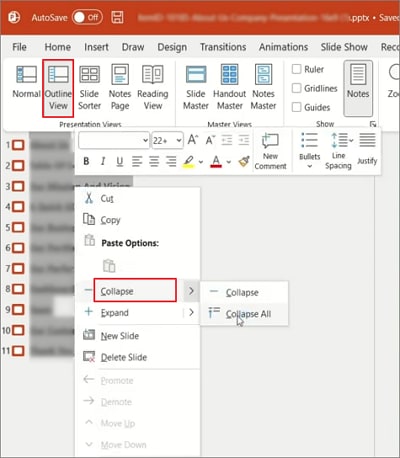
- Step 4. Click and select all the slide titles. Then right-click and select "Copy."
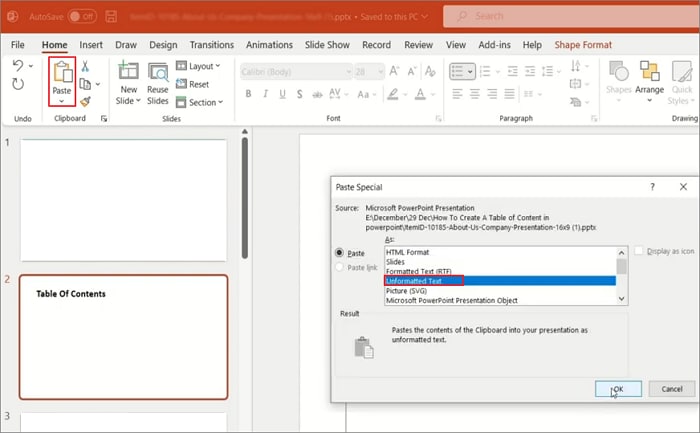
- Step 5. Go back to the Normal view. Paste to add titles to the table of contents slide by clicking "Paste" > "Paste Special" > "as Unformatted Text."
Method 2. Dragging Slides to Create a Table of Contents
Dragging slides is the easiest way to create a table of contents. All you need is to drag and drop. Then the linking and images are done for you.
- Step 1. Create a new slide to be your "Table of Contents".
- Step 2. Scroll the "Thumbnails Pane" on the left and find the slides you want to add.
- Step 3. Drag and drop the slides to the table of contents slide.
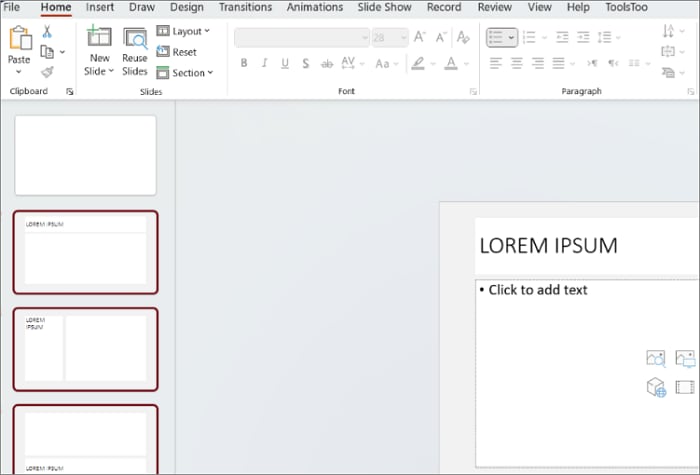
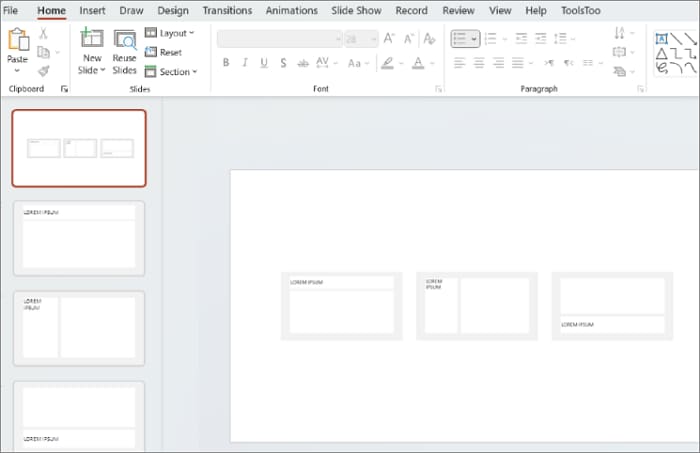
- Step 4. PowerPoint will display thumbnails of the slides. You can click on a thumbnail to navigate to a specific slide.
Method 3. Create a Table of Contents by Slide Zoom
The new Slide Zoom feature, the latest feature in PowerPoint 2019 and PowerPoint for Office 365, can be used to create your table of contents.
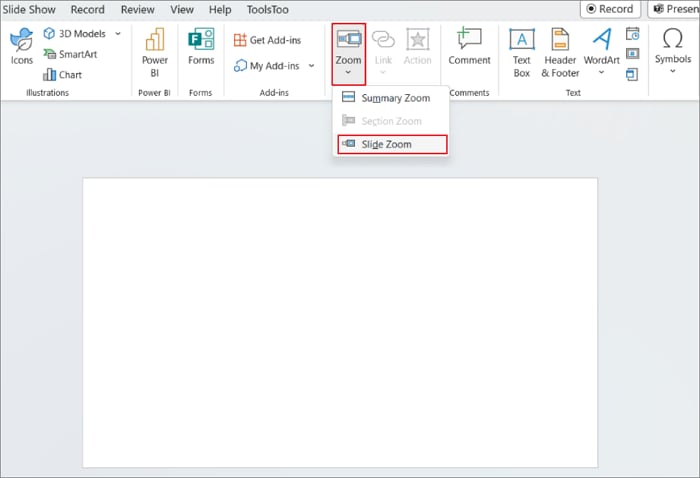
- Step 1. Click on "Zoom" on the "Insert" tab, and select "Slide Zoom".
- Step 2. PowerPoint will display the "Slide Zoom" dialog box.
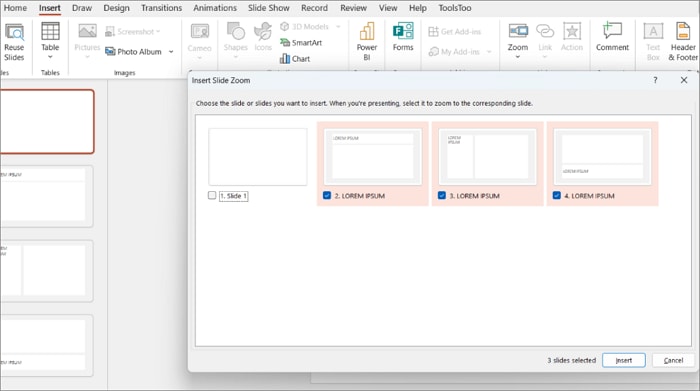
- Step 3. Select the slides you want to use and click "Insert".
PowerPoint will use thumbnail images to represent slides. You can change any thumbnail with another image. Select your entire "Zoom". This will activate the "Zoom Tools Format" tab. Click on "Change Image" and change the image you want.
Method 4. Manually Add a Table of Contents
The last way is a bit more complicated, but it allows you to change the title.
- Step 1. Add a table of contents at the beginning of the presentation.
- Step 2. Type the title of each slide in the presentation.
- Step 3. You can also go to each slide to copy the title and paste it on the table of contents summary slidee.
Add hyperlinks to the table of contents
After creating a table of contents, you can add hyperlinks to each heading so that you can quickly access a specific page by clicking the headings.
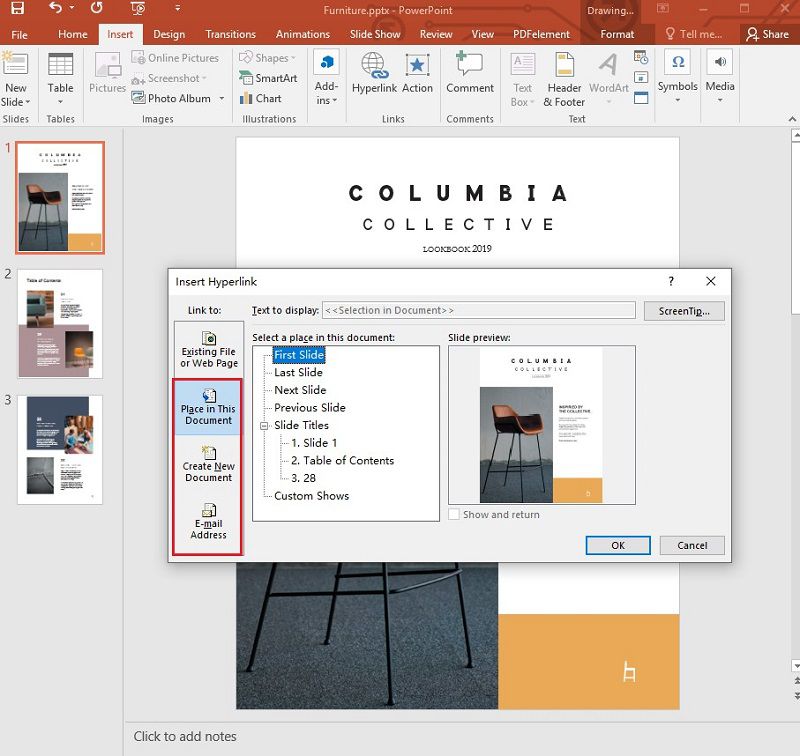
- Step 1. In the table of contents slide, select a heading and click Insert > Link.
- Step 2. Navigate to the bottom of the drop-down menu and select Insert Link…, which open the Insert Hyperlinks window.
- Step 3. To link to a specific slide in the presentation, click Place in This Document, select the target slide and insert the table of contents
Part 2. The Best PDF Software
PowerPoint is a versatile software for presentations, but it also has its limitations. As you can see, creating a PowerPoint table of contents is a complicated task. The good news is you can convert PowerPoint presentations into PDF files, and increase the versatility. So in order to achieve this process, you also need a great PDF editor, i.e. Wondershare PDFelement - PDF Editor Wondershare PDFelement Wondershare PDFelement. It is very popular with the palette of features. The following are the powerful features:


 G2 Rating: 4.5/5 |
 100% Secure
- Create PDF documents from scanned images or other files.
- Convert files to PDF, or convert PDF to other file formats, including Microsoft Office, HTML, Epub, RTF, and more.
- Create interactive form fields automatically with one click.
- Extract data from form fields within the document.
- Annotate documents by adding comments, text markups, drawings, stamps, and even attachments as comments.
- Perform spell check to see if there are any errors in your document.
- Protect PDF documents with password encryption.
- Add digital signature to serve as a traditional handwritten signature.
Part 3. How to Make a Table of Contents in PDF
G2 Rating: 4.5/5 |100% Secure
PDFelement streamlines the process of creating a table of contents in PDFs. It analyzes your document's bookmarks and automatically builds a table of contents with just a click. This not only saves you time, but also ensures an accurate table of contents reflecting your PDF document's structure.
Step 1. Open the PDF File
Launch PDFelement and open the file where you want to add table of contents.

Step 2. Add Bookmarks to the PDF
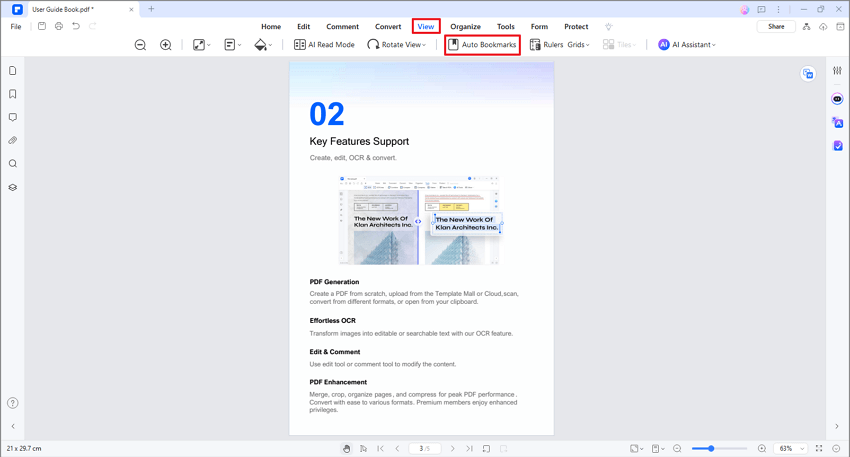
Go to "View", and click on "Auto Bookmarks" thereunder. PDFelement will analyze the structure of your PDF document based on its font and content and automatically add bookmarks to your PDF.
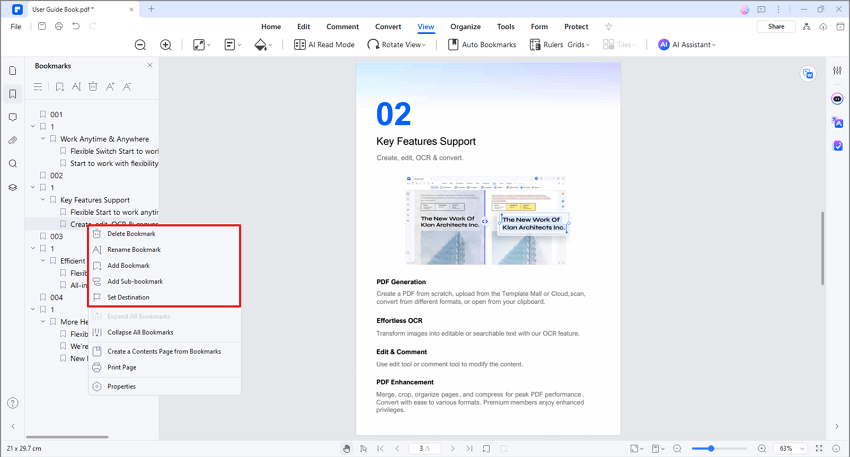
Step 3. Edit Bookmarks (Optional)
Feel free to edit the auto-generated bookmarks. Just head to the Bookmark panel on the right side of the software interface, right-click the bookmark you wish to modify, and easily delete, add, or rename bookmarks to suit your needs.
G2 Rating: 4.5/5 |100% Secure
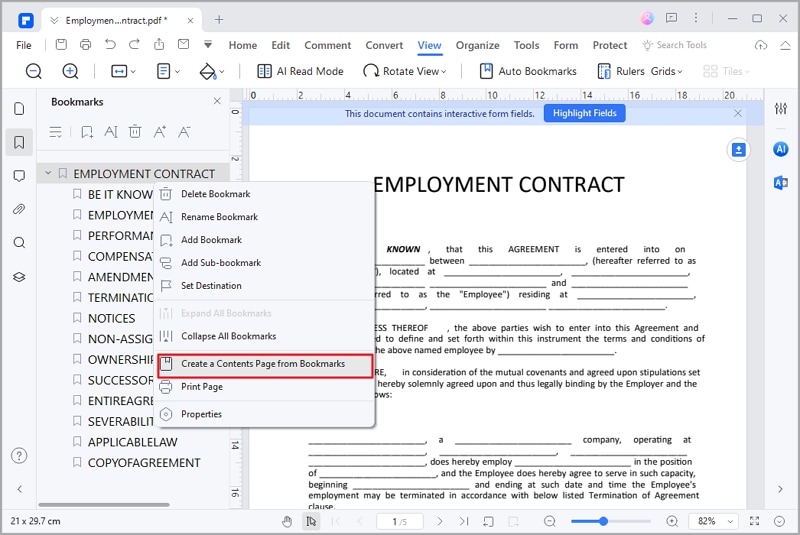
Step 4. Generate a Table of Contents in PDF
Right-click on a bookmark and select "Create a Content Page from Bookmarks" from the drop-down list.
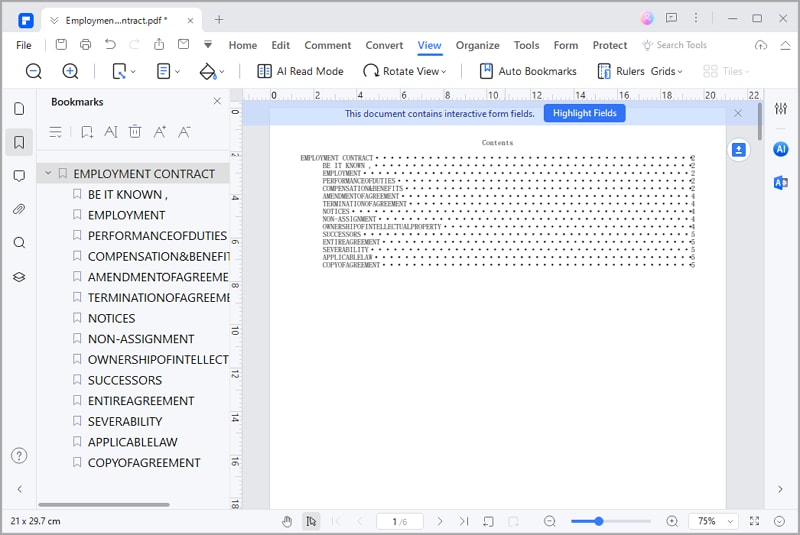
PDFelement will then add a new page to your PDF with a table of contents containing links to specific sections, making document navigation easier。
G2 Rating: 4.5/5 |100% Secure
Free Download or Buy PDFelement right now!
Free Download or Buy PDFelement right now!
Try for Free right now!
Try for Free right now!


Elise Williams
chief Editor