 Home
>
PowerPoint Tips
> How to Add Border in PowerPoint
Understanding how to add borders in PowerPoint is still a challenge to many people. The program is loaded with various icons that make it simple to add a border. This detailed guide will take you through detailed steps by which you can insert the border in PowerPoint with ease and efficiency.
How to Add Border in PowerPoint
The following are the steps on how to add audio to PowerPoint in PowerPoint 2016/2013/2010. The steps are easy to follow with relevant images that show the corresponding steps. Moreover, all the steps follow a similar but with minor differences in some versions of PowerPoint.
Step 1. Select the Shape
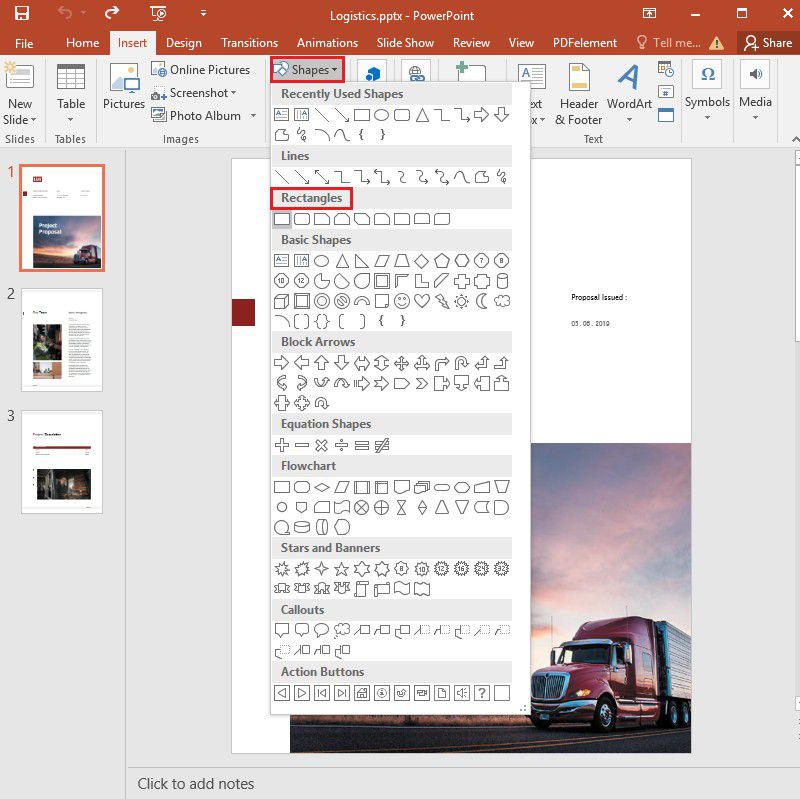
Go to the slide where you want to add a border in PowerPoint. And you can click on the “Insert” > “Shapes” option, and then you will be provided with a number of options such as rectangles or circular shapes. Select one that suits your document.
Step 2. Add the Border
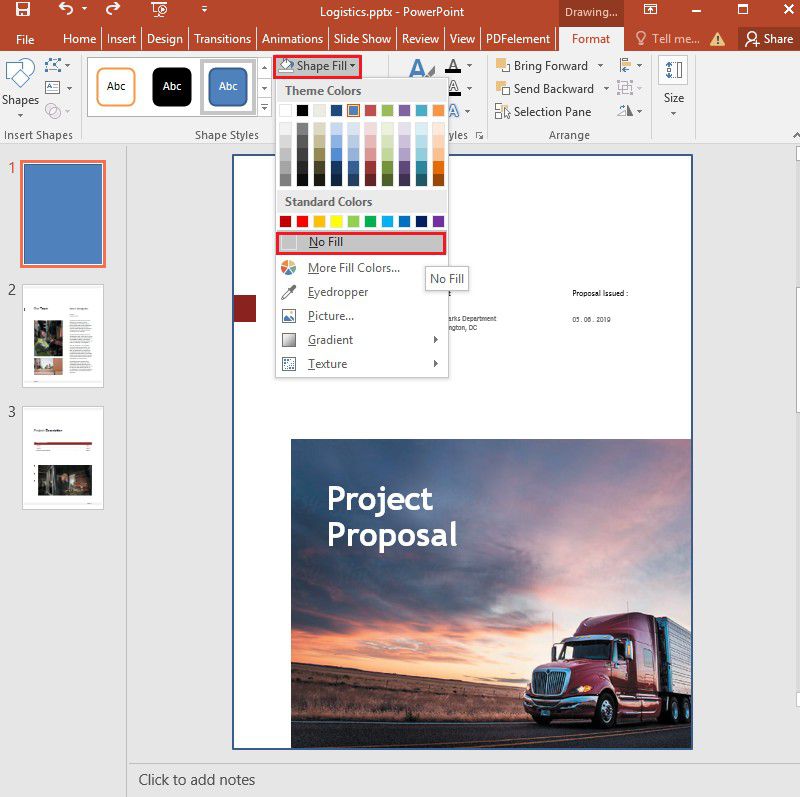
A cross sign symbol will appear on the interface. Use the mouse to take the sign to your program’s top-left corner. Then press and drag such that the shape you desire encompasses the whole slide. Once added to the border, you can remove the background color by clicking "Format" > "Shapes Fill" and selecting the “No Fill” option.
Step 3. Change the Color and Thickness of Borders
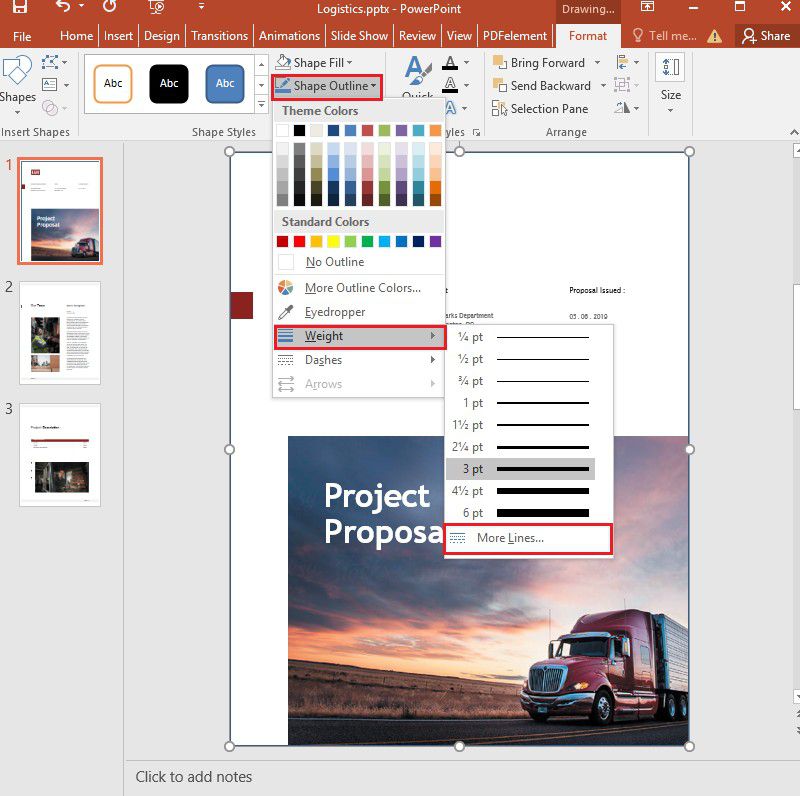
The set border will be thin by default. However, if you would still want to customize it to suit your priorities, PowerPoint lets you do so. Go to this program’s “Format” > “Shape Outline.” This option will let you change the color of the border. In addition, the “Weight” icon allows you to manipulate the thickness of your border. But if you desire an even thicker border, you can select the ‘Weight’ button displayed above and click on “More Lines.”
Step 4. Apply Borders to Other Slides
It is possible to include the set borders to other additional slides. This can be done by selecting the border shape and clicking on “Copy.” After that, go to the new slide and choose “Paste.”
The Best PDF Software
PDF documents have been gaining popularity in recent times owing to their nice display and flexibility. And when it comes to handling PDF, there is one all-rounded tool that is widely relied upon known as Wondershare PDFelement - PDF Editor Wondershare PDFelement Wondershare PDFelement. This powerful tool is equipped with robust features that will let users edit, annotate, convert, protect, and sign their PDF documents with ultimate ease. It is ideal and recommended when it comes to reading PDFs, taking notes, and performing conversions. The following are the main features of PDFelement.
• Annotate PDF
From adding sticky notes, comments to highlighting texts, PDFelement provides you with all the tools to use when handling PDF files. Firstly, you can go to the “Comment” > “Notes” and move the cursor to where you want to annotate. A button named “Sticky Note” will be displayed on the side of your document.
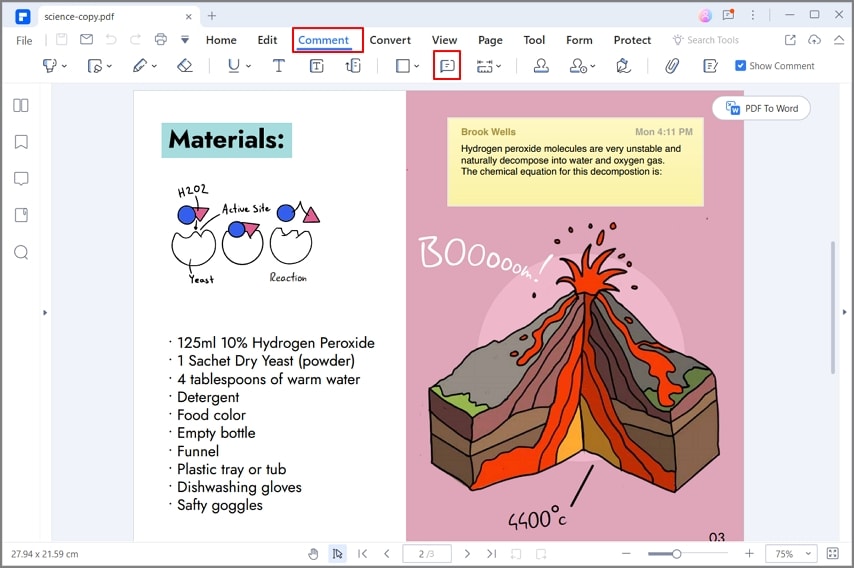
In addition, you can go to the “Comment” > “Highlight” option to highlight the text. The color will be set to yellow by default, and you can right-click on it to change color and opacity.

• Edit PDF
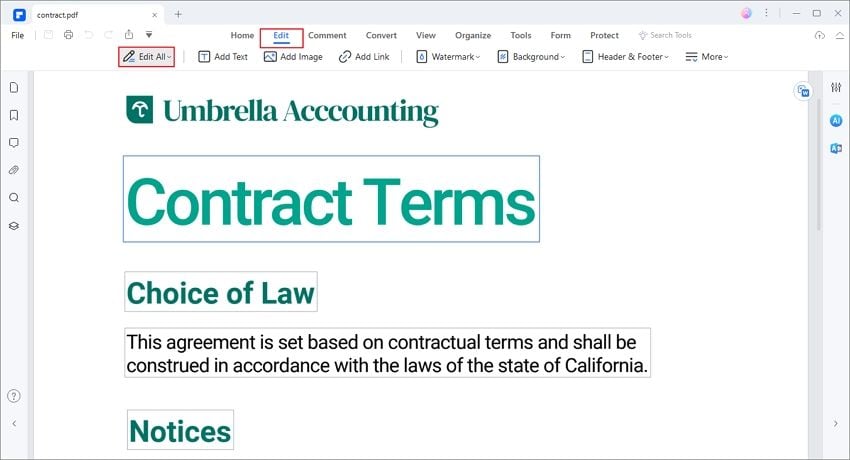
Performing editing tasks on PDFs has never been much simpler, as is the case when using PDFelement. Below is a simple way to edit PDF files with the tool. To begin with, open PDFelement and click on the “Open File” button in the main interface to upload files to the program.

After uploading the files, go to “Edit” on the interface’s top display. This feature allows you to edit texts, change the background color and font type. Moreover, you can also have the ability to either add or delete texts.
• Convert PDF
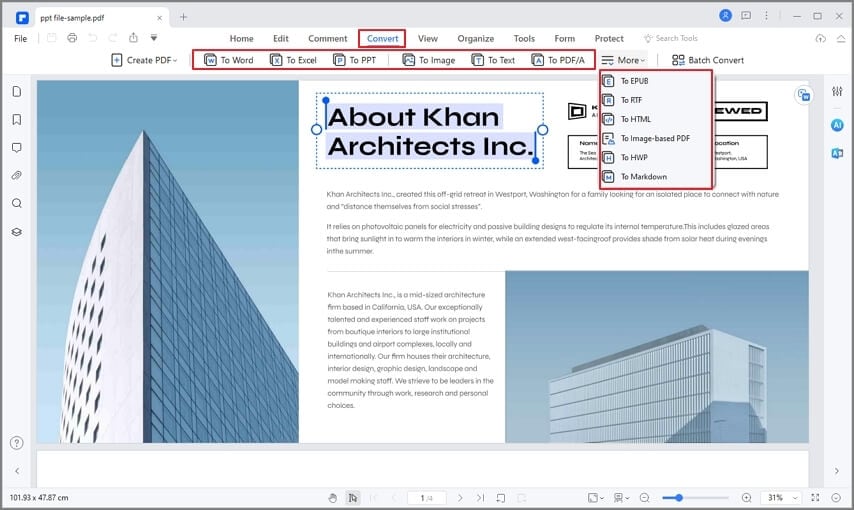
Whether you want to convert PDF to Word, Excel, or PowerPoint, etc., PDFelement is a handy tool that you may rely on. You will be required to upload files into this application first by clicking “Open File.” Once uploaded, go to the “Convert” option, and you will be provided with a number of options that your files can be converted into. Select one that suits you, and set the output folder, and then click on “Start.”
• Create PDF Forms
The feature used in making PDF files fillable by using PDFelement is a bit more advanced than even beginners can be able to grasp with ease. Here is how you can easily create PDF forms with this program.
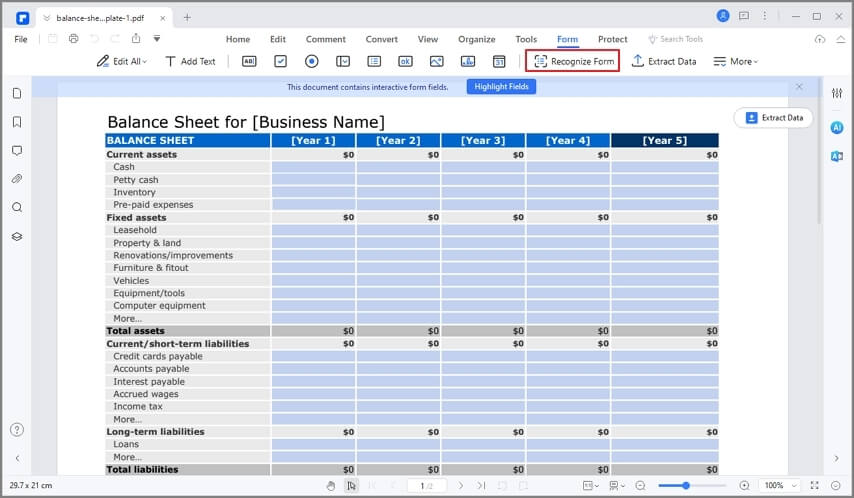
Upload the PDF document to PDFelement by clicking "Open File." If the PDF document you have already has buttons and boxes, you can click on “Forms” > “Form Recognition.”
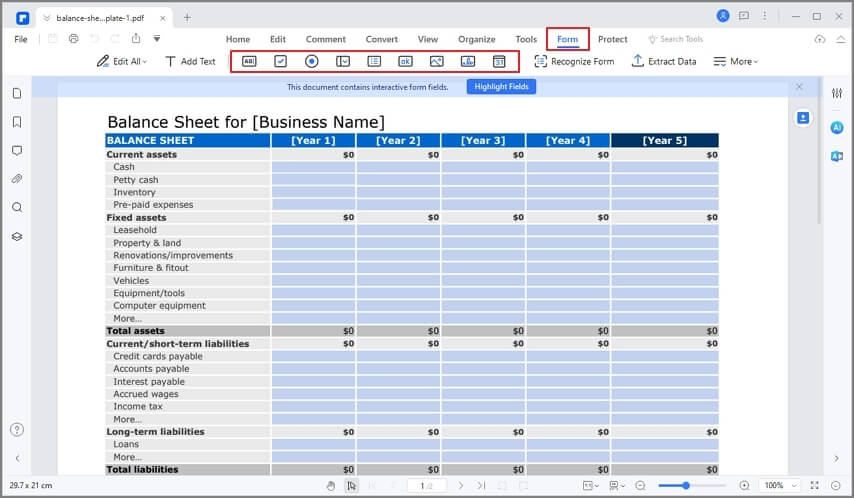
On the other hand, if you will have to create the forms from scratch, go to “Form” > “Text Field.” The program will provide a couple of tools such as “Combo Box,” “Radio Button,” and “Check Box” that you will use in creating the forms.
Hopefully, you are now well conversant on how to insert border in PowerPoint. The good thing is that the steps used are closely similar no matter the PowerPoint version. After you insert the border in PowerPoint, your presentations will get an even better display. Furthermore, Wondershare’s PDFelement is recommended when dealing with PDF files.
Free Download or Buy PDFelement right now!
Free Download or Buy PDFelement right now!
Try for Free right now!
Try for Free right now!
 100% Secure |
 G2 Rating: 4.5/5 |
  100% Secure


Audrey Goodwin
chief Editor