 Home
>
macOS Tips and Tricks
> How to Turn on Dark Mode on macOS 11
According to most Mac users, Dark Mode makes it easier to focus on your Mac activities such as work, since the content stands out as the darkened controls and windows recede into the background. Apple launched it in macOS 10.14, and so you can turn on Dark Mode on macOS 11. The best part about using Dark Mode on your Mac for macOS 11 is that it is easy on your eyes as it uses a dark color scheme that functions system-wide. So, as you use it in apps like Safari, you can also incorporate it in third party apps too.
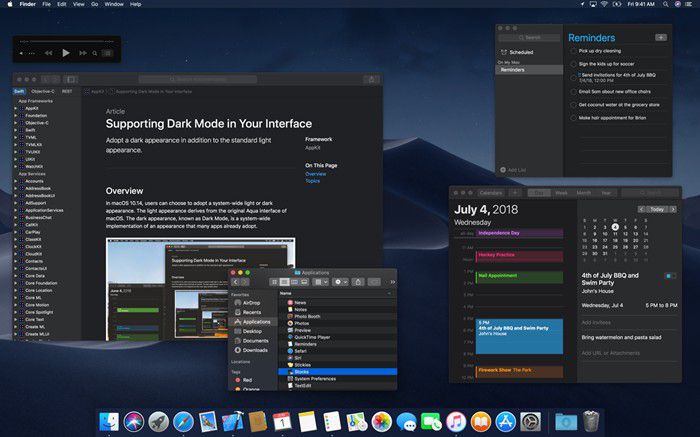
What is Dark Mode
macOS 11, also known as Big Sur, allows you to select your theme appearance as soon as you update your Mac. If you have been used to Light mode, you can try a different appearance this time by using Dark Mode on your Mac for macOS 11. It is known to make your content stand out while darkening controls and windows receding into the background. Additionally, it makes your focus better.
Dark Mode is a system-wide appearance that comes with a few exceptions. It uses a dark color scheme. However, as you choose to master Dark Mode for macOS 11, note that various applications and features include their own appearance preference and thus override Dark Mode. It premiered in macOS 10. 14, also known as Mojave, as an easy way to toggle the system appearance from the default bright theme. It has been functional since then as macOS 10.15, also known as Catalina, improved how it works with new features by scheduling when to activate it based on sunrise and sunset by default.
Dark Mode changes the appearance of built-in apps like Finder, Safari, Photos, Notes, Apps, Mail, and Music. If you download third-party applications, they may also support this feature.
Which Macs are Supported
Although you can master Dark Mode for macOS 11, it has to be the supported Macs. They are namely;
- MacBook Air models introduced in mid-2012 or later
- MacBook Pro models introduced in mid-2012 or later
- iMac models introduced in late 2012 or later
- Mac mini models introduced in late 2012 or later
- Mac Pro models introduced in 2013 or later
- iMac Pro
- MacBook models introduced in early 2015 or later
Older Macs that can only support macOS produced before Mojave like High Sierra and Sierra cannot use the Dark Mode feature but can enable a dark menu bar and dock.
How to Turn on Dark Mode on macOS 11
The following steps will help you in how to enable Dark Mode in macOS 11.
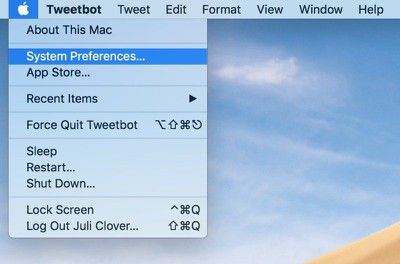
Step 1: Access System Preferences
There are various ways to go to System Preferences. You can use Spotlight, whereby you can type in “system preferences,” or simply find it on the menu bar that is accessible through the Apple button, or open it from Launchpad using a four-finger pinch.
Step 2: Find General
When System Preferences opens, focus on the top row of icons. You should be able to locate it on the left side. So choose General from the options; it stores all the settings related to Mac’s color and look.

Step 3: Head to Appearance
In the top of the Appearance window, you will find the Appearance option and it is where you view the available options, which are clearly labeled. Light is used to turn on the light mode
Dark is for dark mode
Auto is automatically set to put the Light mode during the day and Dark mode during the night.
In this case, choose the Dark option.
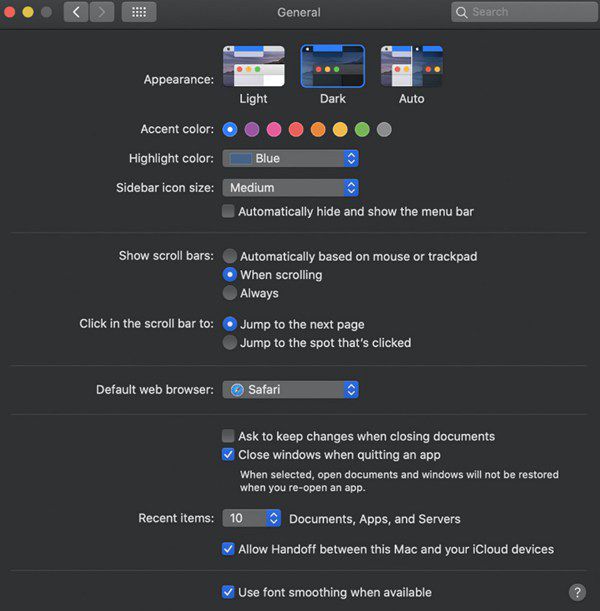
However, if you wish to use Dark Mode on your Mac for macOS 11 at night only, click on the Auto option instead.
How to Use Dark Mode in Pages on macOS 11
Pages for Mac is a powerful word processor that comes included in the device, which allows you to create splendid documents. It provides the right tools to customize fronts and add beautiful graphics.
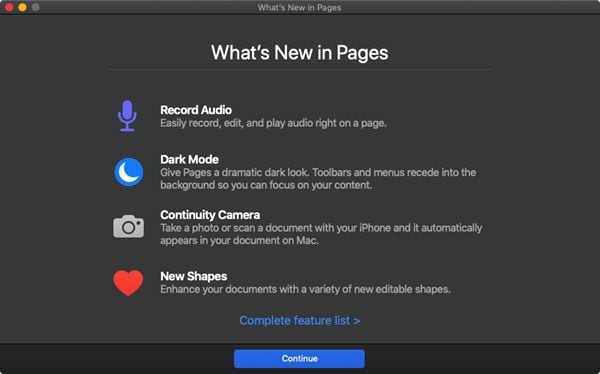
As you enable Dark Mode in macOS 11, Pages do not comply. The documents create in this application are intended for printing by default, and so you will still type black words on white space.
If you still need a dark space for typing, you can customize the layout, a process that involves changing the background color, and saving the template to use it more in the future.
To create a Pages background with Dark Mode, use the following steps;
- Open a blank page in Pages and insert a shape.
- You can choose a square shape and move it to the corner on the upper left
- Drag its bottom right corner so that the shape can occupy the entire page
- It should fill the page perfectly.
- Change the color of the shape to black.
- To ensure that this remains as the background of every page
- Go to Arrange>Section Master and Move Object to Section Masters
- To change the color of the text to white, Go to the Update function
How to Use Dark Mode in Safari on macOS 11
Safari for Mac is a browser that comes embedded in the device. It allows you to conduct research online and read articles posted on multiple websites.
When you use Dark Mode on your Mac for macOS 11, Safari complies by automatically showing websites in Dark Mode, especially for those that are designed to support this appearance. If a website does not support the usage of Dark Mode, you can improvise by using Safari Reader.
Safari Reader is used to viewing a webpage article on a single page. Basically, it is formatted for easier reading and presented without distracting items like ads.
- Go to Applications, and open the Safari application on your Mac
- Click the Reader View icon that is to the left corner of the Safari address bar. Note that this button appears if the webpage has an article that Safari Reader can display.
![]()
- Select the letter aA icon to the right corner of the Safari address bar and switch to the darkest background color. You can also adjust the font size and font. This step is only done once and since Safari remembers your preferences automatically.
![]()
- To stop using Safari Reader, simply click the Reader View icon again or hit Esc on the keyboard.
Best PDF Editor for macOS 11 – PDFelement for Mac
One of the third-party apps where you can enjoy enabling Dark Mode in macOS 11 is PDFelement for Mac. This is the ultimate tool for PDF files because it is powerful enough to handle multiple activities that make your PDFs attractive and acceptable at work, school, and online. It simplifies how you deal with PDF files, and yet it is cheap, secure, and fast.
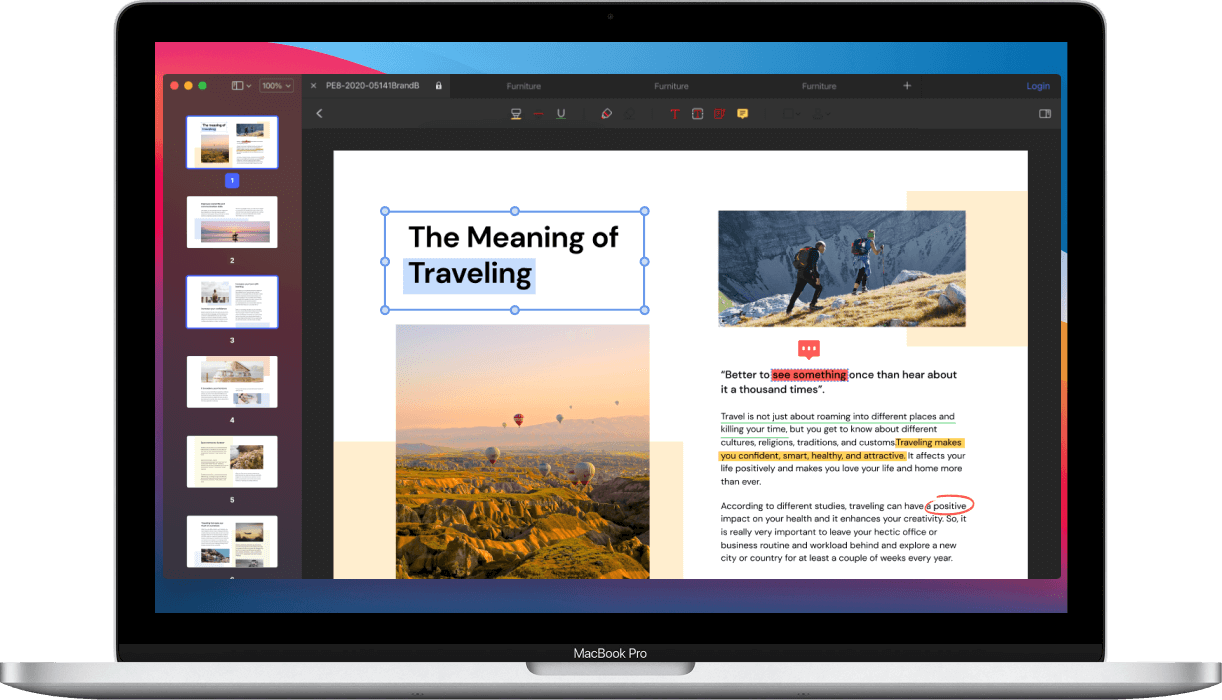
PDFelement for Mac differs from other PDF editors in the markets because it has great things to offer macOS 11 users. The most basic ability is editing texts, whereby it allows you to change up the paragraph contents, as well as their font, font size, and color. So, you can add new texts using very few clicks. Additionally, you can add images quickly, which comes in handy when conveying special messages. These texts and images can also be deleted or replaced depending on your PDF requirements.
Acquiring PDFelement for Mac is a forever opportunity to make the best PDFs. The ability to add texts ensures that you put across all the ideas, facts, and proposals in your mind, providing a perfect way to communicate with professionals and colleagues. Image addition adds quality to your work as well.
Free Download or Buy PDFelement right now!
Free Download or Buy PDFelement right now!
Try for Free right now!
Try for Free right now!
 100% Secure |

Audrey Goodwin
chief Editor