
Table of Contents
Large PDFs usually become a problem at the worst time: an upload portal rejects the file, an email attachment limit gets in the way, or a client asks for a smaller copy right before a deadline. On a Mac, you have several ways to reduce PDF size, but they do not all treat quality the same way.
The quickest built-in option is Preview. It can shrink a PDF in under a minute, but it gives you very little control over image quality. If the document contains photos, scans, charts, or small text, that lack of control can matter. A dedicated PDF optimizer for Mac, such as PDFelement, gives you more predictable compression settings and is usually the better choice when the file still needs to look professional.
This guide explains how to compress PDF on Mac using PDFelement, Preview, and free online tools. It also covers what to do if you need a smaller PDF without making images blurry or text hard to read.


 G2 Rating: 4.5/5 |
 100% Secure
Why PDF Files Get So Large on Mac
A PDF can look simple on the page and still be heavy behind the scenes. The file may contain high-resolution images, embedded fonts, scanned pages, hidden editing data, comments, layers, form fields, or print-ready color information. A 12-page brochure with large product photos can easily be much bigger than a 100-page text-only contract.
Scanned PDFs are often the biggest offenders. If each page is stored as a full-page image, the PDF is closer to a folder of photos than a normal text document. Compressing that kind of file requires a different approach than shrinking a digital PDF exported from Word, Pages, Google Docs, or Adobe InDesign.
Before choosing a method, think about how the PDF will be used. A file for email review can usually tolerate more compression than a file going to a commercial printer. A scanned contract needs readable text more than perfect image detail. A design portfolio may need a careful balance: small enough to upload, but not so compressed that the images look unprofessional.
Best Way to Compress PDF on Mac with More Control
If you want to compress a PDF file on Mac and keep control over the result, use a dedicated PDF tool rather than only relying on Preview. PDFelement for Mac is a practical option because it lets you open the PDF, choose a compression level, compare file size changes, and save a smaller copy without changing the original.
This is especially useful for work documents that cannot look distorted after compression: proposals, reports, scanned forms, resumes, manuals, contracts, or files with images and annotations.
G2 Rating: 4.5/5 |100% Secure
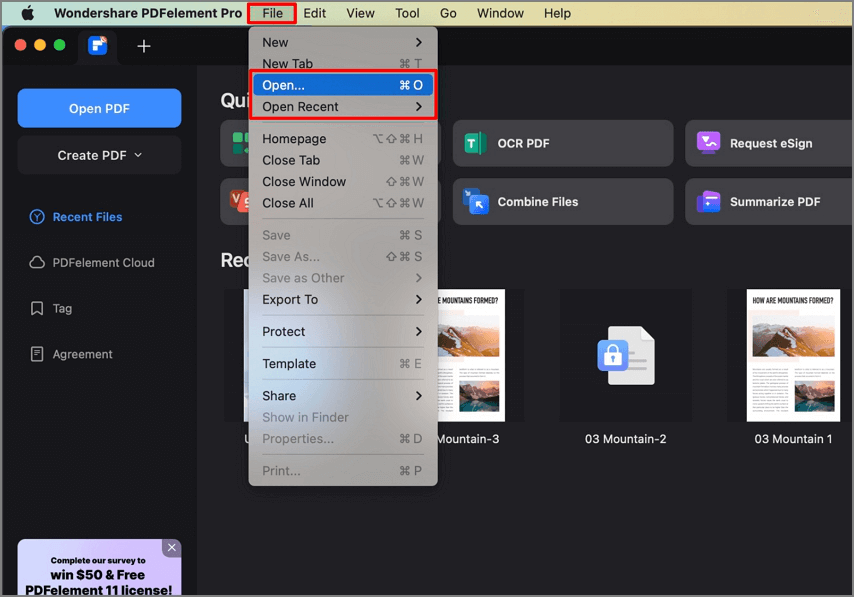
Step 1. Open the PDF in PDFelement for Mac
Launch PDFelement on your Mac and open the PDF you want to reduce. You can use the Open File option from the home screen or open the file from the menu bar.
If you are compressing an important document, keep the original file in a separate folder. Compression is normally safe, but it is better to save the reduced file as a new copy so you can compare both versions.
Step 2. Choose the Compress PDF option
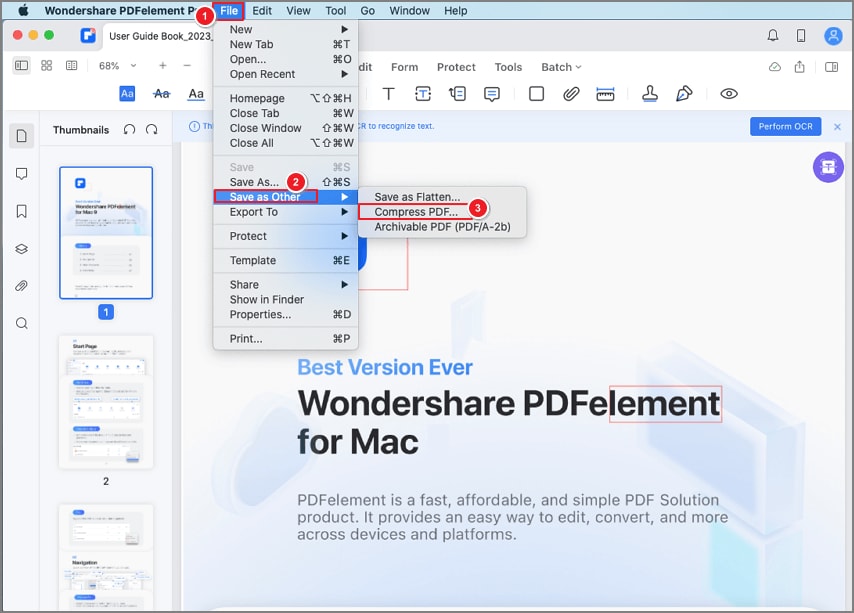
With the file open, go to File > Save as Other > Compress PDF. This opens the compression panel, where you can choose how aggressively you want to reduce the file size.
The benefit of using a PDF optimizer on Mac is that you are not limited to one generic “reduce size” filter. You can choose the level that fits the document rather than accepting whatever the app decides.
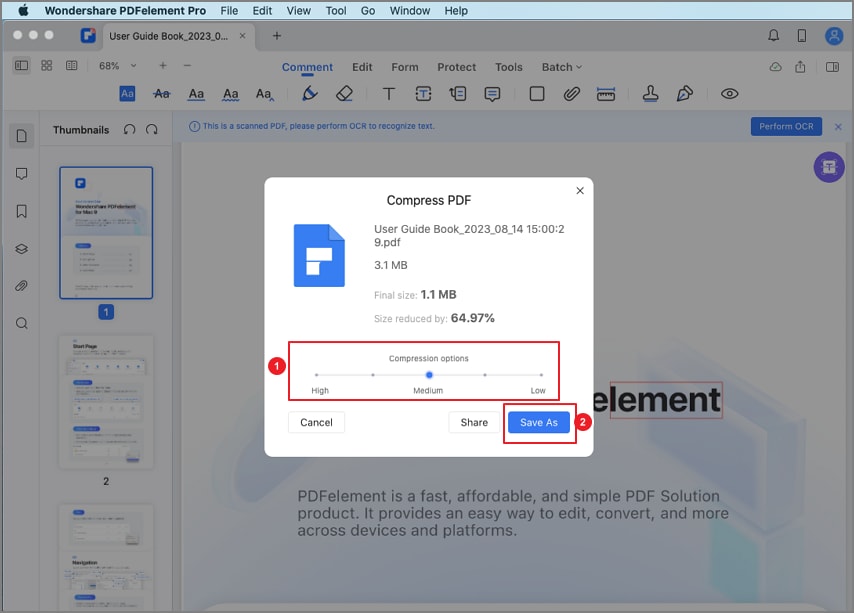
Step 3. Pick the right compression level
PDFelement provides different compression levels, commonly including high, medium, and low compression. The best choice depends on your goal.
Use a lower compression level if you need to compress PDF on Mac without losing quality as much as possible. This is a safer choice for documents with images, charts, small print, signatures, stamps, or scanned pages.
Use medium compression when you need a noticeable size reduction but still want the document to remain clean on screen.
Use high compression when size matters more than image detail. For example, if a website requires a file under a specific limit, high compression may be necessary. Just check the result before sending it.
A useful habit is to compress the same PDF at two levels, then compare them. Open both files side by side and zoom to 100% and 150%. Check logos, signatures, screenshots, charts, and any page with small text.
G2 Rating: 4.5/5 |100% Secure
Step 4. Save a new compressed copy
After choosing the compression setting, save the optimized PDF as a new file. Give it a clear name, such as Project-Proposal-compressed.pdf or Tax-Form-under-10MB.pdf.
PDFelement is also helpful if compression is only one part of the job. You can delete unnecessary pages, replace oversized images, crop pages, convert files, add OCR to scanned PDFs, annotate, sign, protect, and organize the document before sending it. That matters because the best way to shrink a file is sometimes not only compression. Removing duplicate pages or replacing one huge image can reduce the file size more cleanly than forcing heavy compression across the entire PDF.
How to Compress a PDF in Preview on Mac
Preview is the built-in Mac option, and for many simple tasks it is good enough. If you searched for “compress PDF Preview,” this is the method most people mean. It is free, already installed on macOS, and easy to use.
The downside is control. Preview’s standard reduce-file-size filter can sometimes make images look soft or heavily compressed. For basic PDFs, that may not matter. For visual documents, it can be too aggressive.
Step-by-step Preview method
Open the PDF in Preview. If Preview is not your default PDF app, right-click the file, choose Open With, and select Preview.
Next, click File > Export. Do not choose the normal Save command if you want to create a compressed copy with different export settings.
In the export window, open the Quartz Filter dropdown and choose Reduce File Size. Select a destination folder, rename the file if needed, and click Save.
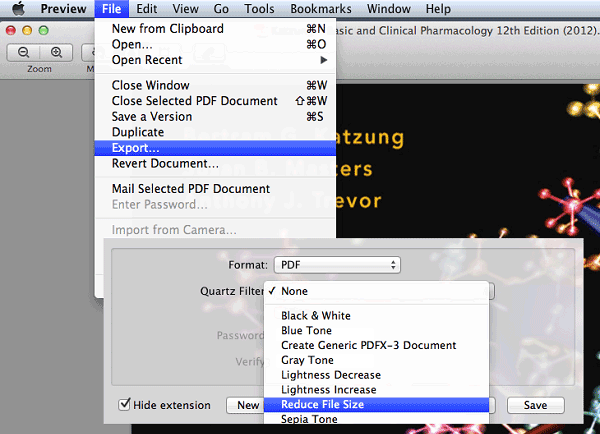
After saving, check the file size in Finder. Then open the compressed PDF and inspect the pages that matter most. Pay close attention to images, charts, scanned text, and signatures.
When Preview works well
Preview is a good choice when the PDF is not visually demanding and you need a fast free PDF compressor on Mac. It can work well for class notes, text-heavy documents, basic forms, and files that only need to be small enough for quick sharing.
It is also useful when privacy is a concern and you do not want to upload the PDF to an online service. Since Preview runs locally on your Mac, the file does not leave your device.
When Preview is not the best option
Preview is less ideal when you need predictable quality. The built-in compression filter can reduce image resolution more than expected, and it does not offer simple quality levels such as low, medium, or high compression.
Avoid relying only on Preview for design files, portfolios, scanned legal documents, image-rich reports, or anything that must be printed. If the first Preview result looks blurry, use a dedicated PDF compressor for Mac instead.
Apple’s own Preview documentation is useful if you want to understand related export and PDF handling options in macOS. You can refer to Apple’s Preview User Guide for current Preview features.
Free and Online Ways to Compress PDF Files on Mac
You do not always need installed software. If the PDF is not confidential and you only need a quick reduction, an online compressor can be convenient. There are also a few manual cleanup methods that sometimes reduce file size without applying harsh compression.
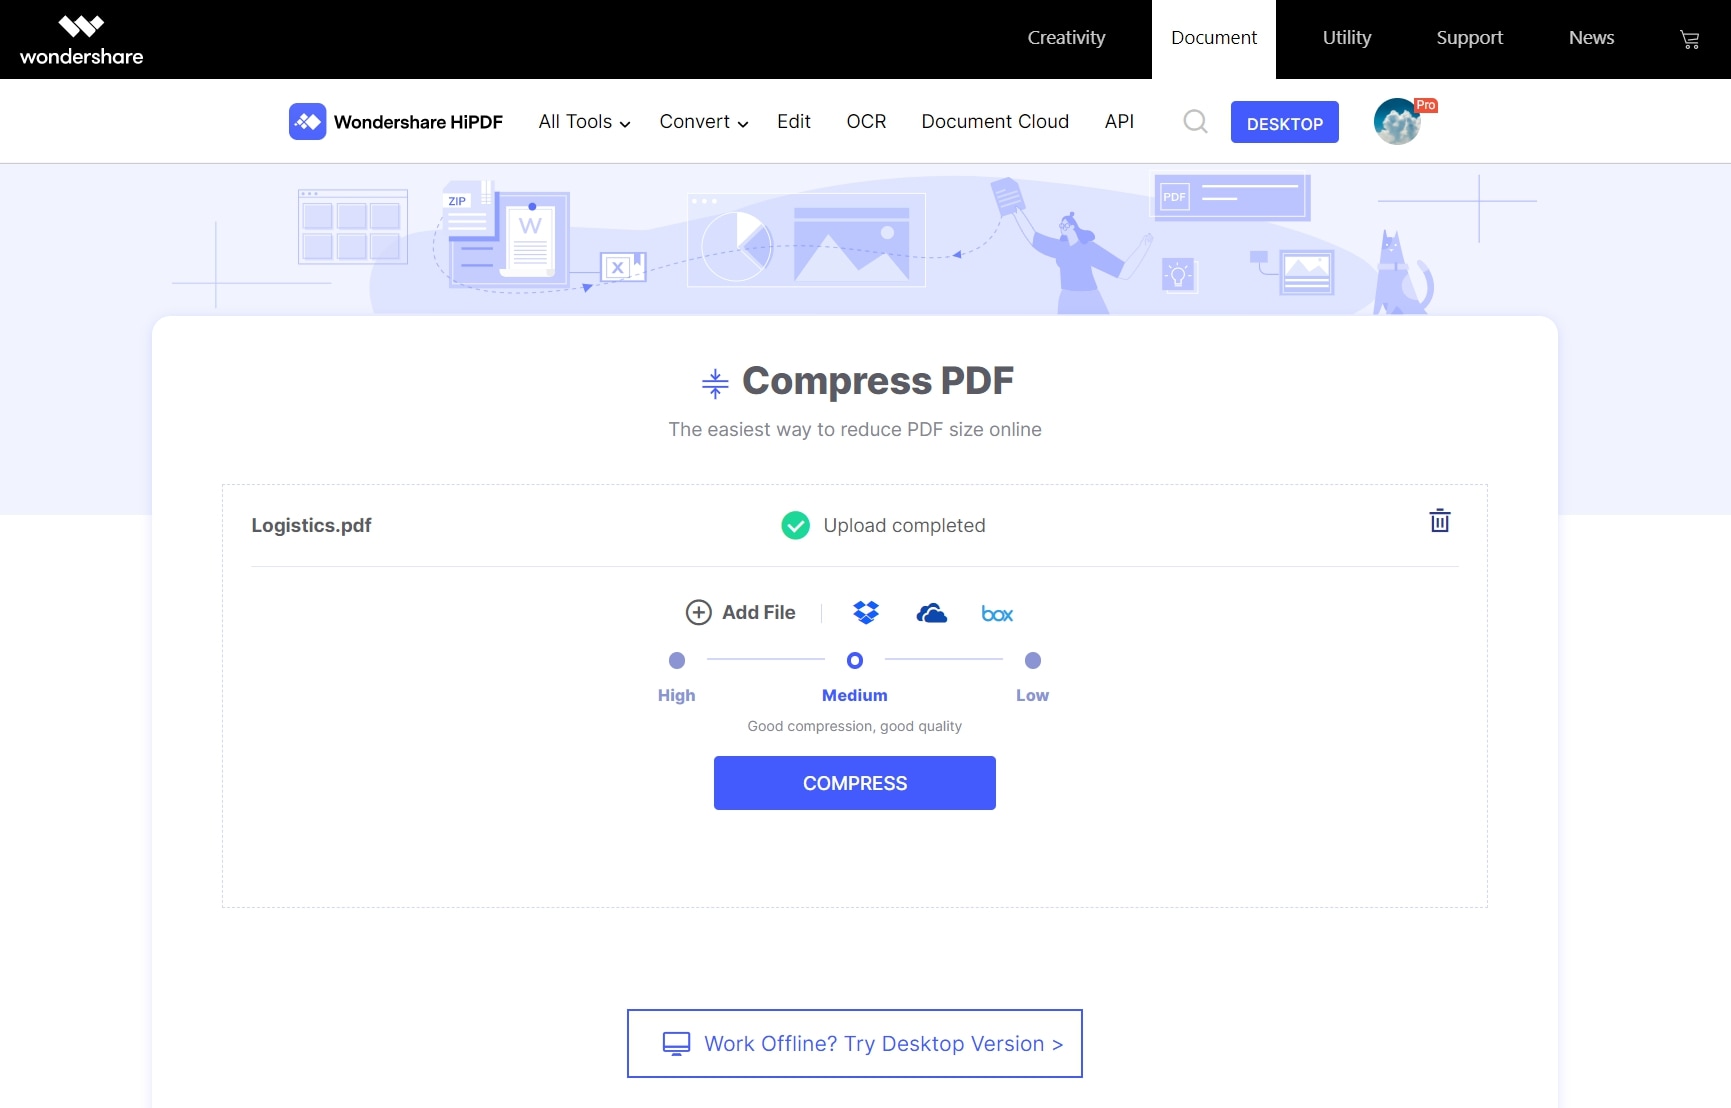
Use an online PDF compressor
Online tools such as HiPDF let you upload a PDF, choose a compression level, and download a smaller version. This is useful if you are using a borrowed Mac, a locked-down work device, or a browser-only workflow.
The basic process is straightforward: open the online PDF compressor, upload the file, select a compression option, run the compression, then download the reduced PDF.
Be careful with sensitive documents. If a PDF contains financial records, identity documents, contracts, medical files, confidential business information, or private client data, local compression is usually safer than uploading the file to a web service. For general best practices around protecting personal information online, the FTC’s guidance on computer security is a useful reference.
Use Save As or Export to clean up file data
Sometimes a PDF carries extra data from previous edits. Saving a fresh copy can remove some unnecessary information, depending on the app that created or edited the PDF.
This will not shrink every file, and it will not replace proper compression. But it is quick enough to try. Open the PDF in a PDF editor, choose Save As or Export, and save a new copy. Then compare the original and new file sizes in Finder.
This works best for PDFs that have been edited many times, combined from multiple sources, or exported from design and office apps with extra metadata.
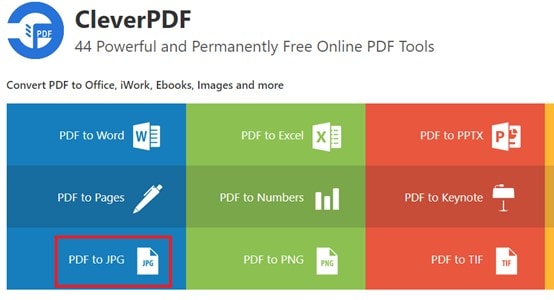
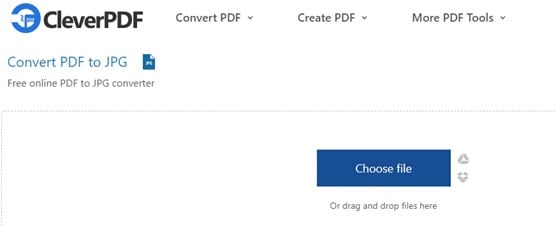
Convert image-heavy PDFs only when PDF format is not required
If your PDF is mostly images and the recipient does not actually need a PDF, converting pages to JPG can reduce size or make the file easier to share. This is not always a better format. You may lose selectable text, links, bookmarks, form fields, and multi-page document structure.
Use this route only when an image file is acceptable. For example, if someone only needs to view a single-page flyer or preview a scanned page, JPG may be fine. If they need to search, print, archive, sign, or edit the document, keep it as a PDF.
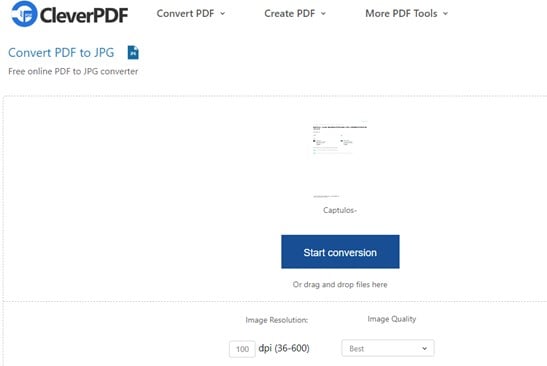
Online conversion tools usually let you choose image quality or resolution. Lower quality creates smaller files, but it also increases visible compression. If the file includes small text, avoid extreme settings.
How to Compress PDF on Mac Without Losing Quality
Strictly speaking, most meaningful PDF compression changes something. Images may be downsampled, duplicate resources may be removed, fonts may be subset, or hidden data may be discarded. The goal is to reduce file size without visible or practical quality loss.
A good compression workflow starts before you click the compress button.
Choose compression based on document type
A text-heavy PDF can usually be compressed safely because text does not require much storage. If the file is still large, the size may come from embedded fonts, hidden data, or a few oversized images.
A scanned PDF needs more care. Each page may be an image, so heavy compression can make text fuzzy. If the scan is black-and-white text, a monochrome or grayscale optimization can reduce size while keeping readability. If the scan includes photos, stamps, or handwriting, preview the result carefully.
A design-heavy PDF is the hardest to compress cleanly. Product photos, gradients, transparent elements, and print-ready graphics can all increase file size. For these documents, use moderate compression and avoid crushing image quality just to hit an arbitrary file-size target.
G2 Rating: 4.5/5 |100% Secure
Resize or replace large images before compressing
If a PDF contains one or two massive images, compressing the whole file is a blunt fix. A cleaner approach is to edit the PDF first: replace oversized images with smaller versions, crop unnecessary areas, or remove decorative images that do not add value.
This is where a tool like PDFelement is useful beyond the basic compression feature. You can open the PDF, identify pages that make the file heavy, adjust or remove unnecessary content, and then compress the final version. For a report or proposal, this often gives a better-looking result than applying the strongest compression setting immediately.
Watch scanned PDFs and OCR needs
Compression can affect OCR accuracy if it makes scanned text too blurry. If you need the PDF to remain searchable or editable, keep the scan readable before running OCR.
A sensible workflow is to compress lightly first, check that the text is still clear, and then run OCR if needed. If the PDF is already searchable, test search after compression by looking for a phrase from the document. If search still works and the pages look clean, the compressed file is probably safe to send.
Keep an original copy
Always keep the original PDF until the compressed version has been accepted. File-size limits can push people toward overly aggressive compression, and it is frustrating to discover later that a signature, chart, or image is no longer clear.
A simple naming system helps:
filename-original.pdffilename-compressed-medium.pdffilename-under-5MB.pdf
That small habit prevents accidental overwrites and makes it easier to return to a higher-quality version if needed.
Which Mac PDF Compression Method Should You Use?
The best method depends on the PDF and the reason you are compressing it.
If you need the fastest free option, use Preview. It is built into macOS, works offline, and takes less than a minute. Just check the output because the quality settings are limited.
If you need more control, use PDFelement or another dedicated PDF optimizer for Mac. This is the better route for business documents, image-heavy files, scanned PDFs, and anything that needs to stay polished after compression.
If you are on a device where you cannot install software, an online compressor can help. It is convenient for non-sensitive PDFs, but avoid uploading private or regulated documents unless you trust the service and understand its privacy policy.
If the PDF is still too large after compression, do not keep compressing blindly. Look for the real cause. Remove unnecessary pages, replace huge images, flatten or remove unneeded annotations, export a cleaner copy, or split the file into smaller sections if the recipient allows it.
For most Mac users, the practical workflow is simple: try moderate compression first, inspect the result, then increase compression only if the file is still too large. Smaller is not always better. The right compressed PDF is small enough to send and clear enough to use.
People Also Ask
-
How do I compress a PDF on Mac for free?
Use Preview. Open the PDF, choose File > Export, select Reduce File Size from the Quartz Filter menu, and save a new copy. This is the easiest free PDF compressor Mac users already have installed. Check the final PDF before sending it because Preview can reduce image quality noticeably. -
How do I compress a PDF file on Mac without losing quality?
Use a PDF compressor that offers compression levels, then choose a low or moderate setting. PDFelement for Mac is useful because you can choose the compression level and save a separate copy. For the best result, remove unnecessary images or pages before compressing instead of using the strongest compression setting. -
Why does Preview make my PDF blurry?
Preview’s Reduce File Size filter can downsample images aggressively. That means photos, scanned pages, screenshots, and small text may lose detail. If this happens, use a dedicated PDF optimizer on Mac with adjustable compression settings. -
Can I compress a scanned PDF on Mac?
Yes, but scanned PDFs need extra care because each page may be stored as an image. Use light or medium compression first, then check readability. If you need the scanned PDF to be searchable, make sure the text remains clear enough for OCR. -
What is the best PDF compressor for Mac?
The best choice depends on the task. Preview is best for quick free compression. PDFelement is better when you need more control over quality, file size, editing, OCR, page organization, or document cleanup before compressing. Online compressors are convenient for non-sensitive files when you cannot install software. -
Can I reduce a PDF to a specific size on Mac?
Some PDF tools let you choose compression levels, but exact final size is not always guaranteed because PDFs contain different kinds of content. If you need a file under 10 MB or 5 MB, try medium compression first, check the size, then use higher compression or remove large images if needed. -
Is it safe to compress PDFs online?
It depends on the document and the service. Online compressors are fine for many public or low-risk files. Avoid uploading PDFs that contain personal IDs, contracts, financial data, medical information, or confidential business material unless you are comfortable with the provider’s privacy and security practices. -
Does compressing a PDF remove text or pages?
Normal PDF compression should not remove visible pages or text. It usually reduces image resolution, removes redundant data, subsets fonts, or optimizes internal resources. Still, you should always open the compressed file and review important pages before sharing it.

