How to Make a Timeline on Google Docs
How do you create a timeline in Google Docs? Here is an article showing you a step-by-step guide on how to make a timeline on Google Docs, helping you do this task.
 100% Secure |
 Home
>
Google Tips and Tricks
> How to Make a Timeline on Google Docs
Home
>
Google Tips and Tricks
> How to Make a Timeline on Google Docs
Timelines hold importance in guiding people on how to efficiently structure the operation of their project and help the viewers understand the complete dynamics of the case study. You might come across a situation where you may find it difficult to develop a timeline for your presentation in the office or school. For such cases, different platforms such as Google Docs can be consumed for creating timelines for your presentation. This article introduces you to the specific tool and guides you on how to make a timeline on Google Docs with ease.
How to Make a Timeline on Google Docs
Executing the creation of a perfect timeline on Google Docs follows a procedure to follow a series of steps. To understand the dynamics of how to create a timeline in Google Docs, you need to follow the detailed steps provided below.
Step 1. Import the Document
You need to initiate a new document on Google Docs. Tap on “File” present in the toolbar on the top of the screen. Select the “Page Setup” option in the drop-down menu, and then change the orientation of the page to "Landscape."

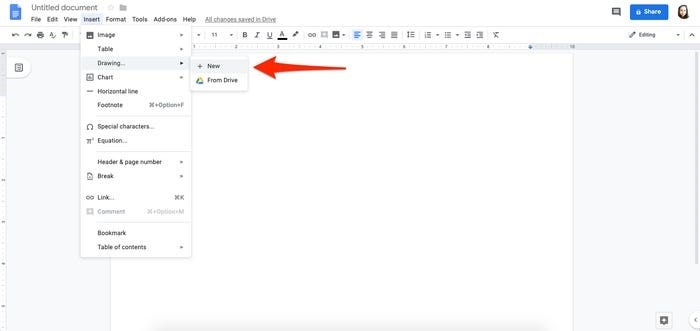
Step 2. Open the Drawing Tool
Now, you can approach the "Insert" button and then access the "Drawing" > "+ New" option.
Step 3. Make a Timeline
A new window of the Drawing tool opens up. Tap on the "Line" > "Arrow"option. Then you can draw a line across the window in a horizontal fashion from a starting point of your choice. After that, move back to the top toolbar to select the red arrow option showing "Line Start." You can tap across any option from the drop-down menu. This shall allot arrows across both ends.
Step 4. Add Text
Access the text box tool and draw a box either above or below the line to initiate timeline entries. Copy this text box and paste it further to keep uniformity in the timeline.
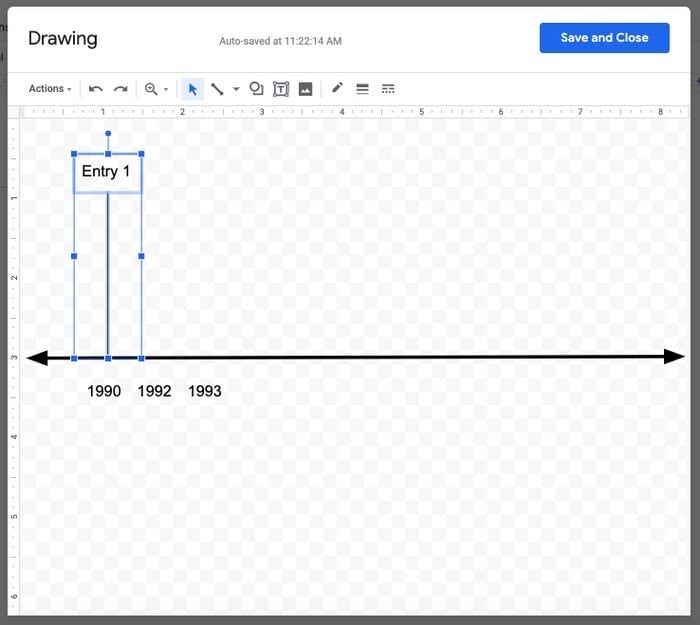
Step 5. Save the Timeline
Re-access the toolbar and tap on the “Line” option to draw a vertical line ending on the timeline. Draw a text box at the end of the line. You can simply select these shapes and duplicate the timeline as much as you want to. Over completion, tap on “Save and Close” and have it added on Google Docs.
The Best PDF Software
Even though there is much word processing software available in the market, you may find it difficult to manage PDF files using it. In this case, this article introduces you to Wondershare PDFelement - PDF Editor Wondershare PDFelement Wondershare PDFelement, a unique and impressive PDF editor that allows you to manage your PDF files with ease. While understanding how to create a timeline on Google Docs, this article improvises the need for a PDF editor. It presents its features and characteristics that are not common among many PDF editors.


 G2 Rating: 4.5/5 |
 100% Secure
PDFelement provides you an environment where you can easily compose and edit your PDF files without having them converted. Over the need for conversion, it withholds the quality of the document in conversion. Furthermore, this platform ensures that you can review and even comment on PDF files through different annotators. It also allows you to create multiple forms and guide users in managing it through the platform itself. The security process in the complete software is quite expressive since it allows you to develop passwords, redact information and consume signature for security purposes
How to Add Shapes in PDF
PDFelement attenuates a very explicit set of features and tools that allows you to manage your PDF files with serenity. To understand the process of adding shapes in PDF, you need to follow the steps provided as follows:
Step 1. Upload the PDF File
After downloading and installing PDFelement on your desktop, you need to launch the platform and import the appropriate file by clicking on “Open File” on the home window.
G2 Rating: 4.5/5 |100% Secure

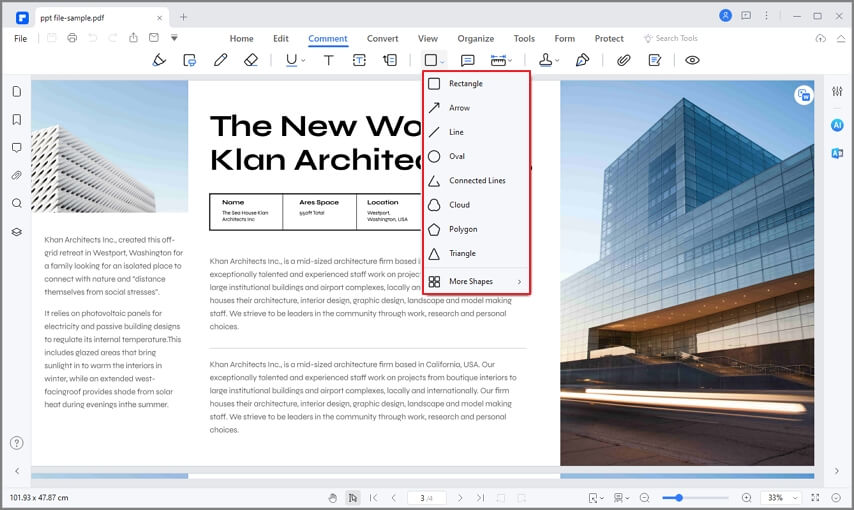
Step 2. Add Shapes
Hover the mouse onto the “Comment” section on the top toolbar and select any shape present on the sub-menu.
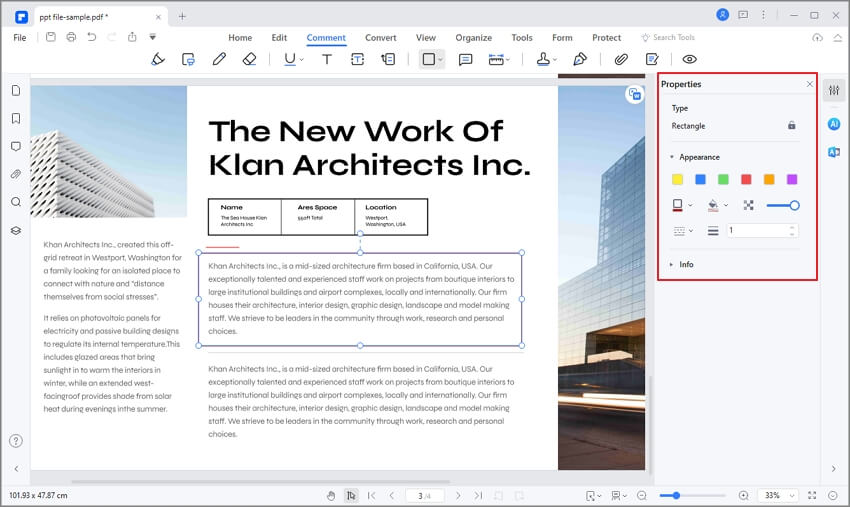
Step 3. Manage the Shape
After drawing it simply over the PDF, you can double click on the shape to add notes or right-click to amend its properties as per your requirements.
G2 Rating: 4.5/5 |100% Secure
This article has introduced you to a detailed guide on how to do a timeline on Google Docs, followed by a brief introduction to PDFelement as an effective PDF editor. You may follow the guide to understand the process of how to make a timeline on Google Docs.
Free Download or Buy PDFelement right now!
Free Download or Buy PDFelement right now!
Try for Free right now!
Try for Free right now!


Elise Williams
chief Editor