
Table of Contents
Adding a signature to a Word document on a Mac is usually simple, but the “right” method depends on what you mean by signature. For most everyday documents, you want a visible handwritten signature placed at the bottom of a letter, agreement, form, invoice, or approval note. In that case, the easiest approach is to insert a signature image into Word, resize it, and save it for reuse.
If you need to send the document to someone else, there is one extra decision to make: should you leave it as a Word file or export it as a PDF? Word is easy to edit, while PDF is usually better for sharing a final signed copy. This guide covers both workflows so you can insert a signature in Word on Mac, keep it looking neat, and choose the best format before sending.


 G2 Rating: 4.5/5 |
 100% Secure
How Signatures Work in Word for Mac
Microsoft Word for Mac does not treat every signature the same way. A scanned handwritten signature, a typed name, a drawn mark, and a certificate-based digital signature are different things.
For most people searching for how to insert signature in Word Mac, the practical answer is to use an image of your handwritten signature. You sign on paper, scan or photograph it, insert the file into Word, and place it where the signature should appear. It looks like a real signature and works well for letters, internal approvals, quotes, and many business documents.
A signature image is not the same as a secure digital signature. It does not prove identity by itself, and it can be copied like any other image. For casual or routine documents, that may be enough. For contracts, legal paperwork, HR forms, or regulated approvals, check what your organization or recipient requires. Microsoft’s own documentation explains more about digital signatures and signature lines if you need a certificate-based workflow: Microsoft Support on digital signatures.
The rest of this article focuses on the workflows Mac users most often need: adding a visible signature to Word, saving it for reuse, and preparing a clean final document.
How To Insert Signature in Word Mac Using an Image
The image method is the most reliable way to add signature to Word Mac documents because it works in nearly every version of Word for Mac. It also gives you control over size, placement, and supporting text such as name, title, email, or date.
Step 1: Create a Clean Signature Image
Start by writing your signature on a plain white sheet of paper. Use a dark pen, preferably black or blue, and leave enough empty space around the signature so it is easy to crop later. Avoid lined paper, shadows, or a wrinkled background. Small imperfections become more noticeable when the image is placed inside a clean Word document.
You can scan the signature or take a photo with your iPhone. If you use a phone, place the paper on a flat surface near a window or under even lighting. Hold the camera straight above the paper rather than at an angle. Save the file as PNG or JPG on your Mac.
PNG is often better if you plan to remove the background or keep the signature crisp. JPG is fine for most simple documents, but heavy compression can make the signature look fuzzy.
Before inserting the image, rename it something recognizable, such as signature-jane-smith.png. This small step helps later when you need to replace, update, or reuse the file.
Step 2: Insert the Image in Word
Open your document in Microsoft Word for Mac and place the cursor where you want the signature to appear. Then use the Word ribbon:
Go to Insert > Pictures > Picture from File, choose your signature image, and click Insert.
Word will place the image into the document at the cursor position. At first, it may appear too large or may push nearby text out of place. That is normal. The next steps are for cleaning it up.
If you are trying to learn how to put signature in Word for a letter, approval form, or contract draft, insert the signature near the signature line rather than at the very end of the document. This makes it easier to align the image with surrounding text.
Step 3: Crop and Resize the Signature
Click the signature image. Word should show the Picture Format tab. Select Crop, then drag the crop handles inward until only the signature and a small amount of surrounding white space remain.
After cropping, resize the image by dragging a corner handle. Use a corner, not a side handle, so the signature does not stretch. A stretched signature looks unprofessional and can be difficult to read.
The best size depends on the document, but in most business documents the signature should be close to the width of a handwritten signature on paper. If it dominates the page, it is too large. If the pen strokes disappear when printed, it is too small.
You can also adjust the image height and width more precisely from the Picture Format tab. This helps when several people need to sign the same document and you want each signature to appear consistent.
Step 4: Position the Signature Correctly
After you insert a signature in Word on Mac, placement is often the part that causes the most frustration. Word treats images as objects, and the text wrapping setting controls how the signature behaves around text.
Click the image and look for Wrap Text under Picture Format. For signatures, these options are usually the most useful:
- In Line with Text: Best when the signature should behave like a typed character inside a paragraph. This is stable and less likely to move unexpectedly.
- In Front of Text: Useful when placing the signature directly over a printed signature line, but it requires more careful positioning.
- Square or Tight: Helpful if the signature sits beside typed information, though it is less common for formal signature blocks.
If the signature keeps jumping to another location, switch to In Line with Text and place it in its own paragraph. Then use paragraph alignment, tabs, or a table to position the signature area. A simple two-column table with hidden borders can work well for documents that need “Signature” on one side and “Date” on the other.
Step 5: Add Typed Details Below the Signature
Many signature blocks include more than the signature itself. You may want your name, job title, company, phone number, or email address below the image. Type those details under the signature, then format them to match the document.
For example:
Jane Smith
Operations Manager
Example Company
Keep this text separate from the image while you are editing. Once the signature block looks right, you can save the image and typed details together as a reusable block. That is the most efficient way to add a signature in Word Mac documents later without rebuilding the layout every time.
How To Save a Reusable Signature Block in Word for Mac
If you sign Word documents regularly, do not insert and resize the image from scratch every time. Word for Mac lets you save the signature as AutoText, which works like a reusable content block. This is especially useful for business letters, approval memos, proposals, and recurring forms.
Save the Signature as AutoText
First, create the full signature block in your document. Include the cropped signature image and any typed details you want to reuse. Check the spacing, font size, and alignment before saving it.
Select the whole block. This means selecting both the image and the typed text below it. If selecting the image and text together is difficult, place the signature block inside a one-cell table with no border, then select the entire table. This keeps the block together and makes reuse easier.
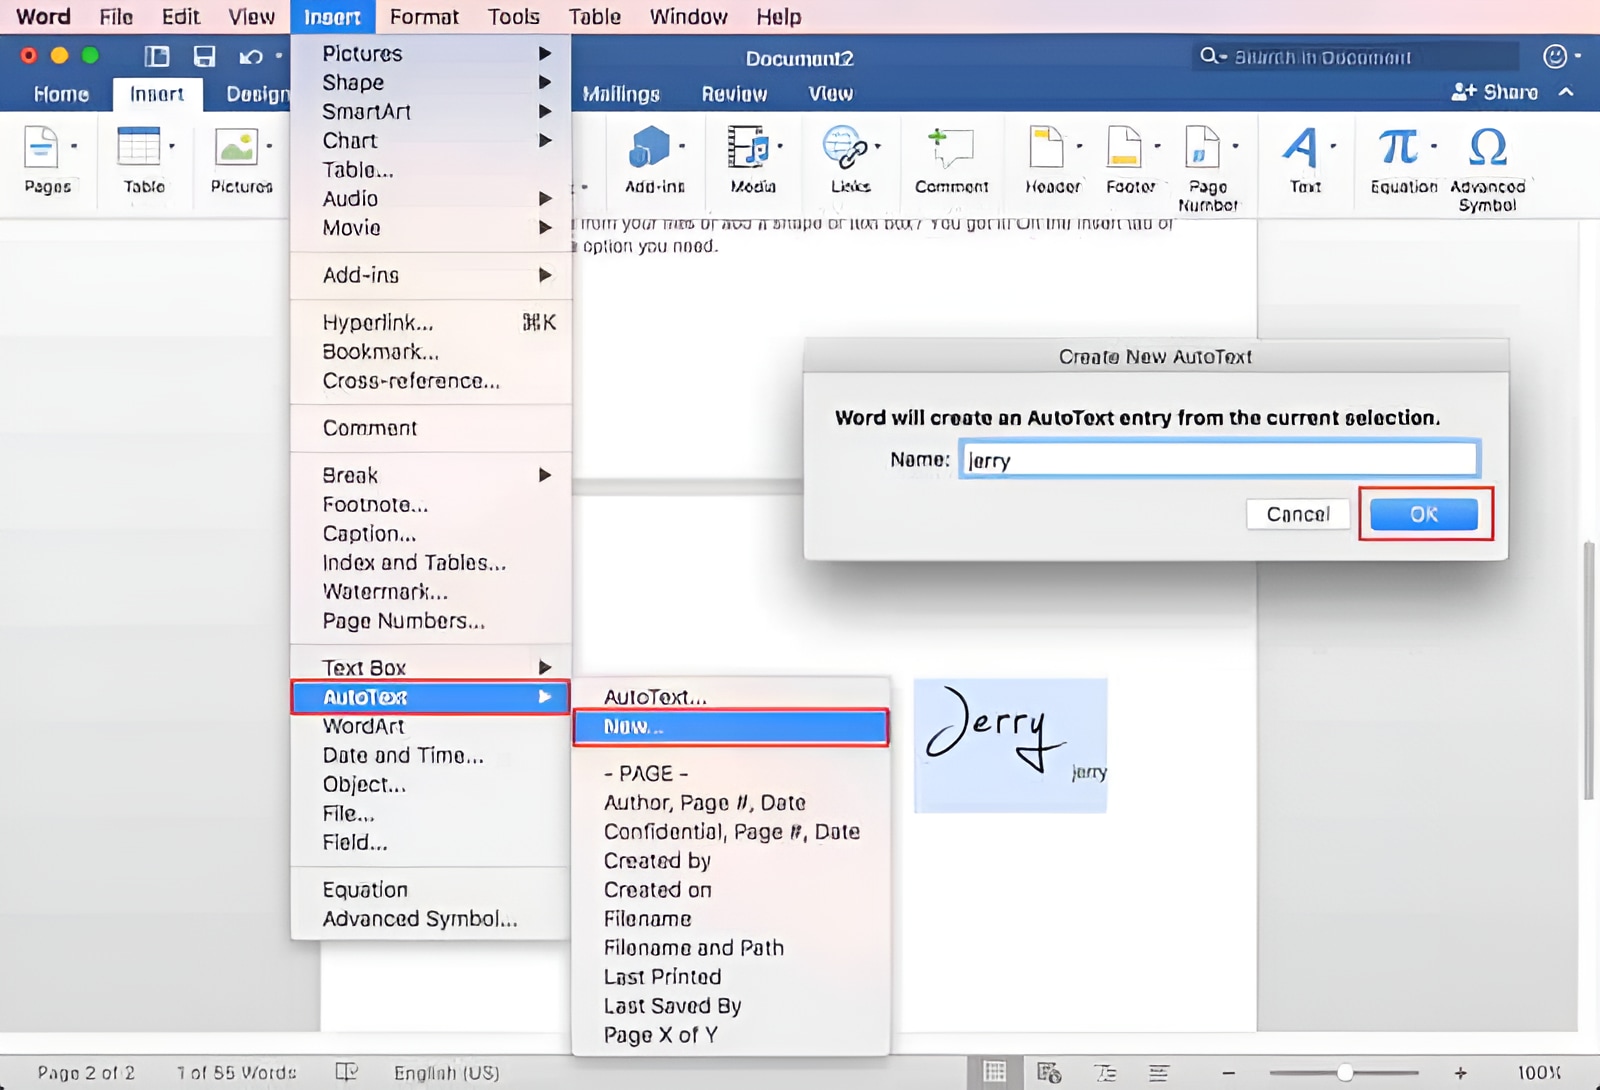
Next, go to Insert > AutoText > New. Give the signature block a clear name, such as Jane Signature or Approval Signature Block, then save it.
The exact menu labels can vary slightly depending on your Word for Mac version. If you do not see the same command, use Word’s search box or Help feature and search for “AutoText.”
Insert the Saved Signature Later
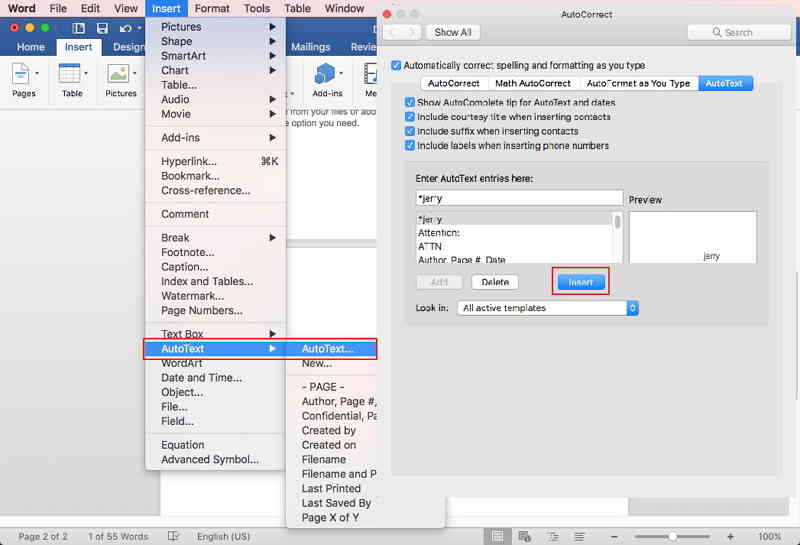
To use the saved signature block in another document, place your cursor where the signature should go. Then go to Insert > AutoText and choose the saved signature. Word will insert the image and text together.
This is the fastest workflow for anyone who often searches for how to add a signature in Word Mac because you only need to prepare the signature once. After that, adding it takes a few clicks.
Before sending the document, skim the page around the signature area. A reusable block can still shift if the new document uses different margins, fonts, or line spacing. If the signature appears too close to a paragraph or page break, add spacing above it or move it into a small borderless table.
Update or Delete an Old Signature Block
You may need to replace your signature image after a name change, title change, or company rebrand. Create the updated block first, then save it with a new AutoText name. If Word asks whether to redefine an existing AutoText entry, confirm only if you are sure you want to overwrite the old one.
For clarity, avoid vague names like sig or new signature. Use names that help you recognize the right block months later. If several people use the same Mac, include initials or a department name.
Other Ways To Sign a Word Document on Mac
The image method is usually best, but it is not the only option. Depending on your document and the level of formality, another method may fit better.
Use a Signature Line
Some Word documents include a formal signature line with a name, title, and date. In Word for Windows, signature line features are more prominent. On Mac, availability can depend on the version and Microsoft 365 feature set.
If your Word for Mac version supports signature line options, you may find them under Insert. This can be useful for creating a visible place where someone should sign, especially if the document will later be printed. However, a signature line by itself does not insert your handwritten signature. It is more of a placeholder or instruction area.
If you are preparing a document for someone else to sign, a signature line can still help. Add labels such as “Signature,” “Printed Name,” and “Date,” then leave enough space for the signer. If the document will be signed electronically later, export it as a PDF and use a PDF signing tool.
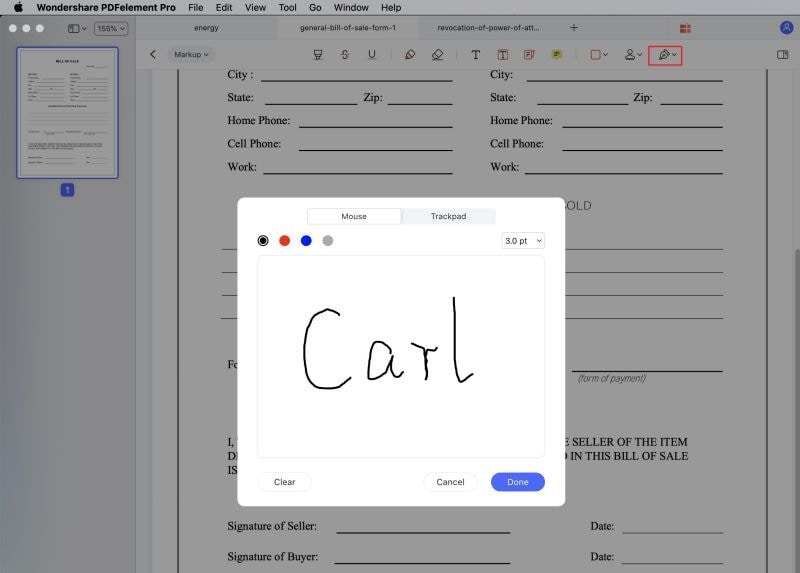
Draw a Signature With Word’s Draw Tools
Some versions of Word for Mac include a Draw tab. If you use a trackpad, mouse, or connected drawing tablet, you may be able to draw directly on the page.
This is convenient for quick notes, but it is not always the neatest option. Drawing with a mouse usually looks uneven, and trackpad signatures can be difficult to control. If you have an iPad with Sidecar or a stylus-supported workflow, drawing may be more natural.
Use this method for low-stakes documents where appearance is not critical. For a polished business document, a scanned or photographed signature image usually looks cleaner.
Use Preview To Create a Signature Image
Mac’s built-in Preview app can create signatures using your trackpad, camera, or iPhone. Preview is most commonly used for PDFs, but it can also help you capture a clean signature that you later use in Word.
Open a PDF in Preview, choose the Markup tools, and use the Signature feature to create a signature. Apple provides instructions for this workflow in its Preview user guide: Apple Preview signature tools.
Once you have a signature, you may still need a usable image file for Word. Depending on your workflow, you can create the signature in Preview, place it on a blank PDF, take a screenshot of just the signature area, and insert that image into Word. It is a bit indirect, but it works if you do not have a scanner.
For best results, crop the screenshot tightly and keep the background clean. If the screenshot includes gray or off-white areas, the signature may stand out against the page.
Sign After Exporting to PDF
Sometimes the smartest answer to how to sign a Word document on Mac is: finish the Word document first, then sign the PDF version. This is a better choice when the document layout should not change after signing.
In Word for Mac, you can export the document by going to File > Save As or File > Export, then choosing PDF. After that, add the signature in a PDF editor or signing tool. The final PDF is easier to share because the formatting is less likely to shift on another device.
This workflow is common for contracts, client approvals, invoices, HR forms, and documents that should be archived after signing.
Use PDFelement When the Final Document Should Be a PDF
Word is excellent for drafting and editing, but signed documents are often sent as PDFs. A Word file can be edited after a signature is added, and formatting may change if the recipient opens it in a different app or version. PDF is usually safer for the final copy because it preserves page layout and is easier to review, annotate, and store.
That is where PDFelement fits naturally into the workflow. You can prepare the document in Word, export it as a PDF, and then use PDFelement for Mac to add a visible signature, annotate the file, organize pages, compress the PDF for email, or apply OCR if the document came from a scan. It is not a replacement for drafting in Word; it is useful when the document is ready to be finalized and shared.
G2 Rating: 4.5/5 |100% Secure
How To Add a Signature to a PDF on Mac With PDFelement
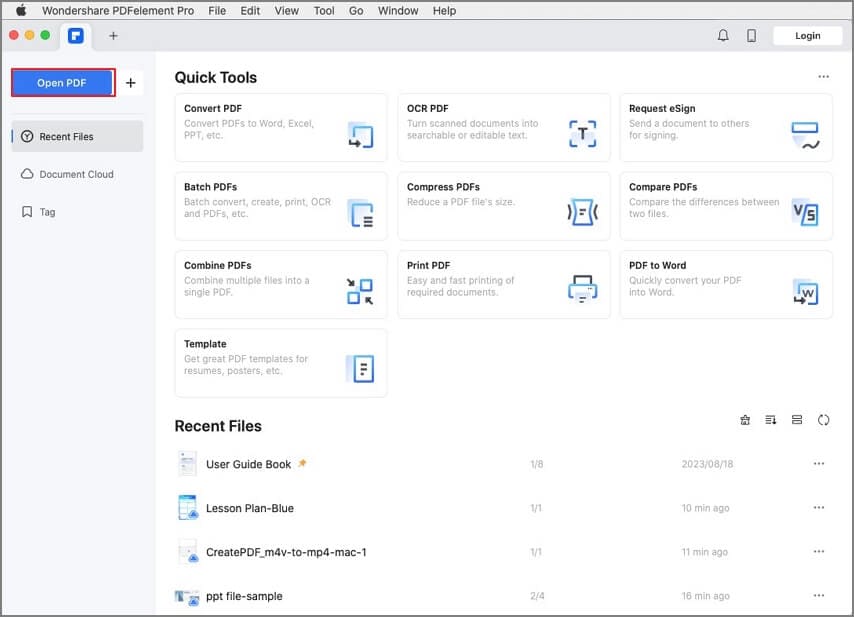
After installing PDFelement on your Mac, open the PDF you exported from Word. You can usually start from the main screen by choosing Open File and selecting the PDF.
Once the PDF is open, go to the commenting or markup tools and choose the signature option. PDFelement lets you create a signature in several practical ways, depending on what you already have available.
You can type a signature, import an image of your handwritten signature, capture one with a camera, or draw one with the mouse or trackpad. If you already created a clean signature image for Word, you can reuse the same file in PDFelement. Place the signature where it belongs, resize it, and save the PDF.
This workflow is especially useful when someone sends you a PDF form rather than a Word document. Instead of converting the file to Word just to sign it, you can sign directly in the PDF and keep the original layout intact.
When To Convert Word to PDF Before Signing
Convert to PDF before signing if the document is final and you do not want recipients to make casual edits. This is common for quotes, approval letters, policy acknowledgments, and signed forms.
Stay in Word if you are still collaborating on the content. Adding a signature too early can create confusion because later edits may change the meaning of the signed document. A cleaner workflow is: draft in Word, review, finalize, export to PDF, sign, then send.
If you need to keep both versions, save the Word file as the editable source and the signed PDF as the official copy. Use clear file names such as Client-Agreement-Draft.docx and Client-Agreement-Signed.pdf.
G2 Rating: 4.5/5 |100% Secure
Fix Common Signature Problems in Word for Mac
Even when the basic steps are correct, signatures in Word can behave oddly. Most issues come from image quality, wrapping settings, or document layout.
If the signature has a white box around it, the image background does not match the page or was captured with shadows. Recreate the signature image in better lighting, scan it again, or use image editing tools to remove the background. For formal documents, a transparent PNG often looks cleaner than a JPG with a visible rectangle.
If the signature moves when you edit text, check the wrapping setting. In Line with Text is the most stable option. If you need exact placement over a line, use In Front of Text, but expect to adjust it manually if surrounding content changes.
If the signature looks blurry, start with a higher-quality image. Do not enlarge a small screenshot too much. It is better to scan or photograph the signature at a higher resolution, crop it, then scale it down in Word.
If the signature prints too light, use a darker pen or adjust the image contrast before inserting it. Some gray signatures look acceptable on screen but weak on paper. Print one test page before sending a large batch of signed documents.
If you cannot select the signature and text together, place them in a small table. Create a one-cell table, insert the signature image and typed details inside it, then remove the table border. This keeps the elements grouped visually and makes it easier to move the whole block.
If the signature appears on the wrong page, check for page breaks and paragraph spacing above the signature. Word may push the image forward if there is not enough space left on the page. Reducing the image size slightly or moving the signature block earlier can fix it.
People Also Ask
-
How do I insert a signature in Word on Mac?
The easiest way is to insert a picture of your handwritten signature. Sign a blank sheet of paper, scan or photograph it, save it as a PNG or JPG, then open Word and choose Insert > Pictures > Picture from File. After inserting it, crop, resize, and position the image where the signature should appear. -
How do I add a signature to Word Mac and reuse it later?
Create the signature block with the image and any typed details, then select the whole block. Go to Insert > AutoText > New, name the block, and save it. Later, place your cursor in a document and insert the saved AutoText entry instead of rebuilding the signature. -
Can I draw my signature directly in Word for Mac?
Yes, if your version of Word includes drawing tools, you can use the Draw tab to write a signature with a trackpad, mouse, or drawing tablet. A mouse-drawn signature may look rough, so a scanned signature image is usually better for professional documents. -
How do I put a signature line in Word on Mac?
You can type labels such as “Signature,” “Printed Name,” and “Date,” then use underscores or a table to create clean signing areas. Some Word versions also include signature line features under the Insert menu, but availability can vary on Mac. -
Is a signature image legally binding?
A signature image can show intent, but it is not the same as a secure digital signature. Legal requirements depend on the document type, jurisdiction, and signing process. For important contracts or regulated paperwork, use the signing method required by the recipient, company, or legal adviser. -
Should I sign a Word document or export it to PDF first?
If the document is still being edited, keep it in Word. If it is final, export it to PDF and sign the PDF. A PDF is usually better for sending because the layout is preserved and the file is harder to accidentally change. -
Can I use Preview on Mac to make a signature for Word?
Yes. You can create a signature in Preview using the trackpad, camera, or iPhone. If you need to use it in Word, you may need to place it on a blank document or PDF, take a clean screenshot of the signature, and insert that screenshot as an image. -
Why does my signature keep moving in Word?
The image wrapping setting is usually the cause. Select the signature image, go to Picture Format > Wrap Text, and try In Line with Text for a more stable layout. For exact placement over a line, In Front of Text can work, but it may require manual adjustment. -
What is the best image format for a Word signature?
PNG is usually best because it keeps edges crisp and can support a transparent background. JPG also works, especially for simple scanned signatures, but it may show compression artifacts or a visible background box. -
Can PDFelement sign Word documents directly?
PDFelement is mainly for PDF workflows. A practical approach is to finish your document in Word, export it as a PDF, and then use PDFelement to add a signature, annotate, organize pages, compress the file, or prepare the final signed PDF for sharing.

