 Home
>
PowerPoint Tips
> How to Insert Chart in PowerPoint
It is known that PowerPoint, as the best software to create beautiful and catchy presentations, allows you to create highly customized presentations by adding images, objects, and charts, etc. So, if you are looking for chart templates for PowerPoint or a tutorial on how to make a chart in PowerPoint, this article contains the tutorials you need.
How to Insert Chart in PowerPoint
- Step 1. Launch PowerPoint and open the presentation to select the desired slide where you need to add the chart.
- Step 2. On the Title Bar, click “Inset” > "Chart" and a small window will open having different chart options and templates such as Column, Area, Bar, Pie, and Histogram. If you are using PowerPoint 2003, once you click on the “Charts”, it will directly insert a chart into your slide along with a “DataSheet” window in which you could make changes in the values, and then you can change the values accordingly.
- Step 3. Select your desired chart style and click "OK".
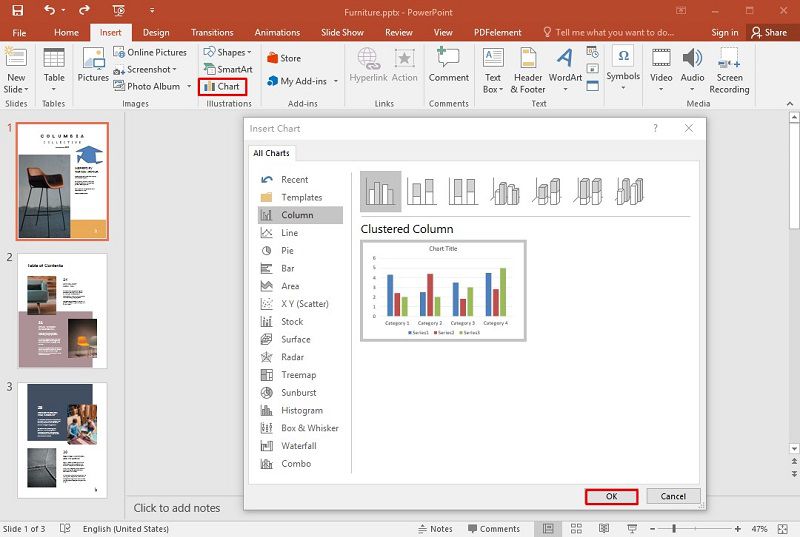
- Step 4. After that, the chart will be inserted into your slide and an Excel Spreadsheet will open where you could add the values in your chart. Now you can add the values accordingly and you’ll be able to see the changes in real-time.
- Step 5. Once you made all the changes in chart values, close the Excel Spreadsheet, and then your chart will remain in the PowerPoint Slide. Now align it accordingly and you are done with it. Moreover, you can also change the color and style of your selected charts.
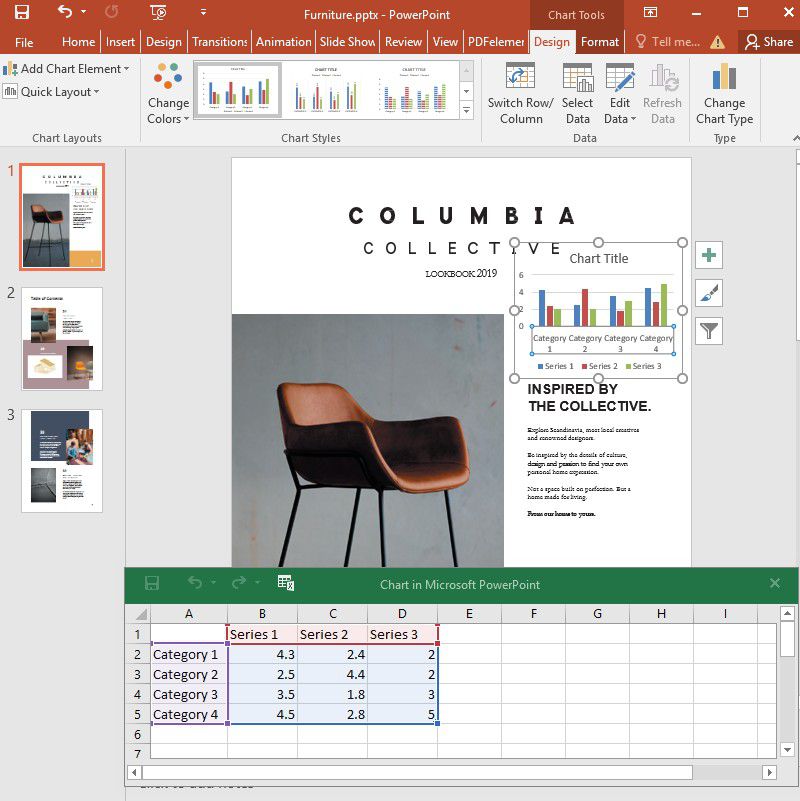
Note: The chart will have four different categories by default when you’ll insert it. Additionally, you can add or remove categories as per your stats. What's more, you can directly make a chart in Microsoft Excel and copy/paste it from Excel to PowerPoint slide.
The Best PDF Software
Apart from adding and editing charts in PowerPoint, as a matter of fact, PDF also can achieve this function easily by a powerful PDF software, i.e. Wondershare PDFelement - PDF Editor Wondershare PDFelement Wondershare PDFelement. It is a reliable PDF software that allows you create, edit, stylize, convert, and protect your PDF documents without needing any other software. Here are its popular features.
- Creation of PDF documents – Creation of new PDF documents is like a low-hanging fruit with PDFelement.
- PDF editing and styling – You can edit PDF documents with full control and also can add backgrounds, colors, images, headers and footers, annotations, comments, and much more.
- PDF conversion – With PDFelement, you can easily convert your PDF files into 300+ formats and back to PDF within a couple of clicks.
- Data extraction – Using its OCR, you can easily extract data from scanned documents that can be converted into an editable form for later use.
- Security – PDFelement has powerful security features that secure your files from being cracked or misused.
- Signatures – It enables you to add digital signatures to PDF documents, as well as, typed and hand-drawn signatures.
- Form creation – Creation of highly-customized forms using PDFelement is as easy as making them by hand on paper.
How to Deal with Forms in PDF
When it comes to creating and editing Forms in PDF, PDFelement is the most reliable tool for that. Let’s have some quick tutorial of the 3 main Form features of PDfelement.
Create PDF Forms
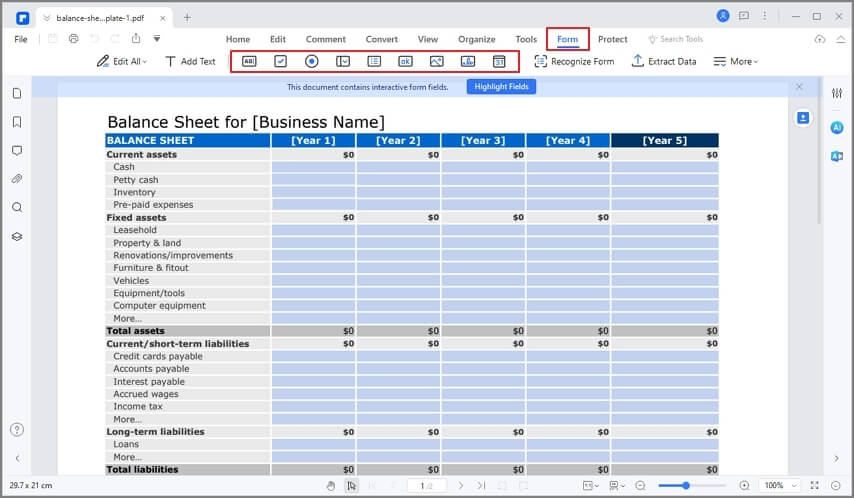
- Step 1. Launch PDfelement and open a new blank document. Then you can click on “Form” in the Menu Bar.
- Step 2. Below the menu bar, you’ll see several fields to add in your form such as Text Field, Radio Button, Combo Box, and so on. Now you can select fields that you want to add to your document and align them via drag-and-drop.
- Step 3. Once you add all the fields, save it into your PC and send it to wherever you want to send.
Edit PDF Forms
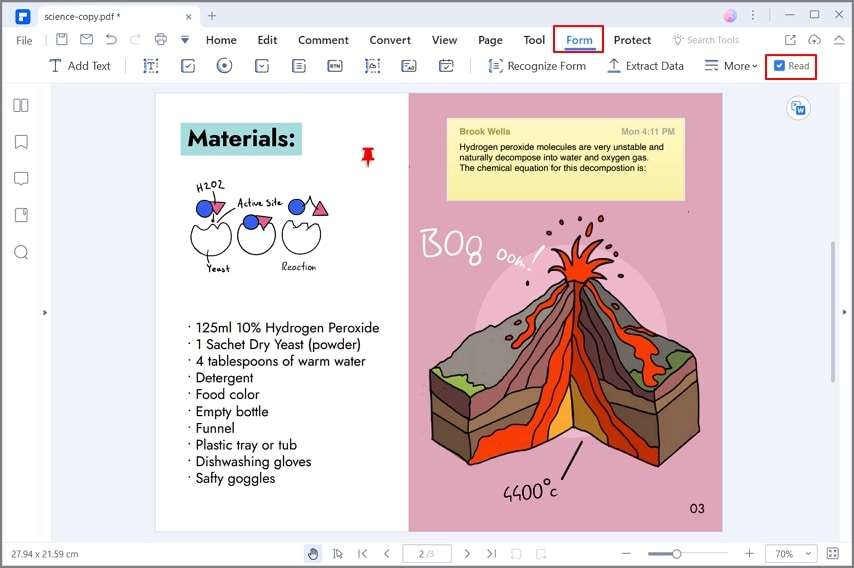
- Step 1. Open the PDF form in PDFelement, and click on “Form”> “Form Edit”.
- Step 2. By clicking on Form Edit, you’ll be able to edit any field in the form either you want to change, add, or delete any field from it.
- Step 3. Once done, you can save the file.
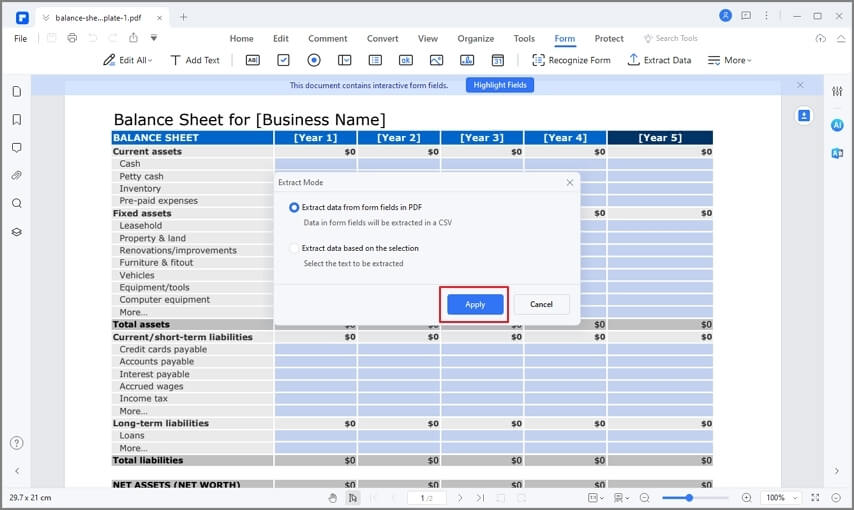
Extract Forms
- Step 1. Open the form on PDFelement that already has data in it.
- Step 2. Now, a message box will open with 2 options. Select “Extract data from PDF form fields” and then click “Next”.
- Step 3. Once done, you can save the file. Now, the data will be extracted from the forms and will be converted into CSV format which can be used for several purposes.
Free Download or Buy PDFelement right now!
Free Download or Buy PDFelement right now!
Try for Free right now!
Try for Free right now!
 100% Secure |
 G2 Rating: 4.5/5 |
  100% Secure


Elise Williams
chief Editor