 Home
>
Indesign Tips and Tricks
> How to Add Crop Marks in InDesign
As one of the most popular document layout tools, InDesign provides users with many options to both create and edit documents. There are so many things you can do to edit text and images in the document using a wide range of creative tools that InDesign has to offer. One of these tools is the ability to add crop marks in InDesign. Crop marks, usually added to the print dialogue box, are especially essential in letting you know where to cut to get the correct size. In this article, we are going to share with you how you can add crop marks in InDesign.
How to Insert Crop Marks in InDesign
Crop marks can be a very essential part of any document. This is because they marks where the document can be cut to attain the correct size. This is particularly important if you need to adhere to strict sizing guidelines or if you will be making copies of the same document and they all need to be the same size. Whatever the reason you need to create crop marks in your document, the following is a simple step-by-step guide to help you do that:
- Step 1: To add crop marks to an InDesign document, you will need to use an InDesign script. Therefore, the first step is to see if the script is already installed. To do this open InDesign and then click on "View > Automation > Scripts" to open the Scripts palette.
- Step 2: Click on the palette for "Crop Marks" script which is usually installed.
- Step 3: If it is not installed, insert the InDesign or Creative Suite CD and drag the script into the script folder.
- Step 4: With the scripts installed, select the object you want to draw the crop marks around and then double-click on the "Crop Marks Script" in the palette.
- Step 5: Specify the requirements in the dialogue box that appears and then click "OK" and your specifications will be applied to the selected object.
Tips: How to Edit InDesign Files
If you don't have access to InDesign or you don't know how to use the program, you can try Wondershare PDFelement - PDF Editor Wondershare PDFelement Wondershare PDFelement, a document management tool that allows you to create and edit PDF documents, as well as InDesign PDF files.

The following are just some of these features:
- Create a PDF document by simply opening any document type in the program. You can also convert PDFs to other formats.
- Easily edit the content in PDF documents including all text and images.
- It also has a powerful OCR feature that can be used to edit scanned or image-rich PDF documents.
- Create and edit fillable forms in PDF and ad signatures to secure your PDF documents.
To demonstrate how easy it is to use PDFelement to edit InDesign files, here's a simple step-by-step tutorial to help you edit InDesign files:
Step 1: Open InDesign PDF File
To open the InDesign file you want to edit, simply click on the "Open File…" button and then browse your computer for the InDesign PDF you want to open.

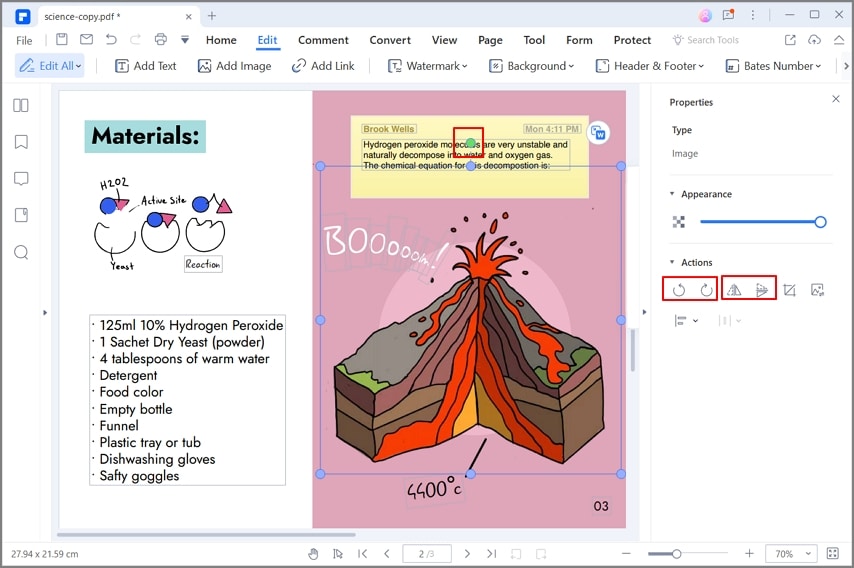
Step 2: Comment PDF
To add comments to the document, click on "Comment" in the main menu and then select the type of comment you want to add. You can choose to add a "Note" or a "Text Box" and then click where you want to add the comment in the document.

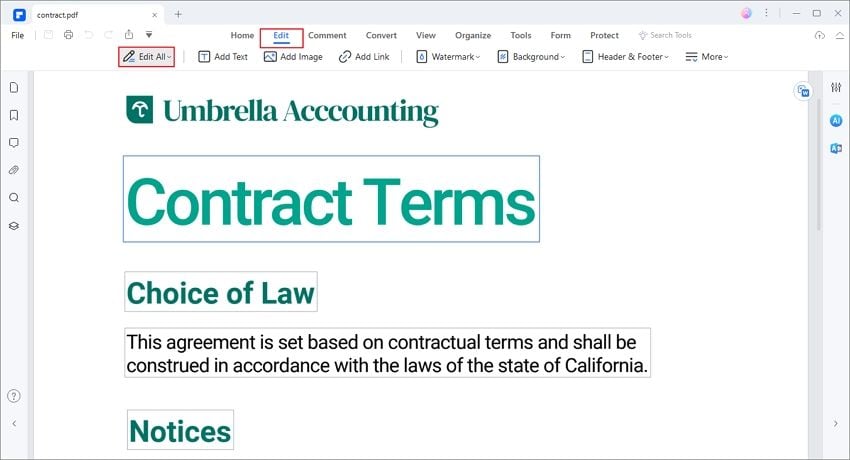
Step 3: Edit PDF
To edit the text or images in the document, click on "Edit" in the main menu and then select the text or image you want to edit. With the text selected, you should see a tools panel on the left allowing you to change the font style, size, and even color.

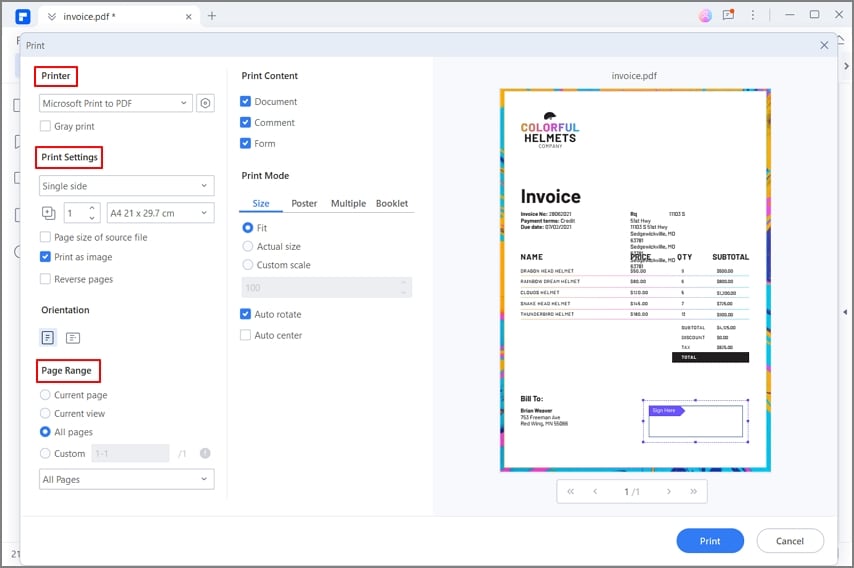
Step 4: Print PDF
To Print the PDF file, make sure that the printer is correctly installed and then click "File > Print." Specify the printer you want to use as well as the page size, page range, and print mode in the dialogue box that appears before clicking "Print".

Free Download or Buy PDFelement right now!
Free Download or Buy PDFelement right now!
Try for Free right now!
Try for Free right now!
 100% Secure |
 G2 Rating: 4.5/5 |
  100% Secure


Elise Williams
chief Editor