
Table of Contents
If you use a Mac, Apple Preview is often the fastest way to turn an image, scanned page, or document into a PDF. The wording can be confusing, though. “Preview” is not usually a file type—it is the built-in macOS app that opens PDFs, JPGs, PNGs, TIFFs, and several other formats. So when people search for how to convert Preview to PDF, they usually mean: “How do I convert a file that opens in Preview into a PDF?”
The good news: you can do this without installing anything. Preview includes built-in options such as Export as PDF and Print > Save as PDF. For more advanced work—editing text, combining pages cleanly, OCR, compression, annotation, or signing—you may want to finish the PDF in a dedicated editor such as Wondershare PDFelement.
Below are the practical ways to convert Preview files to PDF on Mac, plus fixes for common problems.


 G2 Rating: 4.5/5 |
 100% Secure
What “Convert Preview to PDF” Really Means on Mac
Preview is Apple’s default viewer for many visual and document formats. You can open a file in Preview, then save or export it as a PDF. This is useful when you need to submit a file to a portal, send a cleaner document by email, combine scanned pages, or preserve a layout.
File types Preview can open
Preview can open many common file formats, including:
- JPG/JPEG images
- PNG images
- TIFF files
- BMP files
- GIF files
- Existing PDF files
- Some Photoshop and Illustrator-related previews, depending on the file
- Scanned documents imported as images
Apple’s official Preview documentation also explains how Preview works with PDFs and images on Mac. You can refer to Apple’s Preview User Guide for current macOS-specific details.
The exact export options may vary slightly depending on your macOS version and the type of file you open. For example, an image file may show Export as PDF, while an existing PDF may show options for exporting, printing, duplicating, or saving selected pages.
Export as PDF vs Print to PDF
Preview gives you two common ways to create a PDF:
| Option | Best for | What it does |
|---|---|---|
| File > Export as PDF | Quick conversion of an image or supported file | Saves the current file as a PDF directly |
| File > Print > Save as PDF | More control over paper size, orientation, scaling, and page range | Uses macOS’s print system to generate a PDF |
If Export as PDF is available, it is usually the simplest method. If you need to adjust page size, print only selected pages, or fix scaling, the Print > Save as PDF route gives you more control.
How to Convert Preview to PDF Using Apple Preview
The native Preview app is enough for many simple PDF conversions. Use the method that matches what you are trying to convert.
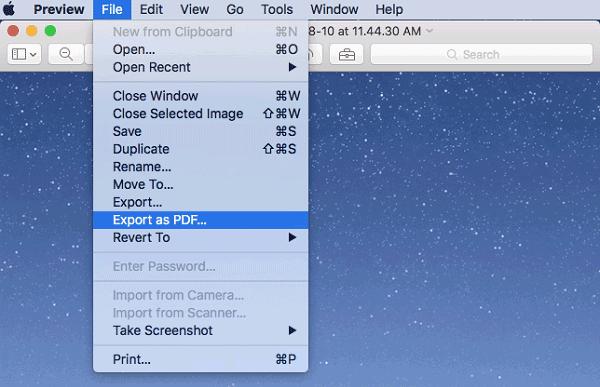
Method 1: Use Export as PDF
This is the quickest way to convert a Preview-supported file into PDF format.
Steps
-
Open the file in Preview.
- You can double-click the file if Preview is your default app.
- Or right-click the file and choose Open With > Preview.
-
Click File in the top menu bar.
-
Select Export as PDF.
-
Choose the destination folder.
-
Rename the file if needed.
-
Click Save.
This method works well for single images and simple documents. If you are converting a receipt, screenshot, signed form image, or scanned page, the exported PDF will preserve the visual appearance of the file.
One thing to remember: if your source file is an image, the PDF will usually contain that image. The text inside the image will not automatically become selectable or searchable. For that, you need OCR, which Preview does not provide as a full PDF workflow.
Method 2: Use Print > Save as PDF
If you do not see Export as PDF, or you want more control over the final page layout, use the print dialog.
Steps
-
Open the file in Preview.
-
Click File > Print.
-
In the print window, check the preview area to make sure the page looks correct.
-
Adjust settings if needed:
- Paper Size
- Orientation
- Scale
- Pages
- Copies, if applicable
-
Click the PDF dropdown menu in the lower-left corner.
-
Select Save as PDF.
-
Choose a file name and destination.
-
Click Save.
This method is especially helpful when an image appears too large, too small, cropped, or rotated. You can change paper size and scaling before saving the PDF.
For example, if a PNG screenshot is being converted into a PDF but appears huge on the page, open the print dialog and adjust the scale until the preview looks right. Then save it as PDF.
Method 3: Convert Multiple Images into One PDF
Preview can also combine several image files into a single PDF. This is useful for receipts, photo-based records, scanned homework, signed pages, or ID documents.
Steps
-
Put all images in one folder.
-
Rename them in the order you want them to appear, such as:
page-01.jpgpage-02.jpgpage-03.jpg
-
Select all the images in Finder.
-
Right-click and choose Open With > Preview.
-
In Preview, make sure the thumbnail sidebar is visible.
- If not, click View > Thumbnails.
-
Drag thumbnails up or down to reorder pages.
-
Select all thumbnails using Command + A.
-
Click File > Print.
-
Choose Save as PDF from the PDF dropdown.
-
Save the combined PDF.
This is one of the most useful Preview workflows, but it can be a little fragile. If you open images separately instead of in the same Preview window, they may not combine into one PDF. The thumbnail sidebar is the key: all pages need to appear in the same Preview window before you save.
Method 4: Save Selected Pages from an Existing PDF
Sometimes you do not need to convert a new file—you need to extract part of a PDF that is already open in Preview.
Steps
-
Open the PDF in Preview.
-
Show thumbnails by clicking View > Thumbnails.
-
Select the page or pages you want to save.
- Hold Command to select non-adjacent pages.
- Hold Shift to select a range.
-
Drag the selected pages from the thumbnail sidebar to your desktop or a Finder folder.
-
macOS will create a new PDF containing those pages.
You can also use File > Print, enter a page range, and select Save as PDF. This is better if you want pages 3–8, for example, and do not want to manually select thumbnails.
How to Convert Preview Files to PDF with PDFelement
Preview is convenient, but it is not designed for heavy PDF editing. Once you convert Preview files to PDF, you may still need to clean up the document: edit text, add comments, insert pages, compress the file, protect it with a password, sign it, or run OCR on scanned content.
That is where PDFelement fits naturally into the workflow. Use Preview for quick viewing or basic conversion, then use PDFelement when the PDF needs to become a polished, shareable document rather than a simple exported file.
G2 Rating: 4.5/5 |100% Secure
Why use a PDF editor after Preview conversion
A basic Preview PDF is often enough for casual sharing. But it may not be enough if:
- The file contains scanned text that you need to search or copy.
- You need to edit wording inside the PDF.
- You want to merge several PDFs and reorder pages.
- The PDF is too large to upload.
- You need to add comments, highlights, stamps, or signatures.
- You need to protect a document before sending it.
PDFelement is useful for these follow-up tasks because it is built around PDF editing and management, not just viewing.
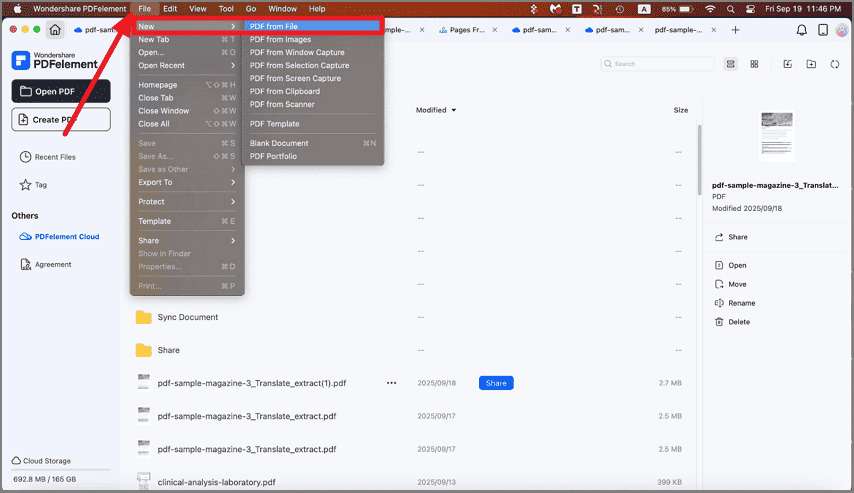
Step 1: Create a PDF from a Preview-supported file
After installing PDFelement on your Mac, open the app and create a PDF from your source file.
- Launch PDFelement.
- Choose the option to create a PDF from a file.
- Select the image or document you would normally open in Preview.
- Open it in PDFelement to generate a PDF.
This is a practical alternative if you already know the file will need editing after conversion. Instead of saving from Preview first and then opening the PDF in another tool, you can create and refine it in one place.
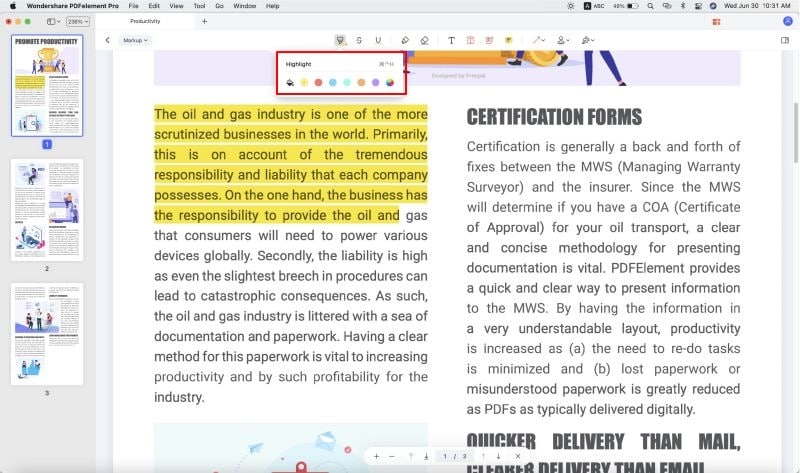
Step 2: Edit, annotate, or organize the PDF
After the file becomes a PDF, you can work on it more directly. For example, you can:
- Add highlights or comments for review.
- Edit text if the PDF contains editable text.
- Insert, delete, rotate, or reorder pages.
- Add a signature or stamp.
- Use OCR for scanned documents, where supported.
- Combine the PDF with other files.
This is especially helpful for business documents. A receipt image converted to PDF might need a note before reimbursement. A scanned contract might need OCR and a signature. A set of PNG pages might need to be merged, reordered, and compressed before upload.
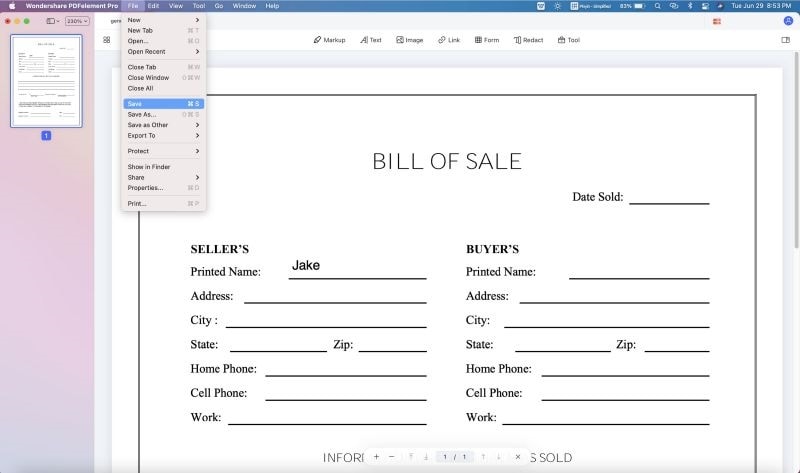
Step 3: Save or export the finished PDF
Once the document is ready, save it as a PDF.
- Click File.
- Choose Save or Save As.
- Select a folder.
- Rename the file clearly.
- Save the final PDF.
A good naming convention can save time later. Instead of leaving files as Untitled.pdf or IMG_4829.pdf, use names such as invoice-march-2025.pdf, signed-rental-form.pdf, or project-notes-combined.pdf.
Preview vs PDFelement: Which Method Should You Use?
Both tools can help with PDF creation, but they serve different levels of work. The right choice depends on what happens after conversion.
Use Preview for quick PDF creation
Preview is the best choice when you need a fast, no-install conversion. Use it for:
- Turning one JPG or PNG into a PDF
- Saving a screenshot as a PDF
- Combining a few images into a basic PDF
- Extracting a few pages from an existing PDF
- Printing a file to PDF with simple layout settings
Preview is free, already on your Mac, and good enough for many everyday tasks. If you only need to convert and send, start there.
Use PDFelement for editing and document workflows
Use PDFelement when the PDF needs more work after conversion. It is a better fit for:
- Editing PDF text and images
- Running OCR on scanned documents
- Compressing PDFs before upload
- Adding annotations for review
- Combining multiple PDFs or file types
- Adding signatures, forms, or password protection
- Preparing documents for business, school, or legal workflows
The practical difference is this: Preview helps you create a PDF; PDFelement helps you finish it.
For example, if you convert a scanned paper form through Preview, the result may look fine but still behave like a flat image. If you need searchable text, editable content, comments, or a smaller upload size, opening that PDF in PDFelement is the more efficient next step.
G2 Rating: 4.5/5 |100% Secure
Troubleshooting: Why Preview PDF Conversion May Not Work
Preview is simple, but a few issues come up often. Most are easy to fix once you know which conversion method to use.
Export as PDF is missing or grayed out
If File > Export as PDF is not available, try the print method instead:
- Open the file in Preview.
- Click File > Print.
- Open the PDF dropdown.
- Choose Save as PDF.
The print method is built into macOS and works in many apps, not just Preview. Apple also documents this general workflow in its support page on saving documents as PDFs on Mac.
If the file still will not convert, check whether the format is fully supported. Some files may only show a preview but not export cleanly.
The PDF is too large
Image-heavy PDFs can become large, especially when the source files are high-resolution photos or scans.
Try these fixes:
- Resize large images before converting.
- Use JPG instead of PNG for photo-based documents when quality allows.
- Avoid combining unnecessary pages.
- Use a PDF compressor after conversion.
- Reduce scan resolution if you are scanning the original document yourself.
Preview has limited compression options. If file size matters—such as for job portals, school submissions, or government forms—a PDF editor with compression tools is usually easier.
Pages are in the wrong order
This usually happens when multiple images are opened in the wrong order or sorted by Finder in an unexpected way.
Before converting:
- Rename files with leading numbers, such as
01,02,03. - Open all files together in Preview.
- Show the thumbnail sidebar.
- Drag pages into the correct order.
- Select all thumbnails before printing or saving.
Do not rely only on image creation dates. Photos and scans can have odd metadata, especially if they came from different devices or messaging apps.
Text is not selectable after conversion
If you convert an image to PDF in Preview, the PDF usually remains image-based. It may look like a document, but the text is not actually text.
To make text selectable and searchable, use OCR. Preview may let you select Live Text in some macOS versions and contexts, but it is not a full OCR workflow for building searchable PDFs. For consistent results, use a PDF editor with OCR capability.
OCR is especially useful for:
- Scanned contracts
- Printed forms
- Receipts
- Book pages
- Handouts
- Photographed notes
After OCR, always check important names, numbers, and dates. OCR accuracy depends on scan quality, font clarity, page angle, and lighting.
Formatting changes after conversion
If a file looks different after being saved as PDF, the issue is usually scaling, page size, or orientation.
Try this:
- Use File > Print > Save as PDF instead of Export as PDF.
- Set the correct paper size, such as A4 or US Letter.
- Switch between portrait and landscape.
- Adjust the scale percentage.
- Check the print preview carefully before saving.
For images, choose a page size that matches the intended use. A wide screenshot may look better in landscape orientation, while a scanned letter should usually stay in portrait.
Tips for Better PDF Results on Mac
Small choices before conversion can make the final PDF easier to read, send, and store.
Choose the right source file
If you have both a screenshot and an original document, convert the original document when possible. A PDF created from a clean source file is usually sharper and more usable than a PDF made from a screenshot.
For scans, use good lighting and keep the page flat. Crooked or shadowed images may still convert, but they look less professional and are harder for OCR tools to recognize.
Rename and organize before converting
For multi-page PDFs, rename files before opening them in Preview. Use a clear numbering system:
contract-01.pdfcontract-02.pdfcontract-03.pdf
or:
scan-001.jpgscan-002.jpgscan-003.jpg
This reduces page-order mistakes. It also makes it easier to rebuild the PDF later if you need to.
Check page size and orientation
A PDF can look correct on your Mac but print poorly if the page size is wrong. Before sending a document that may be printed, check:
- Is it A4 or US Letter?
- Are all pages the same size?
- Are any images rotated sideways?
- Are margins acceptable?
- Is any content cropped?
If the document is formal—a contract, application, invoice, or academic submission—open the final PDF and skim every page before sending.
Add security only when needed
Password protection can be useful for sensitive documents, but it can also create problems for the recipient. Use it when the document contains private information, such as financial records, IDs, HR files, or contracts.
If you do add a password, send it through a separate channel. For example, email the PDF and share the password by phone or secure message.
Keep an editable copy when possible
Once a file is converted into a flat PDF, editing may become harder. If the original was a Pages, Word, Excel, or design file, keep that source file too. Use the PDF for sharing, uploading, or archiving, but keep the original for future changes.
FAQs About Converting Preview to PDF
How do I convert Preview to PDF on Mac?
Open the file in Preview, click File > Export as PDF, choose a folder, and click Save. If that option is not available, use File > Print, open the PDF dropdown, and select Save as PDF.
Is Preview a file format?
No. Preview is the built-in macOS app for viewing PDFs, images, and other supported files. When people say “convert Preview to PDF,” they usually mean converting a file opened in Preview into a PDF.
Can I convert multiple Preview files to one PDF?
Yes. Select multiple images in Finder, open them together in Preview, show the thumbnail sidebar, arrange the pages, select all thumbnails, then use File > Print > Save as PDF. This creates one combined PDF.
Why can’t I select text in the PDF after using Preview?
If the source file was an image or scan, Preview creates an image-based PDF. The text looks visible but is not selectable. Use OCR in a PDF editor such as PDFelement if you need searchable or selectable text.
Can Preview convert JPG to PDF?
Yes. Open the JPG in Preview and choose File > Export as PDF. You can also use File > Print > Save as PDF if you want to adjust paper size, orientation, or scaling.
Can Preview convert PNG to PDF?
Yes. Open the PNG in Preview, then use Export as PDF or Print > Save as PDF. For screenshots and transparent PNGs, check the final PDF appearance before sending.
How do I reduce the size of a PDF made from Preview?
You can try reducing the image size before conversion or using a PDF compression tool after conversion. Preview has limited compression controls, so a dedicated PDF editor is often better for large scanned or image-heavy PDFs.
Can I edit a PDF after converting it from Preview?
Preview can add basic markup, signatures, and simple annotations. For text editing, OCR, page organization, compression, or more controlled PDF work, open the converted file in PDFelement or another PDF editor.
Does converting through Preview change the original file?
No. Exporting or printing to PDF creates a new PDF copy. Your original JPG, PNG, TIFF, or other source file remains unchanged unless you separately edit and save it.
What is the best method to convert Preview files to PDF?
For a single file, use File > Export as PDF. For layout control or multiple files, use File > Print > Save as PDF. For editing, OCR, compression, or signing after conversion, use PDFelement as the follow-up PDF tool.

