PowerPoint is a popular tool for school, office, and conference presentations. It helps people share ideas clearly and visually. But sometimes, when you try to change a PowerPoint file, you find it's "read-only." This means you can't edit or make changes to it. This can be a big problem, especially if you need to update information or customize the presentation.
Many people face this issue and feel stuck. But there's good news. You can remove the read-only restriction and make the file editable again. In this article, we will show you how to do just that. We'll use a sample PowerPoint file as an example. By following our guide, you'll learn how to edit read-only PowerPoint presentations, allowing you to make all the necessary changes.
In this article
Part 1. Understanding Read-Only Mode in PowerPoint
Read-only mode in PowerPoint means you can look at a presentation but can't change it. It's like being able to read a book but not allowed to write on its pages. This mode helps protect the presentation from unwanted changes. When a PowerPoint file is read-only, you can still see everything, but you can't add new slides, delete anything, or alter the content in any way.
There are a few reasons why a PowerPoint file might be in read-only mode. Sometimes, the person who made the presentation sets it to read-only purposefully. They might do this to keep the information safe or ensure it stays the same when shared with others. Other times, it happens because of where the file is saved.
For example, suppose the presentation is downloaded from an email or a website. In that case, your computer might mark it as read-only to protect your computer from possible harm. Understanding why a file is in read-only mode can help us figure out the best way to make it editable again.
Part 2. How To Edit a Read-Only PowerPoint
To make a read-only PowerPoint editable, just follow these easy steps. Imagine we have a PowerPoint file we'll call "Sample PPT" to show you how.
Step 1. First, find where "Sample PPT" is saved on your computer.
Step 2. Next, right-click on "Sample PPT" and choose "Properties."
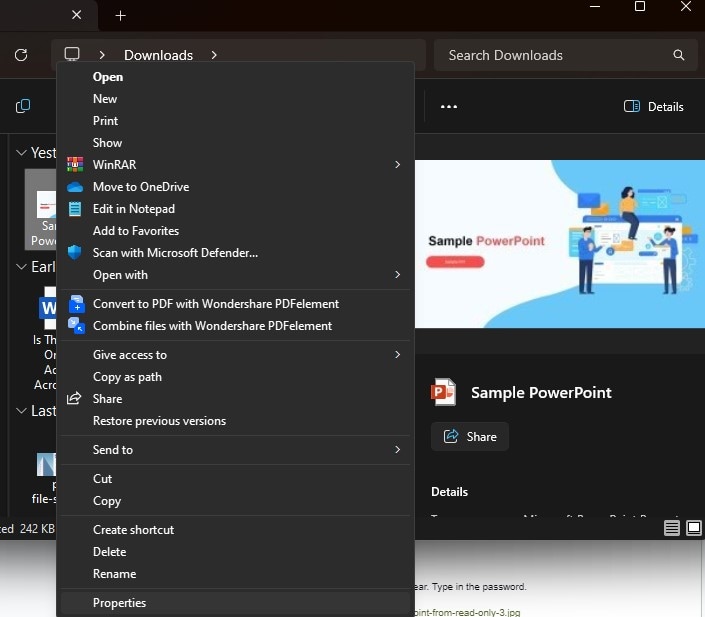
Step 3. A window pops up. Look for a tab named "General." There's a box that says "Read-only." Make sure this box is not checked.
Step 4. Then, press "Apply" and click "OK."
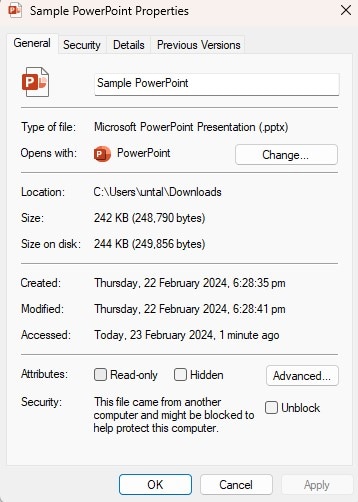
Step 5. Now, open "SamplePPT." You should be able to edit it.
But what if it's still not editable? It might be locked with a password or saved in a place you can't change. If you know the password (make sure you have permission from the person who made it), here's what to do:
Step 1. Open "SamplePPT."
Step 2. A box asking for a password will appear. Type in the password.
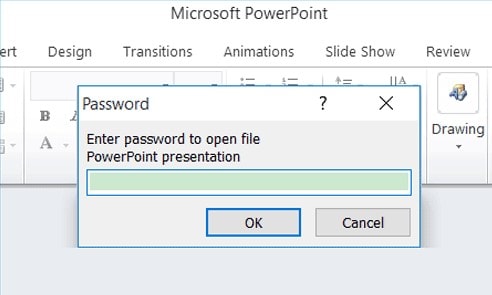
Step 3. Now, you can edit the presentation.
Sometimes, old PowerPoint files don't work well with new versions. To fix this:
Step 1. Open PowerPoint and go to "File," then "Open."
Step 2. Choose the old file.
Step 3. PowerPoint might ask if you want to fix or convert it. Say yes.
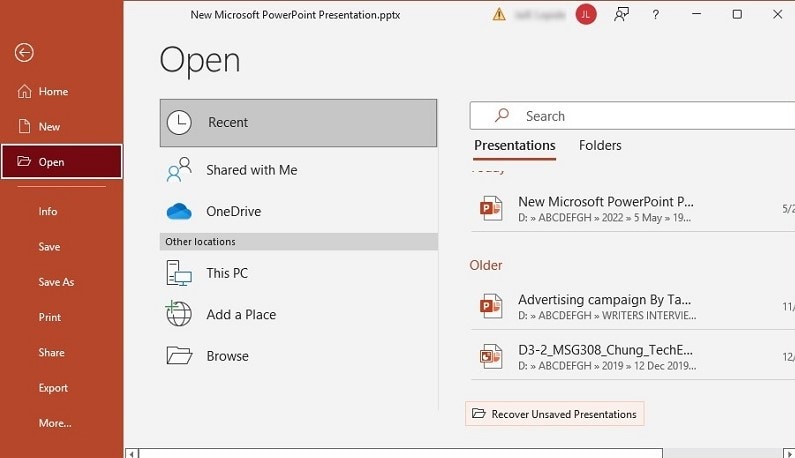
If "SamplePPT" seems broken (like it won't open right), try this to fix it:
Step 1. In PowerPoint, go to "File," then "Open."
Step 2. Find "SamplePPT," but don't open it yet. Instead, click the little arrow next to the open button.
Step 3. Choose "Open and Repair."
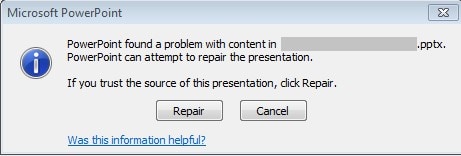
These steps can help you make a read-only PowerPoint editable, unlock it if it's password-protected, update old files, or fix broken ones.
The Purpose of Read-Only Mode in PowerPoint
The read-only mode in PowerPoint is like a safety lock for your presentation. It lets people see your work but stops them from making changes. This is useful for a few reasons.
First, it keeps your presentation safe. Imagine you made a presentation for a big meeting. You wouldn't want someone to change it by mistake. The read-only mode makes sure your work stays just as you made it.
Second, it's great for sharing. Sometimes, you want to show your presentation to others for feedback, but you don't want them to change anything. Read-only lets them see your work without altering it.
Also, it helps with control. When working in a team, you might want to decide when and who can change the presentation. With read-only mode, you can share your work without worrying about unwanted edits.
Lastly, it's good for teaching. If you're sharing a presentation as a learning tool, you might want readers to focus on the content, not editing it. Read-only mode helps with this.
So, the read-only mode is very helpful. It protects your work, makes sharing easy, helps you control edits, and keeps the focus on learning.
Part 3. Reasons Why PowerPoint Files Become Read-Only
There are a few reasons why PowerPoint files turn into read-only:
- Read-Only Mode Activation: Sometimes, the person making the presentation sets it as read-only on purpose. They do this to keep the slides just the way they are. This way, no one else can change the slides accidentally or on purpose.
- Password Protection: A presentation might be read-only if it has a password. This is another way to keep it safe. The creator puts a password on it so only people with the password can make changes. Everyone else can just look at it.
- Version Incompatibility: If a presentation was made in an old version of PowerPoint and you try to open it in a newer version, it might open as read-only. This happens because the new version of PowerPoint is trying to protect the old file. It's like when new software is careful with old files to avoid messing them up.
- File Corruption or Damage: Sometimes, files get damaged or corrupted. This can happen for many reasons, like if there's a problem while saving the file. PowerPoint might then open the file in read-only mode. This is to stop the damage from getting worse. It lets you see the file without risking more problems.
Part 4. Protecting Your PowerPoint Presentation from Unauthorized Edits Using PDFelement

Protecting your PowerPoint presentation from unauthorized edits is important, especially when sharing it widely. One effective way is to convert the presentation to a PDF file. PDFelement is a tool that can do this easily. Here's a simple guide on how to use PDFelement to convert your PowerPoint (PPT) presentation into a PDF. For demonstration, we'll use a sample PPT presentation.
Step 1: Open PDFelement
First, start by opening PDFelement on your computer. You'll see a clean interface with several options.

Step 2: Create PDF from PowerPoint
Look for a "+" icon or a button that says "FromFile" on the home screen. This option creates a PDF from another file type, like PowerPoint. Click on it to proceed.

Step 3: Select Your PowerPoint File
A window asking you to choose the file you want to convert will pop up. Navigate to where your PowerPoint file is saved, select the "SamplePPT" file, and then click "Open."
Step 4: Conversion to PDF
Once you've selected the file, PDFelement will automatically start converting the PowerPoint file into a PDF. This process usually takes just a few moments. You don't have to do anything; just wait for it to finish.
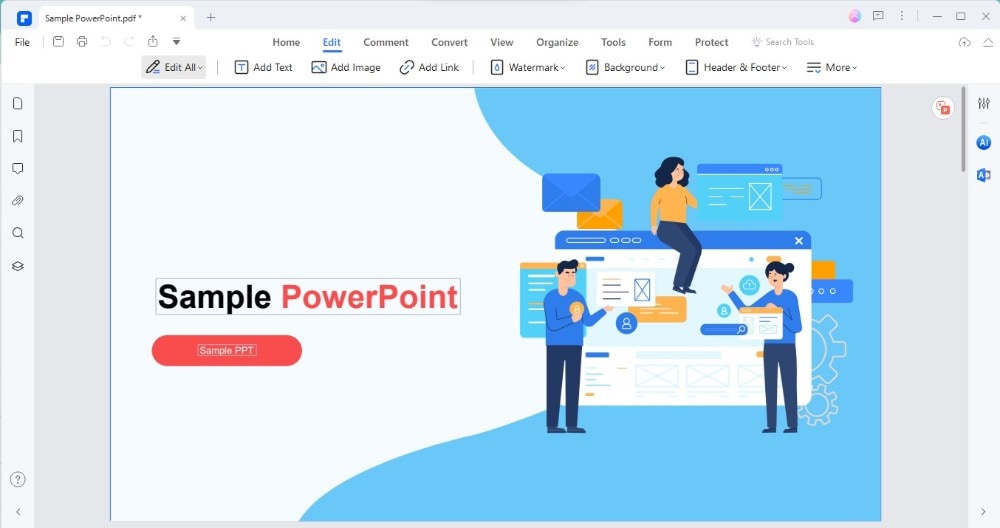
Step 5: Edit Your PDF (Optional)
After conversion, the new PDF file will open in PDFelement. Now, you have the option to edit this PDF file if needed. PDFelement offers a variety of editing tools for text, images, and more. Feel free to make any adjustments to your document.
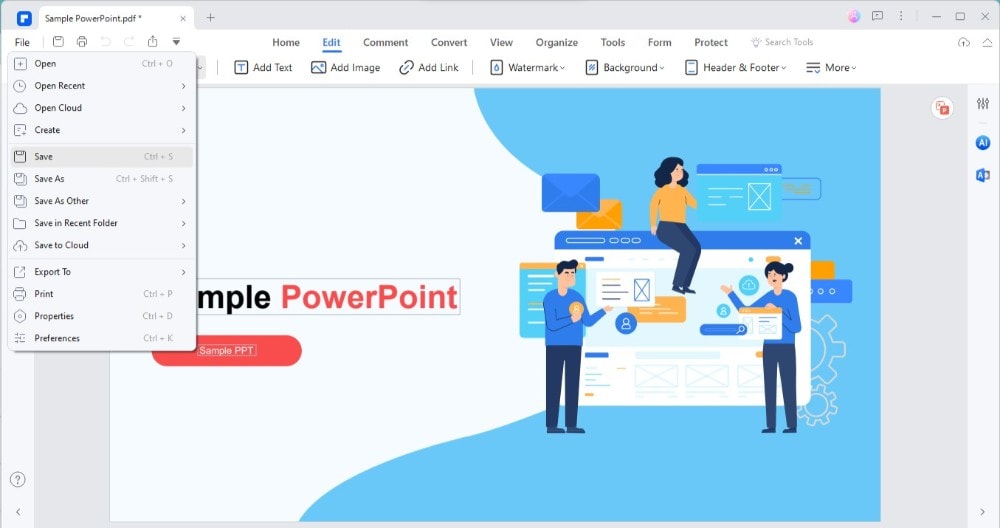
Step 6: Save the File as PDF
If you're done editing and want to save the document as a PDF, go to the "File" menu at the top, then select "Save." Choose where to save it on your computer, give it a name, and click "Save."
Step 7: Convert Back to PowerPoint (If Needed)
Sometimes, you might want to convert the PDF into a PowerPoint presentation. PDFelement allows you to do this, too. Click the "Convert" tab, then choose "To PPT." Select where you want to save the new PPT file, and PDFelement will convert the PDF back into a PowerPoint format.
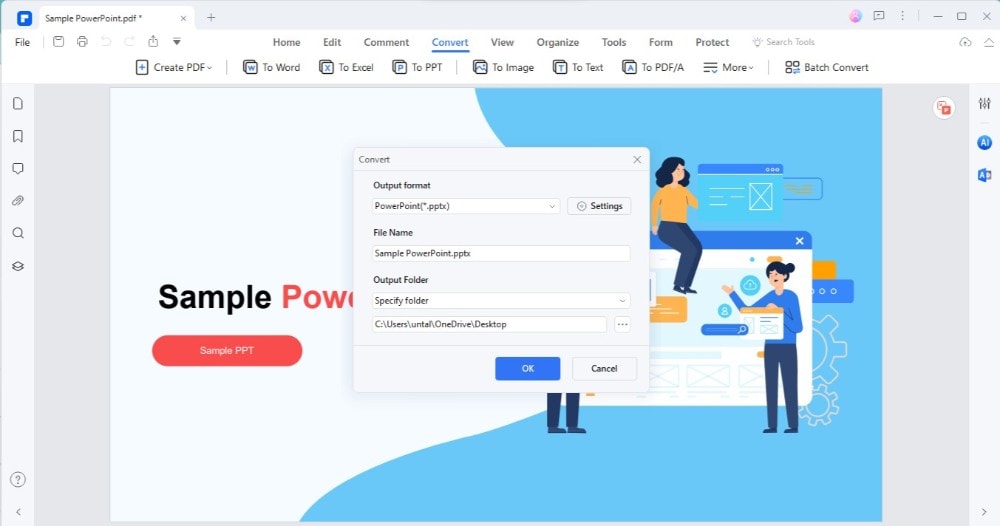
Converting your PowerPoint presentation to a PDF with PDFelement adds an extra layer of protection against unauthorized edits. This method ensures that your content remains as intended, regardless of who views or shares it. Plus, with the option to convert it back to PPT, you're not losing any flexibility in how you use and distribute your presentation.
Alternative Methods in Protecting PowerPoint Presentations
Besides converting your PowerPoint to a PDF, there are other ways to keep your presentation safe from changes you don't want.
One way is using the "Mark as Final" feature in PowerPoint. This tells people that your presentation is finished and shouldn't be changed. It's easy to do. Just click on the "File" tab, choose "Info," and then click "ProtectPresentation." Here, you'll find "Mark as Final." It doesn't lock your file for good, but it's a quick way to show it's the final version.
Another method is putting a password on your presentation. This means only people who know the password can open or change it. To add a password, go to the "File" tab, then "Info," and select "Protect Presentation" again. This time, choose "Encrypt with Password." Enter a password you'll remember because you can't open your file if you forget it.
Lastly, there's third-party software. These are special programs you can download that help protect your files. They offer more options like locking your file so only certain people can open it or even setting a date after which no one can open the presentation. These tools give you more control over who sees and edits your work.
Conclusion
Protecting your PowerPoint presentation is important, especially when sharing it with others. Whether you convert it to a PDF, mark it as final, add a password, or use special software, each method helps keep your work safe. Choose the best option for you and rest easy, knowing your presentation will stay how you want.

 G2 Rating: 4.5/5 |
  100% Secure


