 Home
>
Editing Tips
> How to Add JPG to PDF on Mac (macOS 11 Included)
Suppose you want to add JPG to PDF professionally and make your PDF look awesome. How will you go about it? Whether it is a business document or just any other important document, you will be obliged to curate for the best way to insert JPG into PDF. The secret is that you require an appropriate tool to add JPG to PDF effectively, as guided in this article.
Two Methods to Add JPG to PDF
Wondershare PDFelement - PDF Editor Wondershare PDFelement Wondershare PDFelement offers a powerful platform to add JPG to PDF. It isn't short of options either as you can use a variety of plausible methods to Add JPG to PDF. Whichever the method you pull, none will disappoint you in the end.
Method 1: Insert JPG into PDF
In this method, we are going to use the "Insert Image" option to add JPG to PDF. In PDFelement.
Step 1. Open a PDF
First, run PDFelement on your device to go straight to the primary window. Click the "Open File" button located at the bottom left. This will display the file explorer window to allow you to select the PDF file you want to add JPG image. Click "Open" to import it.

Step 2. Add JPG to PDF
To add JPG, navigate to the toolbar and click the "Edit" button. From the sub-menu, hit the image icon and browse the target JPG from the subsequent file directory window. Hit the respective "Insert" button to insert the JPG into your PDF.

Method 2: Add JPG Image to PDF
In this method, we are going to use the "Edit" option provided for by PDFelement to insert JPG into PDF with ease.
Step 1. Enter the Edit Mode
After launching PDFelement on your computer, go to the toolbar and click on the "Edit" button. From the drop-down options, select the "Edit" icon to put the PDF in edit mode. You should see some of the edit properties on the right window pane.

Step 2. Drag JPG to PDF
Now locate the JPG file that you want to add to the PDF file. Drag this JPG and drop on the desired position on the PDF file opened in PDFelement.

Step 3. Select "Add as an Image"
After dragging the JPG onto the PDF file, choose the "Add as an Image" option when prompted. Now you have added your JPG to PDF successfully.

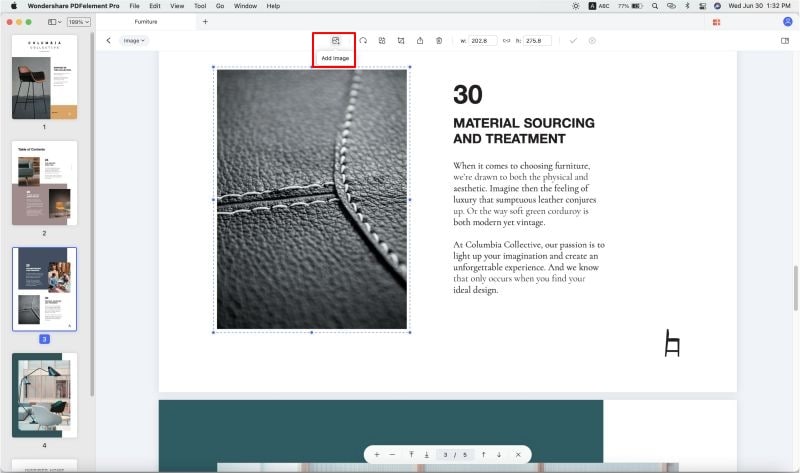
The guide above gives you a glimpse of what to expect from PDFelement. The powerful PDF editor tool makes it super easy and fascinating to add JPG to PDF. It offers an assortment of image editing options to allow you to insert the JPG image as per your need. You can rotate, extract the image, replace the image, cut image, and delete, among others. This way, you create a great-looking PDF. When adding the image, you will see the alignment grid line, which helps to keep the document alignment properly. Besides, you can edit links, texts, and crop pages, add bates numbering, flatten PDF, and add watermarks. Other features include:
- Convert PDF to and from several other file formats.
- Compress PDF file into the desired size without downgrading on quality.
- Perform PDF OCR to make the scanned PDFs both searchable and editable.
- Add comments, stamps, drawings, highlights, and markups to desired contents on PDF file.
- Create interactive form fields and import or export form data.
- Combine PDF files to form a single PDF.
- Protect PDF files with the help of passwords and digital signatures.
- Share your edited PDF files with friends or clients using email attachments, Evernotes, Google Drive, and Dropbox.
How to Add JPG to PDF Online
HiPDF is a handy online program that helps you add JPG to PDF without trouble. The program interface is well-designed to accommodate all levels of users. Whether you are a newbie or an expert, there is no need for an alarm because navigation is plain sailing. With that said, let us see how you can add JPG to PDF online using HiPDF.
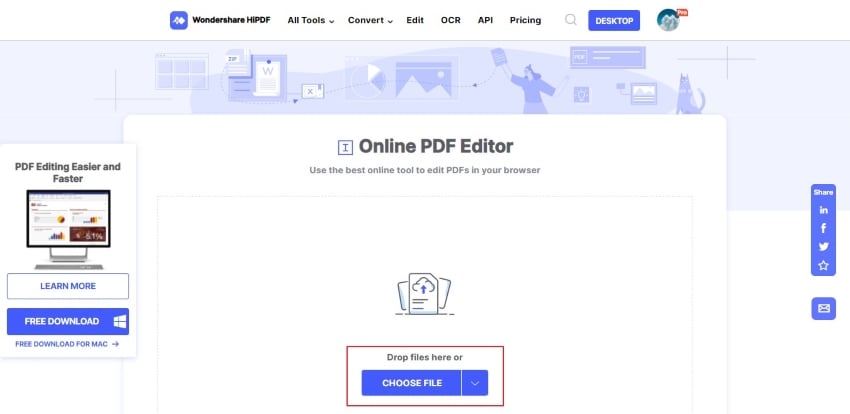
Step 1. Using your browser, navigate to the HiPDF Editor Homepage.
Step 2. Click the "Choose File" option and select the PDF file you want to add to the JPG. Click "Open" to upload it. Alternatively, you can drag and drop this PDF file on the program's interface.

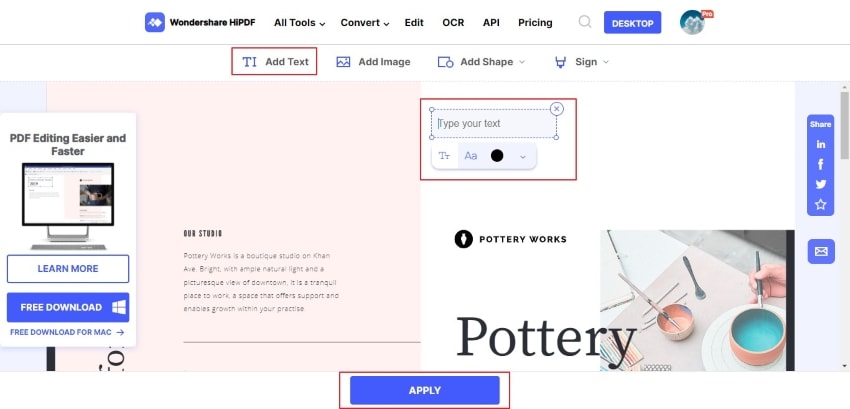
Step 3. When the file is successfully uploaded, it should open on the program. Now hit the "Add Image" option on the menu bar and subsequently browse for the target JPG file. Click "Open", and the JPG file will appear on the PDF file. You can resize it and drag it to where you wanted it to appear on the PDF.
Step 4. Once satisfied, hit the "Apply" button at the bottom. Wait for the processing to finish and then hit the "Download" button to fetch your PDF file.

Free Download or Buy PDFelement right now!
Free Download or Buy PDFelement right now!
Try for Free right now!
Try for Free right now!
 100% Secure |
 G2 Rating: 4.5/5 |
  100% Secure


Audrey Goodwin
chief Editor