Microsoft OneDrive is a cloud-based file storage service offered by the maker of Windows and Office. You can easily upload files to OneDrive and access them from anywhere due to its cross-platform and OS-agnostic design. It is deeply integrated with Microsoft’s other Software as a Service (SaaS) products in the Microsoft 365 ecosystem, which comprises various tools in an entirely cloud-based environment. Once you upload a folder to OneDrive, or even a single file, you can then perform a host of other actions. The upload file in OneDrive process is described in detail in the sections below.
How to Upload a File to OneDrive
The OneDrive uploader is integrated with File Explorer in windows, which means you upload documents to OneDrive directly from your desktop once you set that up. You can also use it in your browser using your Microsoft account in case you’re not on a Windows computer. That’s the advantage of having the multi-terminal capability.
If you want to save a file or upload a folder to OneDrive on your desktop, follow the process shown below:
1. Open File Explorer and click the OneDrive icon in the pane on the left side.
2. You can either toggle between this window and another File Explorer window or just snap them side-by-side to move files.
3. When using the toggle method, use Alt+Tab to switch to the File Explorer window where your file is located, then copy it. Toggle back to the window where you chose the OneDrive folder and paste the file there.
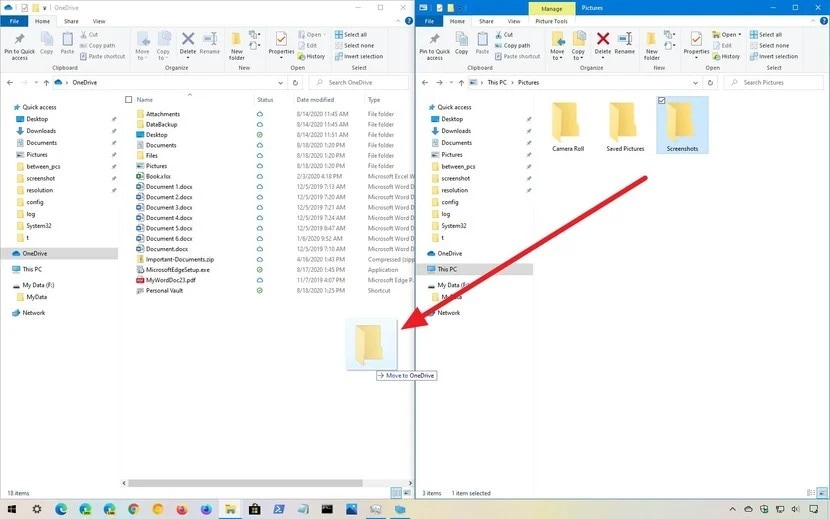
4. If you’re using the side-by-side method, simply drag the file from the File Explorer location to OneDrive and drop it there.
To use the browser version, log in to your Microsoft account on the OneDrive website and follow the steps shown here.
1. The default view is the My Files folder. You can add subfolders here or upload a file directly to this virtual location.
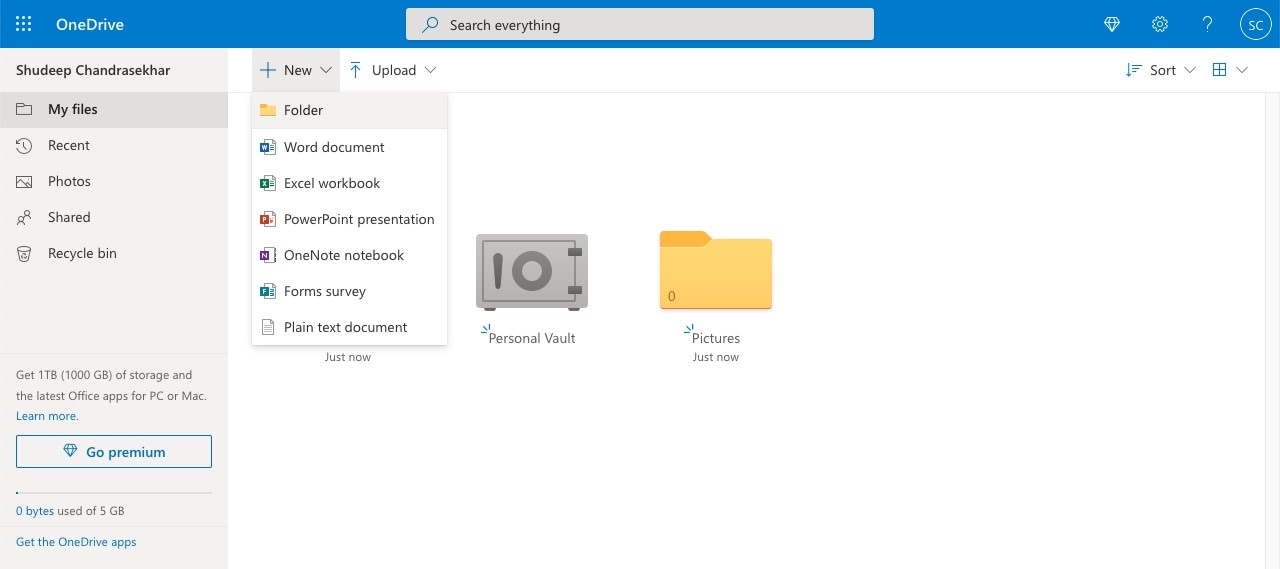
2. To upload a file to OneDrive or upload a folder, use the Upload button to select the appropriate option.
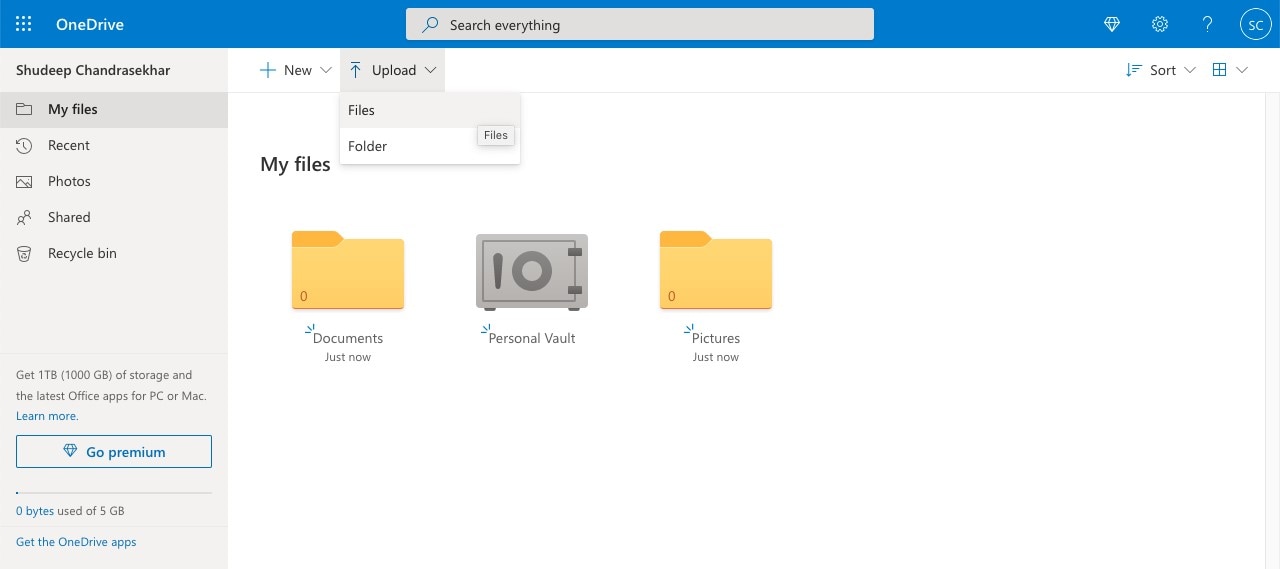
3. In the File Explorer dialog box, choose the file(s) or folder and click OK to upload to OneDrive.
Note: You can upload large files to OneDrive, but always keep your storage limit in mind. The free 5GB plan is useful, but if you have a lot of large files to be saved, especially video and other media files, you may need to upgrade to the 1TB plan or higher.
Advanced Actions After Uploading files to OneDrive
Once you have finished your OneDrive upload, there are several things you can do:
● View and Edit - Simply click on a file to open it in a new tab using the corresponding cloud application, such as Word for Office 365 (Word Online) and so on.
● When you select a file by clicking the circle on the top right corner of the file icon, you’ll see several options in the top toolbar:
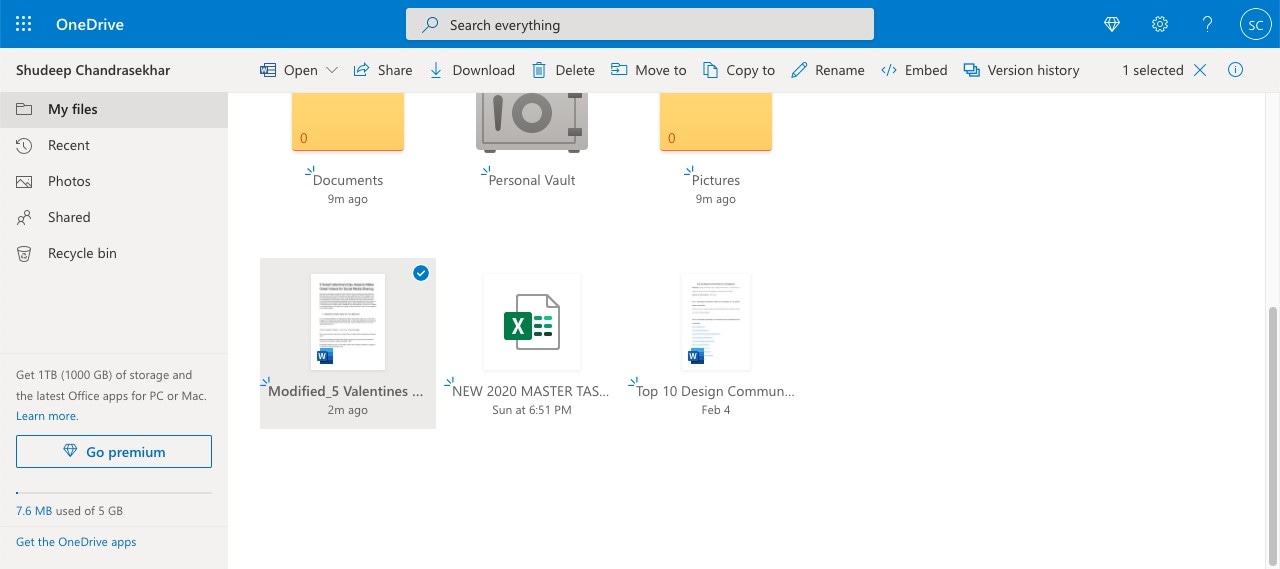
● Open online or offline - Choose between Word Online
● Share - Send a link with specific permissions - view, edit, etc.
● Download - Save a cloud file to your local drive
● Delete - Remove a file from the cloud
● Move To - Change the folder location within OneDrive
● Copy To - Create a copy in a different OneDrive location
● Rename - Change the file name
● Embed - Generate an HTML code to embed the file on a web page
● Version history - Check older versions and restore or download them
OneDrive gives you the flexibility to leverage Windows applications offline as well as online. That means you can work virtually from anywhere regardless of whether the system is Windows, Mac, Linux, or another platform. This multi-terminal feature makes it ideal for all types of remote work, including the work-from-home model. Users can collaborate on files, comment, and use all the related apps available with a Microsoft 365 account.
How to Upload Files using Wondershare PDFelement Cloud
A great alternative to an expensive OneDrive plan is to use Wondershare PDFelement Cloud, a dedicated cloud storage and electronic signature service for PDF documents. Most companies use PDF for official documentation, and the e-signature feature makes it more attractive for business users because of the security and convenience of having two services bundled into one. If you’re looking for an ideal cloud service to store PDFs and manage your signature workflows, this is the perfect tool for it.
Upload File to PDFelement Cloud - How To
1. Create a free Wondershare PDFelement Cloud account or use your existing Wondershare ID to log in. This could be your registered credentials for PDFelement, Filmora, or any other software from Wondershare.
2. In the Home tab, which is your default view, you’ll see a button that says Upload Files. Click that.
3. Now navigate to your local folder where the file is saved and select it for upload. Click OK or Open depending on whether you’re using Windows or Mac.
4. Under Recent Document Activity, you’ll be able to see your uploaded PDF file.
What Can I Do with Uploaded Files in PDFelement Cloud?
Once your files are on the cloud, you can access them from any computer with an Internet connection and a modern browser. When you need to perform an action on one of the files, you can use one of the options below after clicking the three horizontal dots against the file name:

● Open and View - You can use this option to preview the file and see if any changes need to be made.
● Download for editing - This option is for saving files to your local drive so they can be edited or shared.
● Rename and Delete - These options let you alter the filename or remove the file completely from the cloud. This is useful if you want to free up some storage capacity.
● Signature Option 1: Send for Signature - If you need multiple people to sign the same copy of a document, you can use this option.
● Signature Option 2: Bulk Send - If you need individual signatures from many people on several copies of a document, use this option.
● Dashboard View - Use this view to see what documents are awaiting signing from other users or yourself and which have been completed.
Wondershare PDFelement Cloud on your Desktop PC
In the Windows version of PDFelement Pro DC, which is the desktop PDF editor from Wondershare, both cloud storage access and electronic signature access have been integrated into the product. Once you download and install PDFelement Pro DC on your Windows PC, you can execute the following actions:
Wondershare PDFelement Pro DC
Simplify your Workflow with the PDFelement Cloud.

Desktop Capabilities
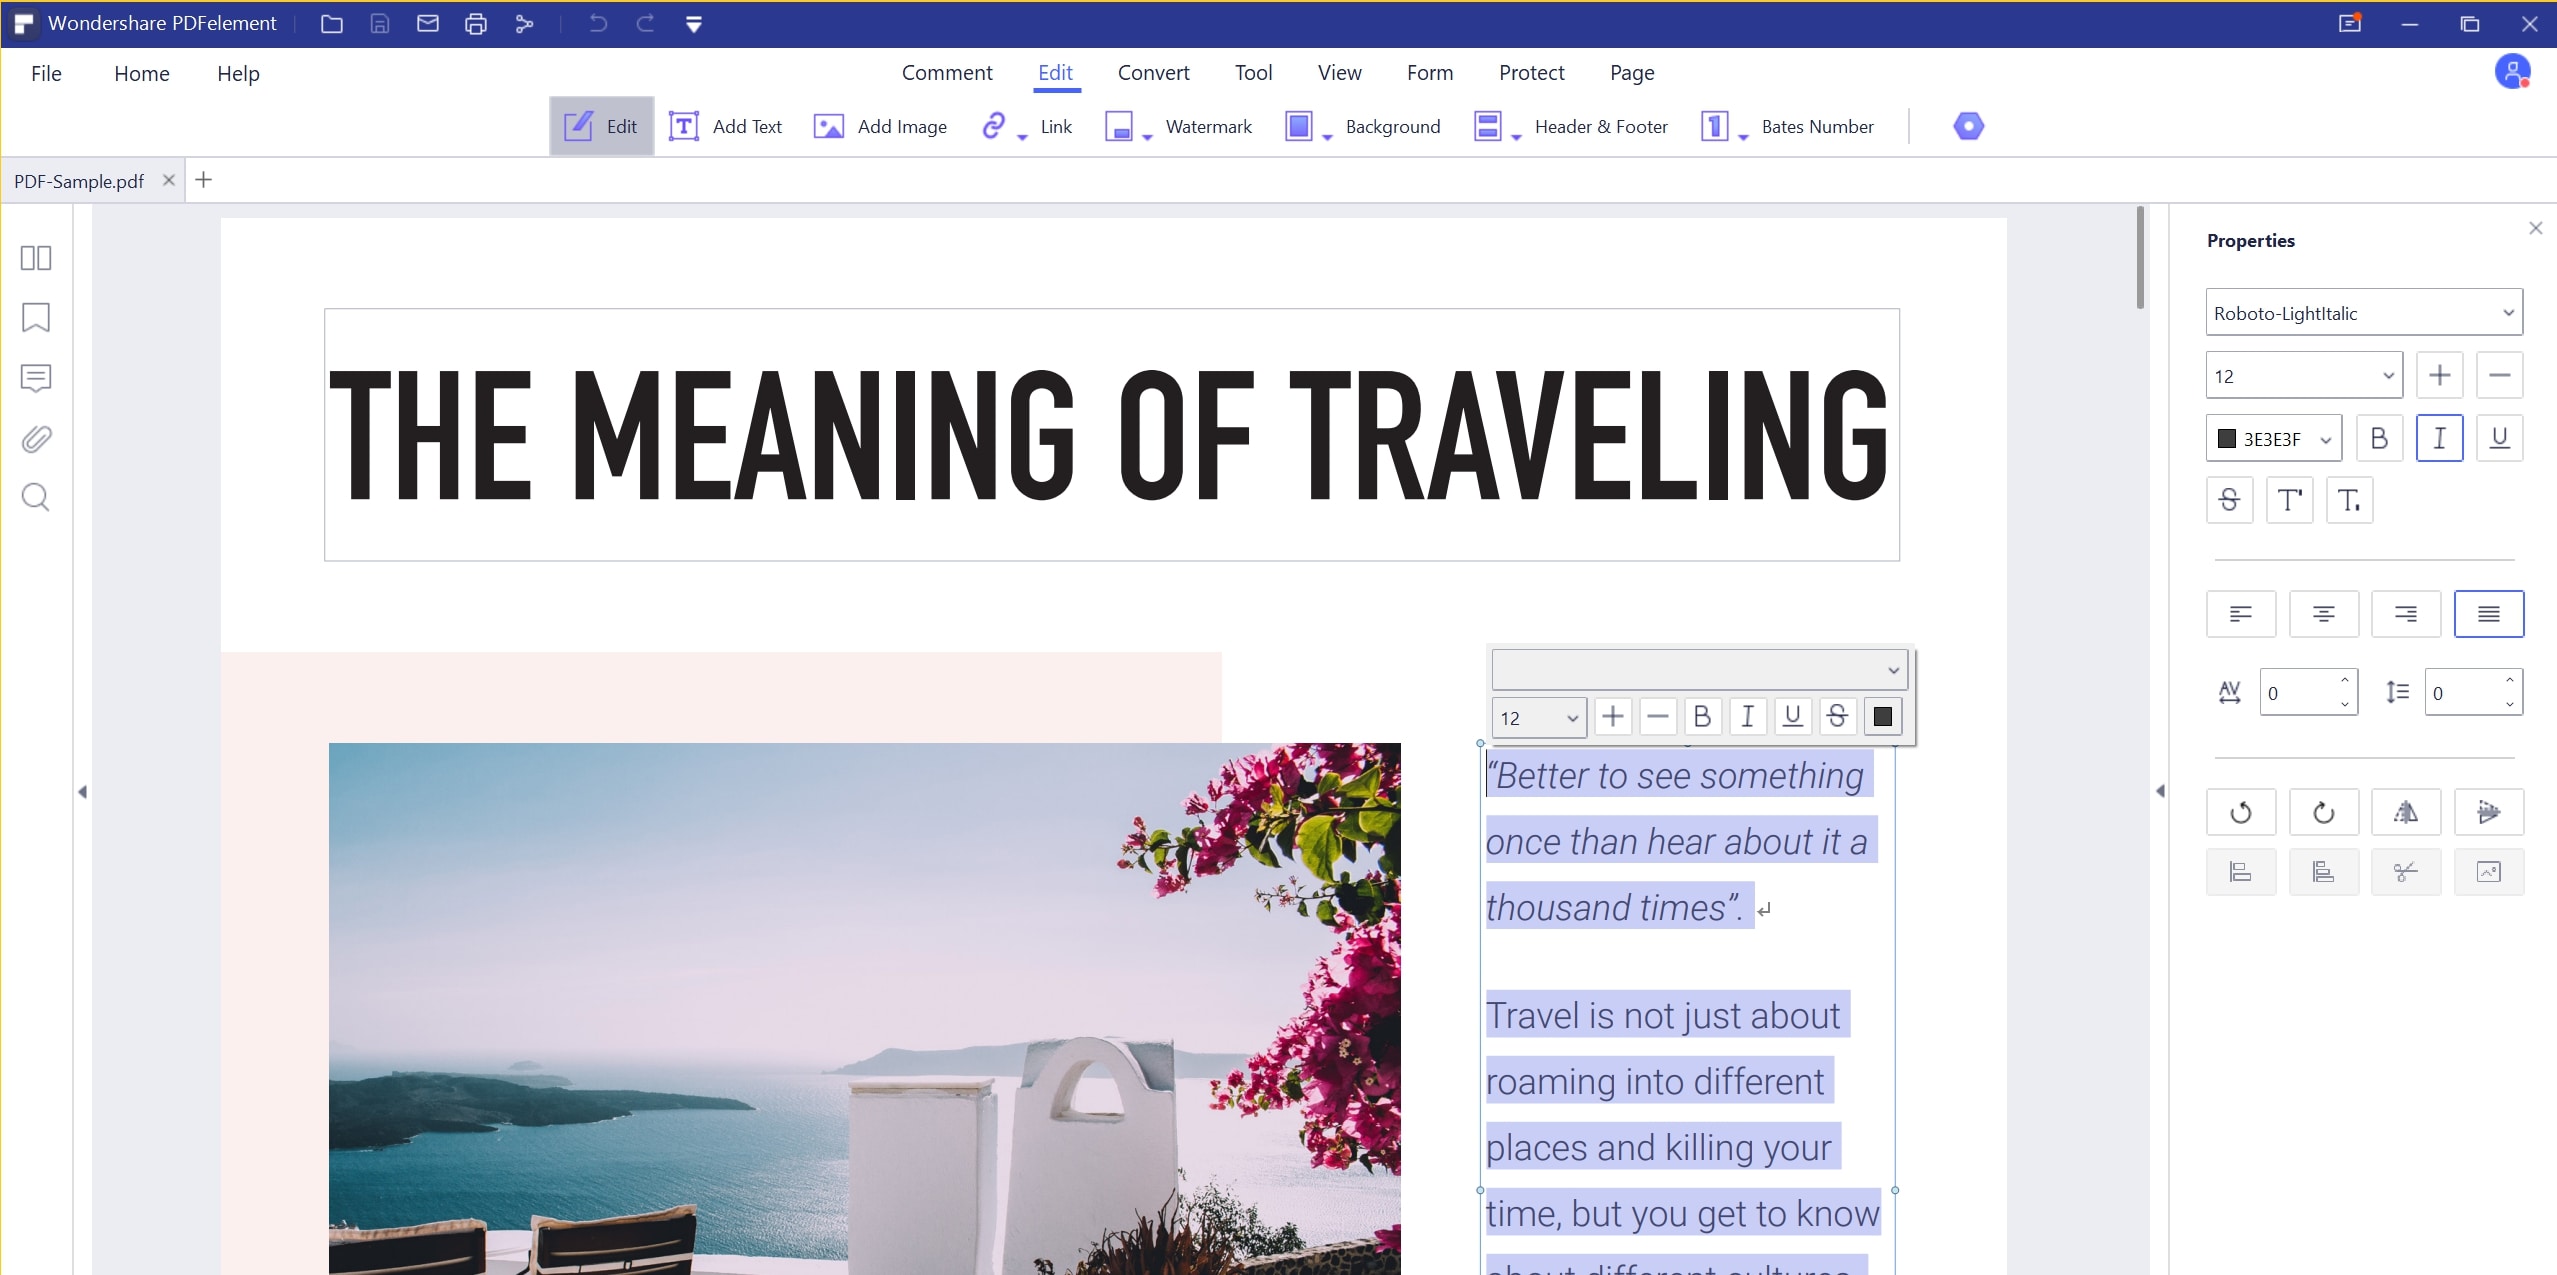
PDFelement offers a range of PDF solutions for you to take advantage of:
● Editing - You can edit all elements in a PDF file, including text, images, links, etc.
● Conversion - Convert to and from PDF into other file types - hundreds of input types are supported and the conversions are highly accurate and fast.
● Annotations - Markup your file when collaborating with others.
● Forms - Fill, create, and convert PDF forms; you can also extract form data and sign forms.
● Organizing - Combine and split PDF files, manipulate pages, and do everything you need to get your files in order.
● OCR - The text recognition feature allows you to convert scanned PDFs into editable PDF files.
● Batch Process - Do several operations on a batch of files, quickly and accurately.
Cloud Capabilities
These features have been integrated into PDFelement Pro DC:
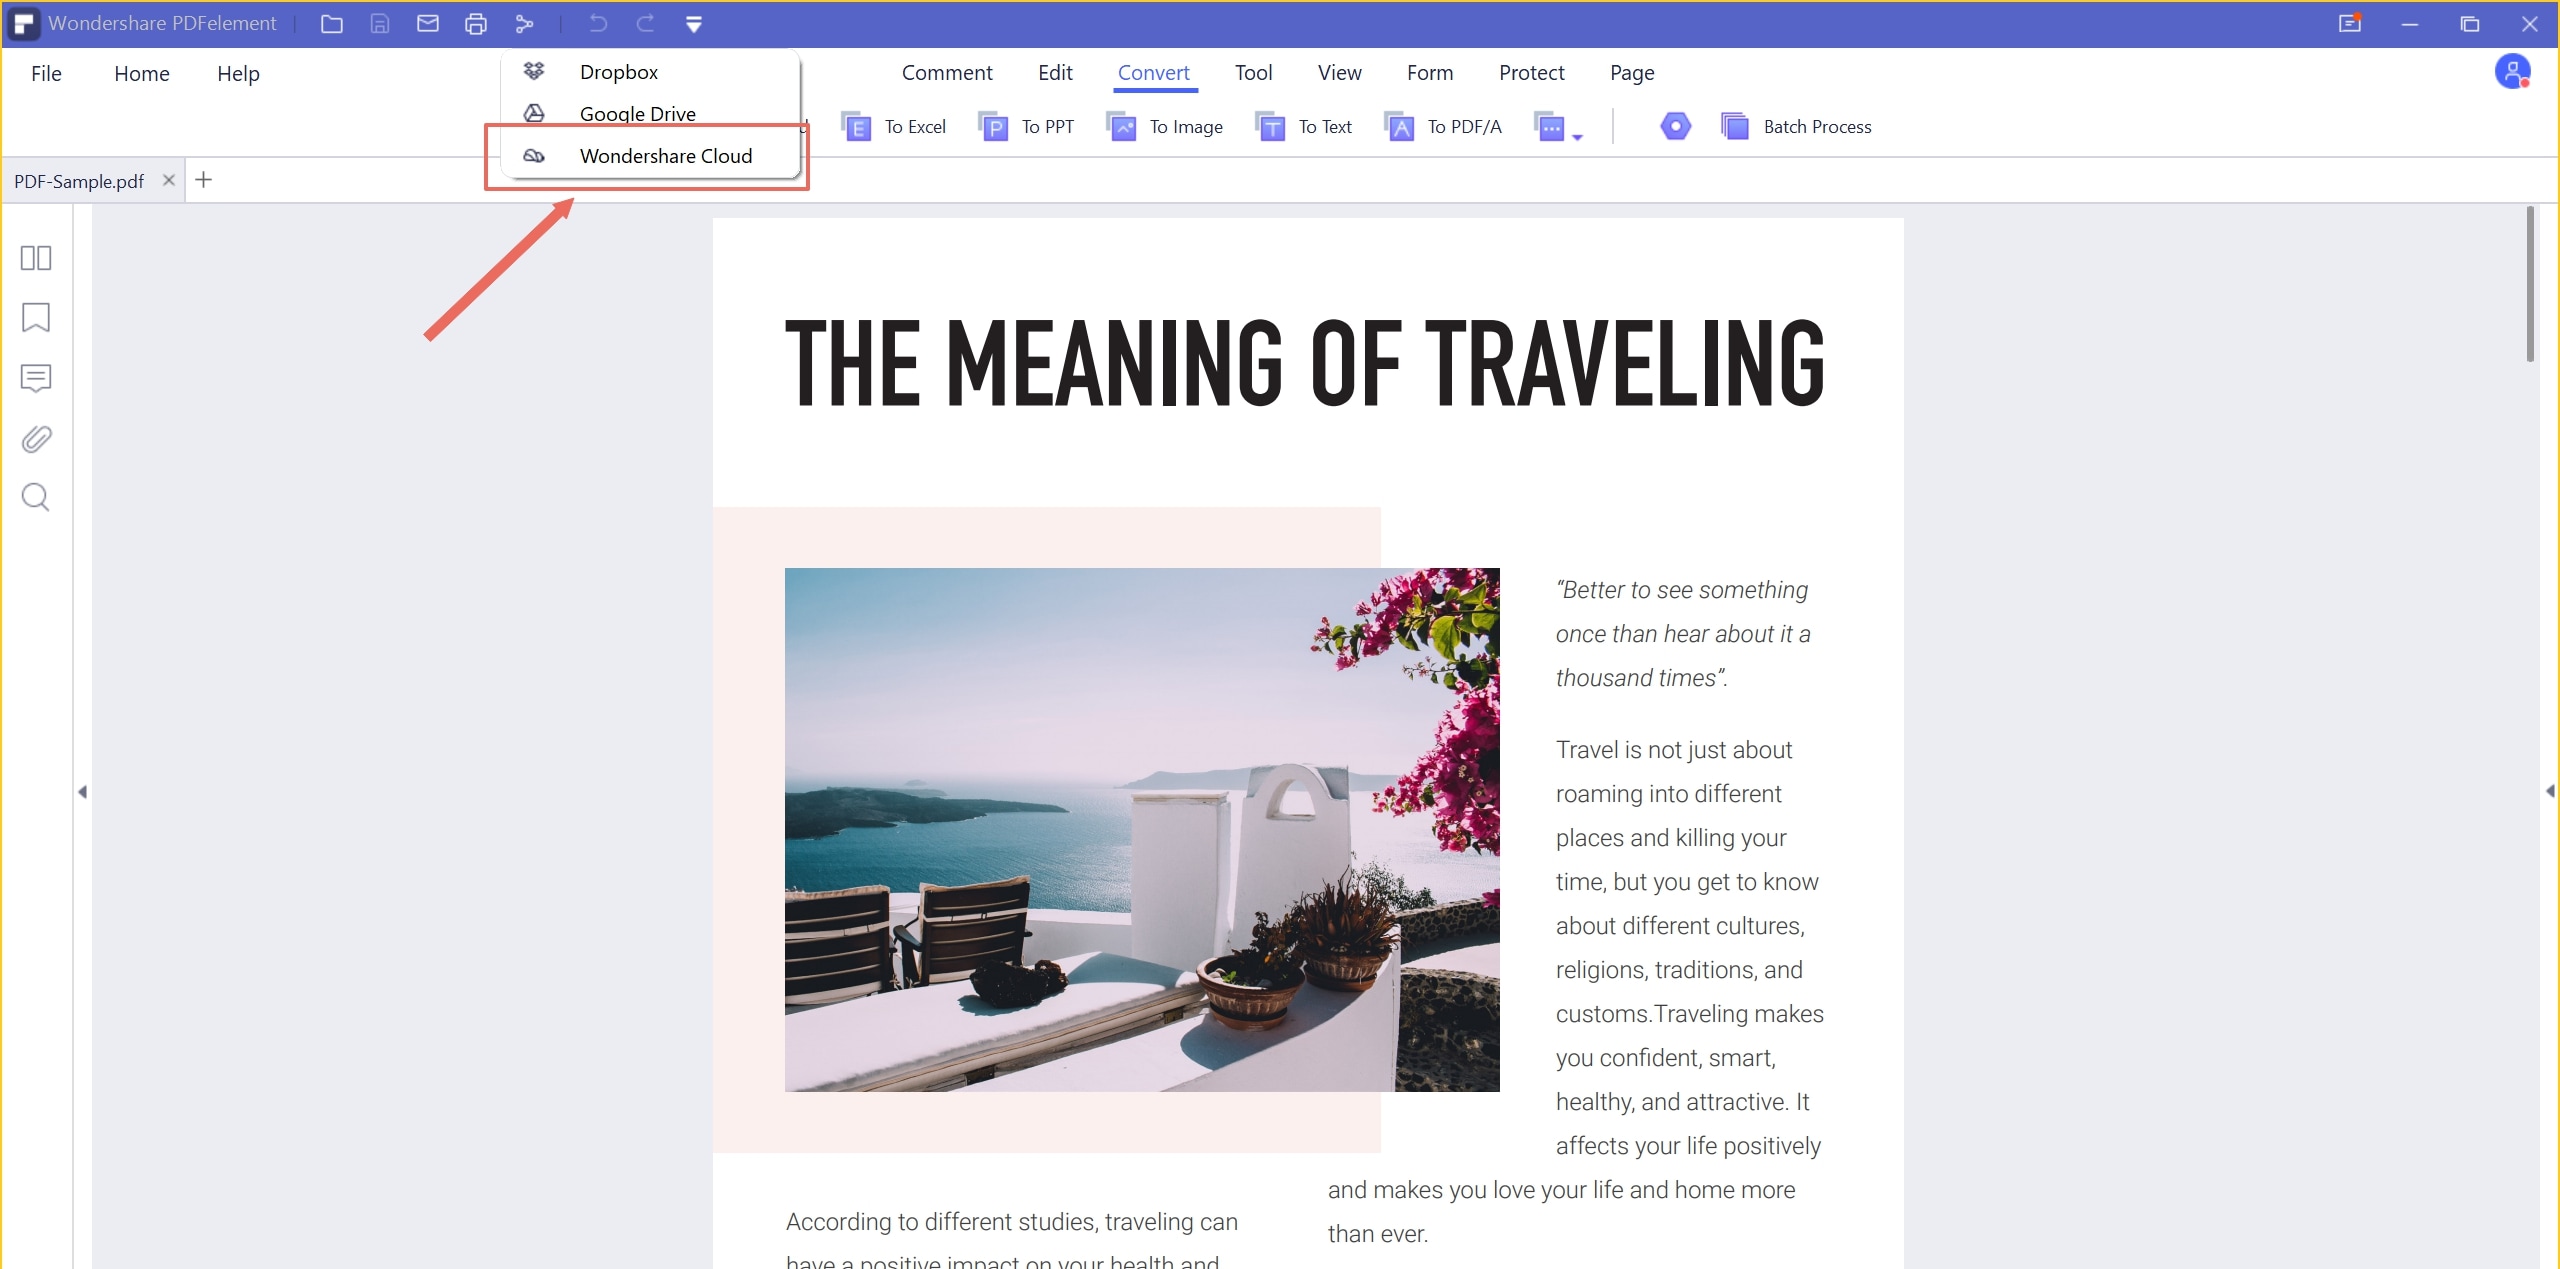
● Upload to cloud - From your PDFelement desktop application, click the Share icon and choose Wondershare Cloud to upload the current file to Wondershare PDFelement Cloud. The service will open in a new browser tab.
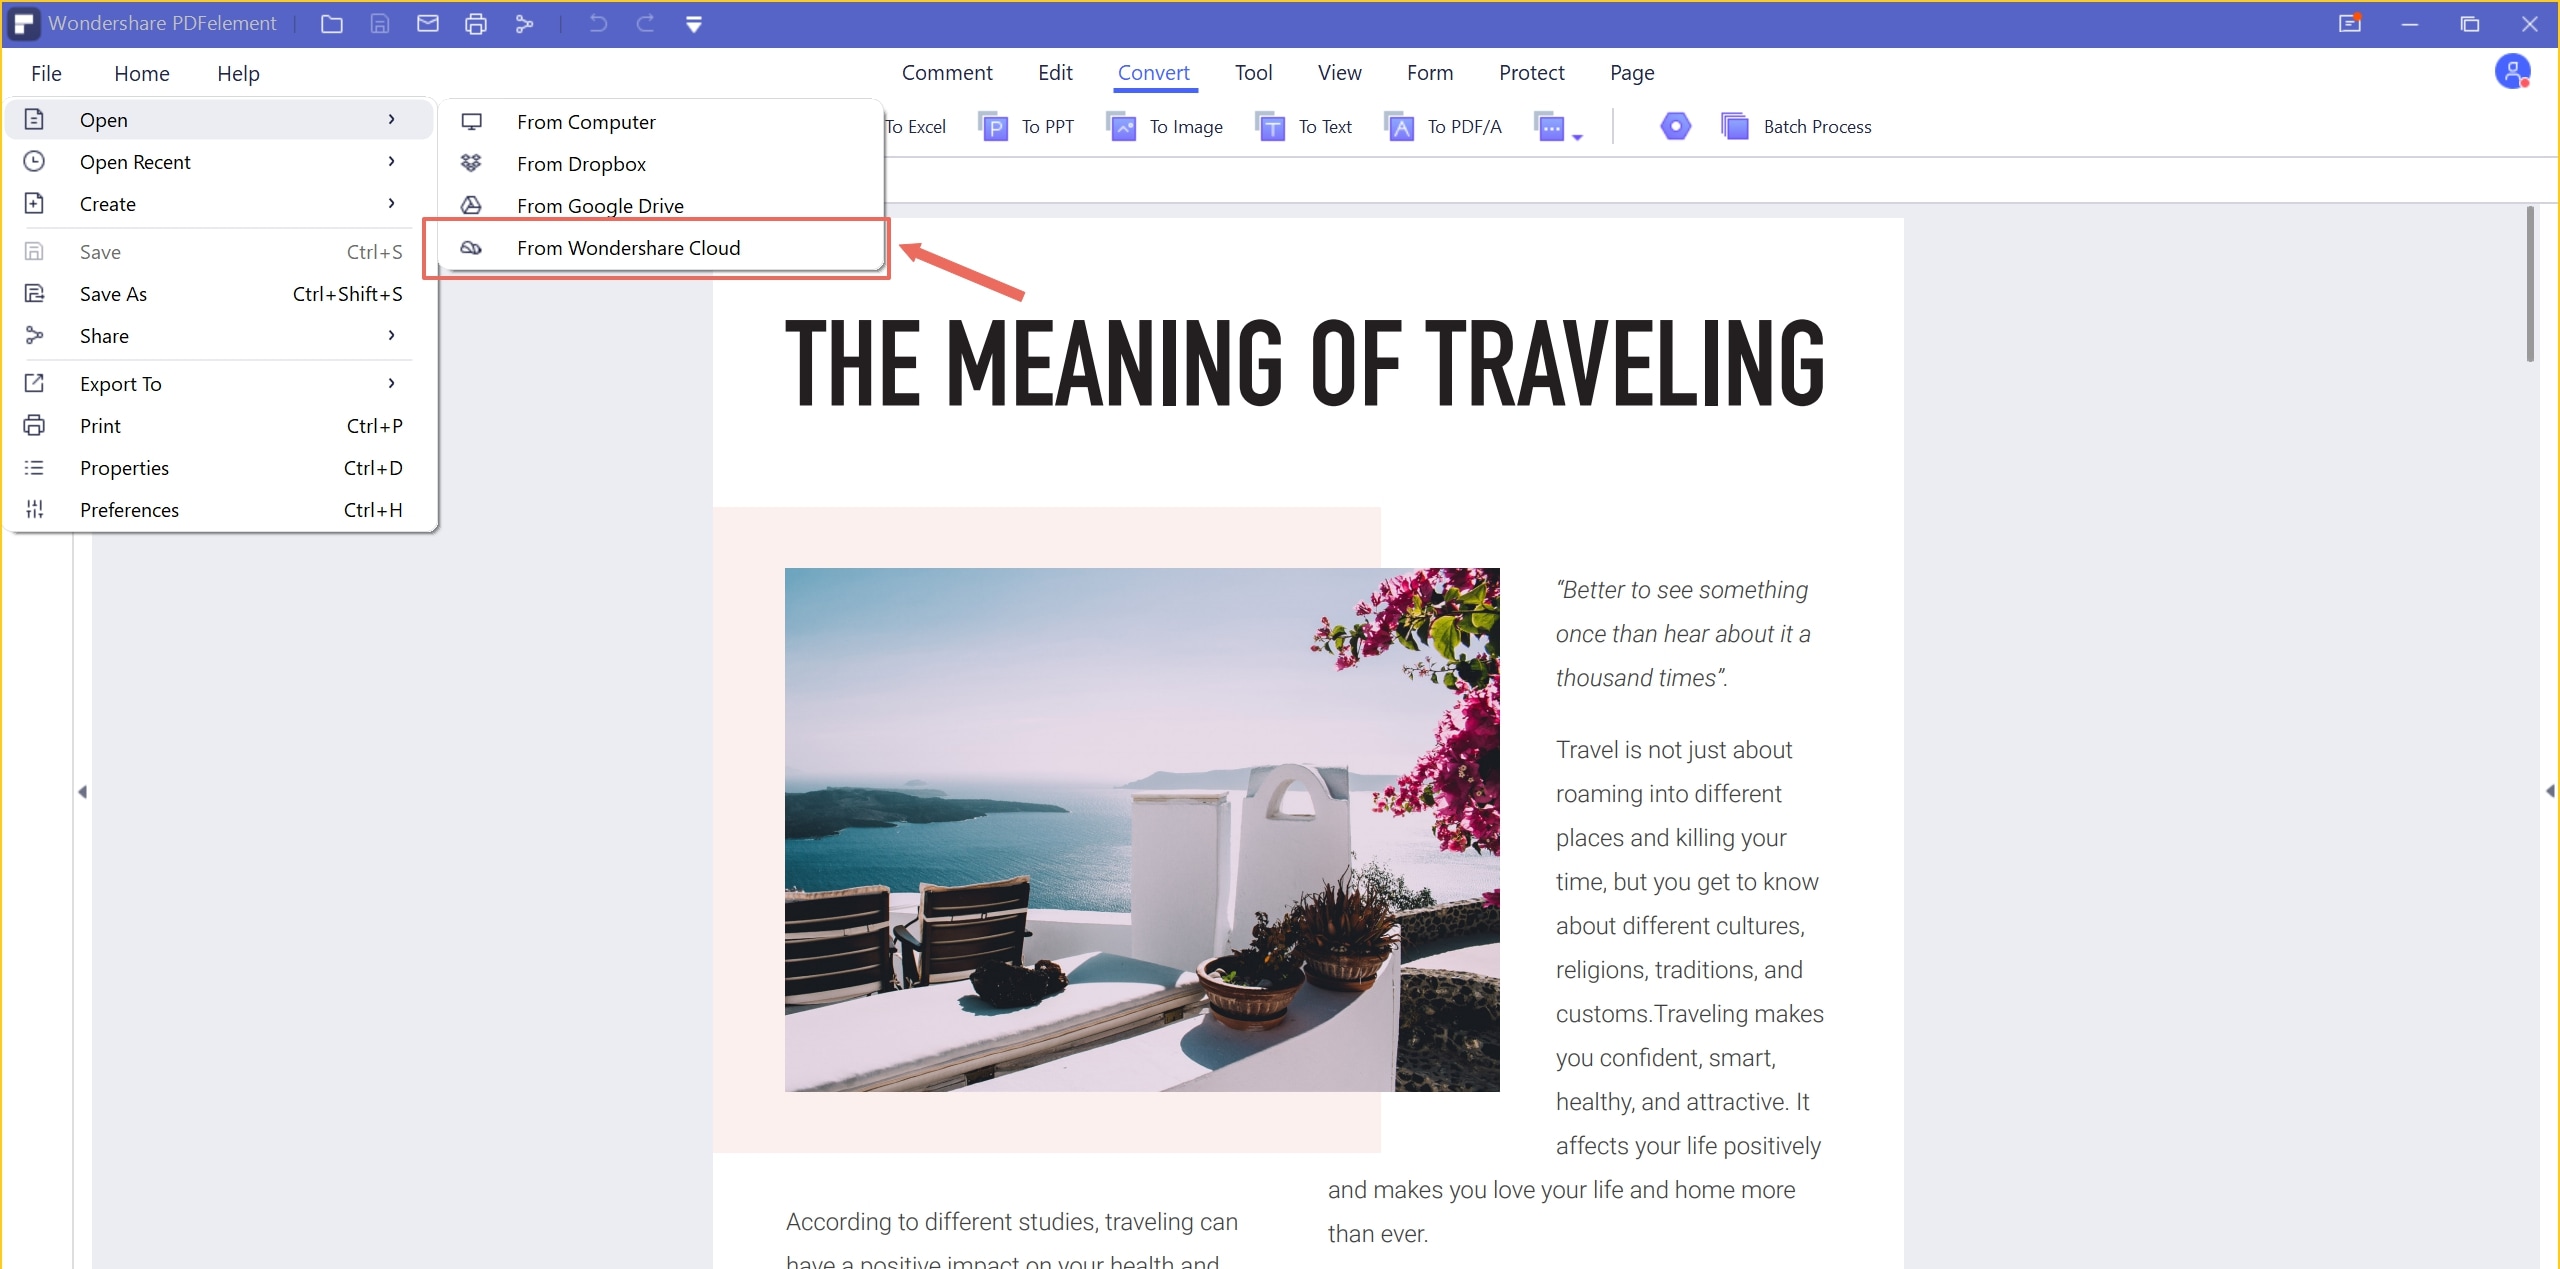
● Download from cloud - To fetch a file for editing or sharing, you can click Open in the File menu and choose From Wondershare Cloud to open your cloud login in a new browser tab. From here, you can follow the Download process to save the file locally and open it in PDFelement.
● Send for Signing - Click the Electronic Signature button under the Protect tab to launch a browser tab and land on the Sign tab of Wondershare PDFelement Cloud. Here, you can click Initiate under one of the sending options and prepare the current file to be sent for signature collection.

In Conclusion
As you saw, the upload to OneDrive process is simple enough and it gives you a host of other tools you can use to perform various actions. However, cloud storage can quickly get expensive, so if you work with PDFs more than other documents and you have a lot of document signing as part of your workflows, it’s better to opt for Wondershare PDFelement Cloud. The bundle option for PDFelement Pro DC gives you additional firepower to handle PDF documents, as shown above. In simple terms, it’s more affordable as well as better aligned with the PDF needs of an organization.


