 Home
>
PowerPoint Tips
> How to Curve Text in PowerPoint for Mac
Curving text in PowerPoint for Mac actually requires few skills. However, you need to be keen not to get lost in the process. Using WordArt, your presentation will look more creative and attracting. What’s more, you can input and transform your text into a variety of shapes and arcs by using WordArt. So this article provides a guide on how to curve text in PowerPoint for you.
How to Curve Text in PowerPoint for Mac
Step 1. Select WordArt
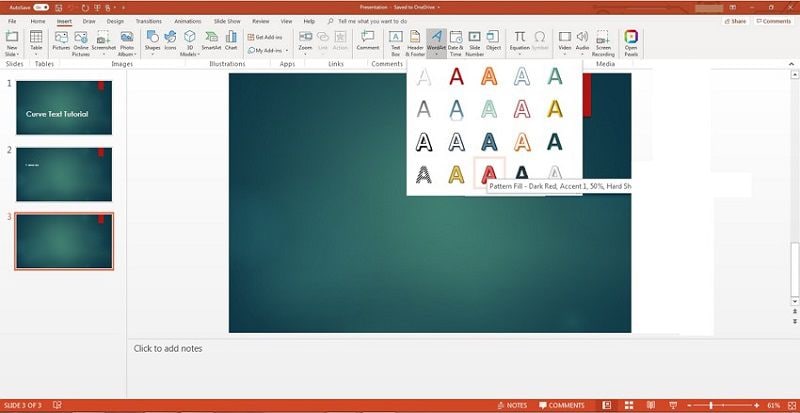
Launch PowerPoint in your PC and click on “Insert” on the menu bar, and then proceed to select “WordArt” under the text group. There are multiple WordArt options available to choose from to make your presentation presentable.
Step 2. Input Sample Text
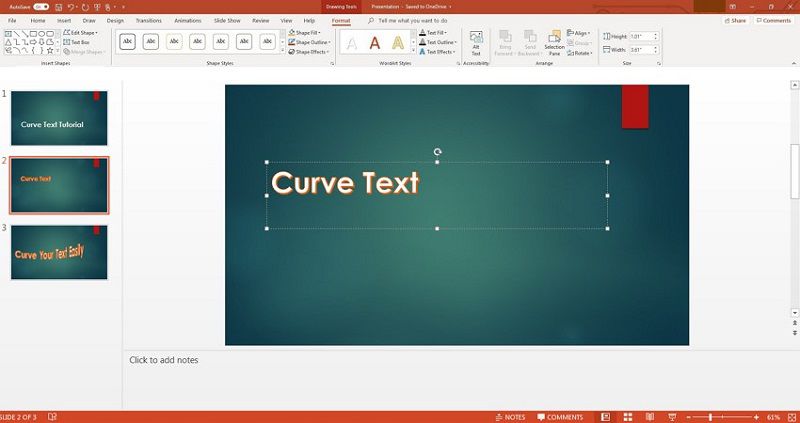
Select the text style you would like, and the selected style will be the same for all text input unless it’s changed. Then you can proceed to input your sample text.
Step 3. Curve Text in PowerPoint
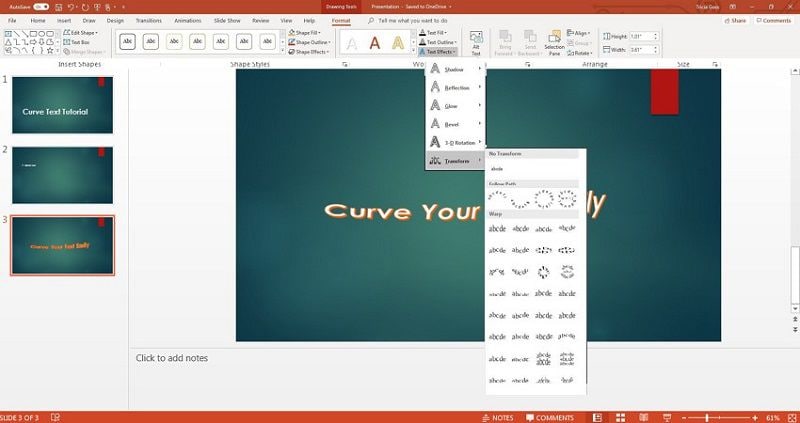
Once you input the sample text, you may proceed to edit the text effects and outline. This will be under the “Format” tab which pops up for editing the text. Highlight your text before you select the text effects to obtain the best text curve in PowerPoint mac for you. Under the WordArt styles, you can select the “Text Effects” tab. Move the cursor to “Transform” to get the available text curves for you. Move the cursor to different effects and preview text on the slide.
Adjust the curved text style
To resize your text to different sizes, you can use the control handles on the text box or border, helping enhance text readability. Apparently, you can opt to curve text in PowerPoint Mac 2016 to a different style. Just highlight the text and select another style. Moreover, you can select text fill or outline to change to different colors.
The Best PDF Editor for You
Wondershare PDFelement - PDF Editor Wondershare PDFelement Wondershare PDFelement for Mac is a powerful software with a variety of features not available in other PDF editors. Using PDFelement, you can create, edit, review and annotate PDF documents easily. In addition, you can convert PDF to presentation to add curved text in PowerPoint for mac for it look catchy. It’s simply designed to convey information in PDF format seamlessly. Here are the features of PDFelement.
- Create by scanning or converting PDF documents which can be easily opened from other devices.
- Editing feature to edit PDF and scanned documents.
- Convert PDF documents to and from other formats easily to allow editing or other features.
- Remotely and digitally sign PDF documents to approve the execution of some work.
- Review PDF documents regarding other readers’ comments on the document.
- Create and edit forms either PDF or web easily.
- Encrypt PDF documents from external unauthorized access.
- Optical Character Recognition feature to extract text from scanned documents to PDF and convert to over 20 languages.
How to Edit Text in PDF on Mac
Step 1. Add Text
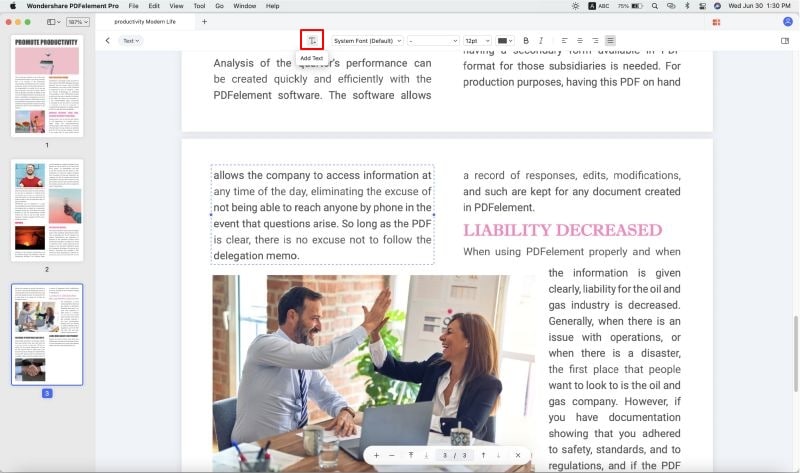
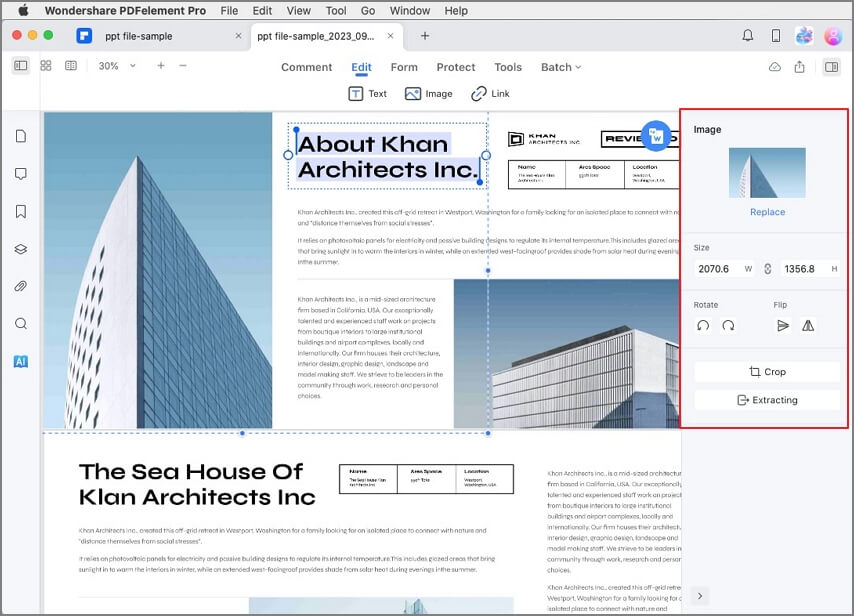
Upload document to PDFelement by clicking the “Open File” button. After uploading the file, click the “Text” button and choose “Add Text” to add text to PDF. Proceed to click on the PDF to add text. A text box will appear where to add text and you can start typing your texts.
Step 2. Edit Text
Using PDFelement, editing text is simplified since it separates texts in separate text boxes. You can easily add, edit and delete text from the PDF. Additionally, you can change fonts as you wish without altering the document flow.
Step 3. Save the Changes
After adding and editing texts on your PDF, now click on “File” and click on the “Save” button. If you want to rename your PDf file, click on the “Save As” option.

Free Download or Buy PDFelement right now!
Free Download or Buy PDFelement right now!
Try for Free right now!
Try for Free right now!
 100% Secure |
 G2 Rating: 4.5/5 |
  100% Secure


Elise Williams
chief Editor