
PDFelement-Powerful and Simple PDF Editor
Get started with the easiest way to manage PDFs with PDFelement!
Google Drive is an online cloud storage location for files, including photos, videos, and documents. This free storage and synchronization service from Google makes it easy to store files online and access them anytime, anywhere. Using Google Drive to store files eliminates the need to send email attachments or save files on USB or other physical drives prone to damage.
While people use Google Drive to store their files, the free space gets filled, and you will be forced to buy more space. However, you can avoid this by deleting those files you don't need on Google Drive. This way, you create more space for other new files on Google Drive. Again, you might want to delete the files for security and privacy reasons. However, you should know how to delete PDF files from Google Drive. Fortunately, this article takes you through a complete guide on how to delete PDFs from Google Drive.
Part 1. How to Delete PDF from Google Drive
Deleting PDF files from Google Drive is not a complex process. It all depends on the gadget that you are using. Different devices allow users to delete PDF files from Google Drive differently. The following steps explain how to delete PDFs from Google Drive on different devices.
Computer
A desktop PC or laptop computer offers a broader screen for ease of navigation. This makes it effortless to delete PDFs from Google Drive. It doesn't matter the version or type of computer you are using. The steps are just the same because you only need a browser. The following steps illustrate how to delete PDF from Google Drive using a computer.
Step 1. On your computer, open the Google Drive Webpage using a suitable browser.
Step 2. Login to your Google Drive account using the correct credentials and head to the "My Drive" section.
Step 3. Select the folder that contains the PDF file you want to delete and select that file. If you want to delete multiple files, just select them all. Right-click the target PDF file, and from the options given, choose "Remove."
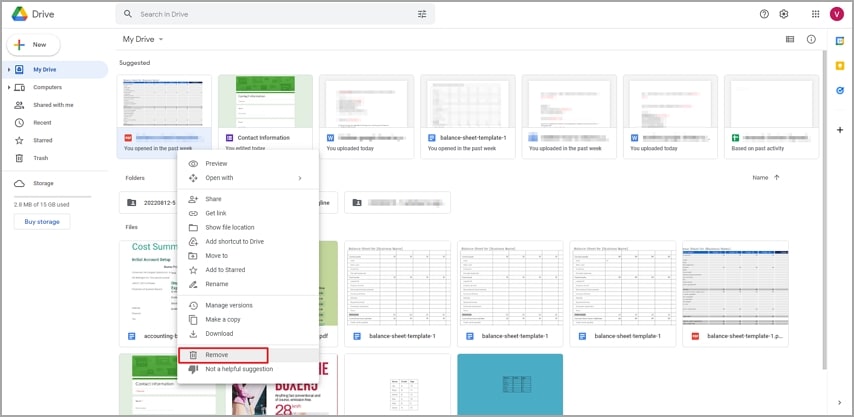
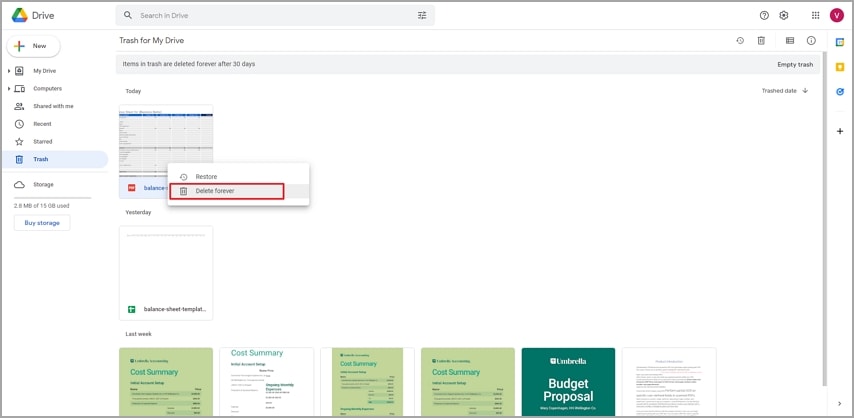
Step 4. The PDF file will immediately be deleted from Google Drive. The deletion speed will depend on the size and number of PDF files you are deleted. Once the process is complete, you should see a notification that the deleted PDF is available in the "Trash" section. If you want to permanently delete the file, head to the "Trash" section and find that PDF file. Right-click on it and choose the "Delete Forever" option.
iPhone/iPad
iPhone also provides a user-friendly interface to delete PDF from Google Drive. If the file is shared and you are the owner, you and the others won't view it once you delete it. Otherwise, if you are not the owner, the others will continue viewing the file even after you delete it on your Google Drive. When you delete a PDF file from Google Drive via iPhone, the file is taken to the trash. If this file is restored from the trash within 30 days, it is automatically deleted. The following steps show how to delete PDF from Google Drive via iPhone/iPad.
Step 1. On your iPhone/iPad, locate and open the "Google Drive" app.
Step 2. Locate the file you want to delete from Google Drive and hit the three dots on the right of that file.
Step 3. Select the "Remove" option from the options displayed, and the file is taken to the trash section.
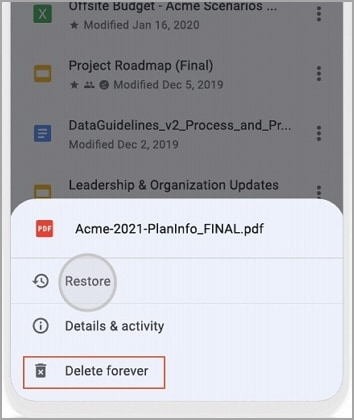
Step 4. If you want to delete it permanently, go to the trash section and remove it. To do so, click tap the three horizontal lines at the top-right of the screen and select "Trash" from the subsequent options. Tap the three dots beside the respective PDF file and choose "Delete forever."
Android
Android devices are common, and many people operate them with ease. Thanks to their user-friendly interface. Deleting PDF from Google Drive on Android is not an exception. It is a seamless process, and you don't need an expert to help you navigate the steps. Android allows users to permanently delete the target PDF files from Google Drive or save them in Google Drive "Trash." The steps are illustrated below.
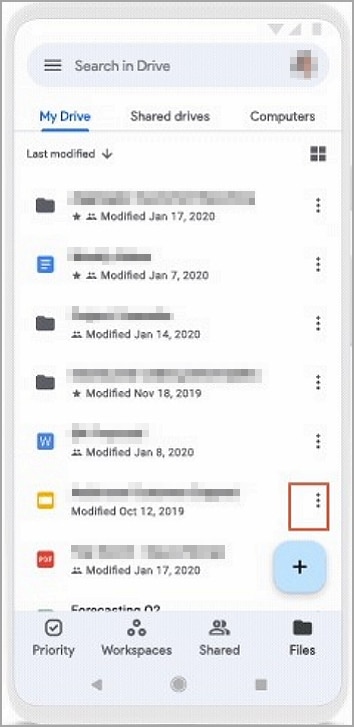
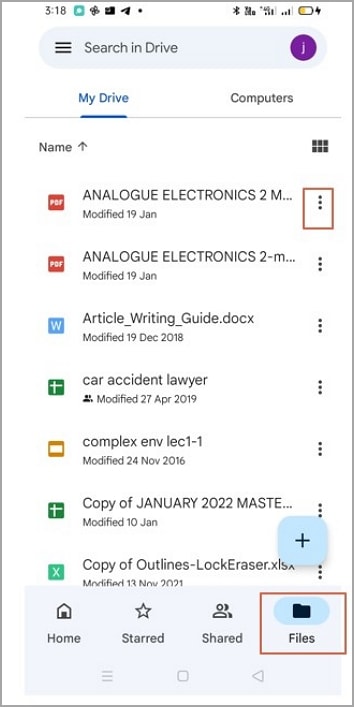
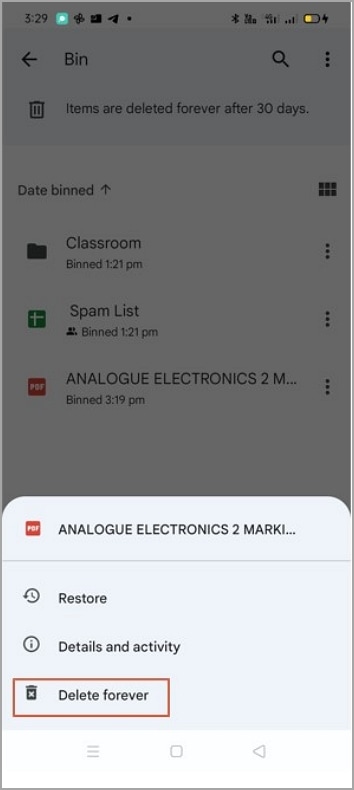
Step 1. Open the Google Drive app on your Android device. When the app loads, tap the "Files" icon at the bottom-right of the screen to display the various folders in your Google Drive account.
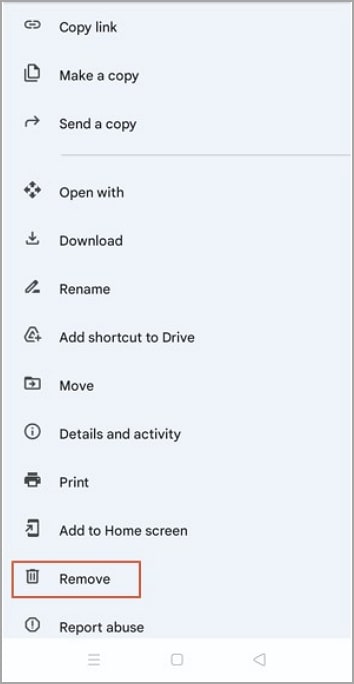
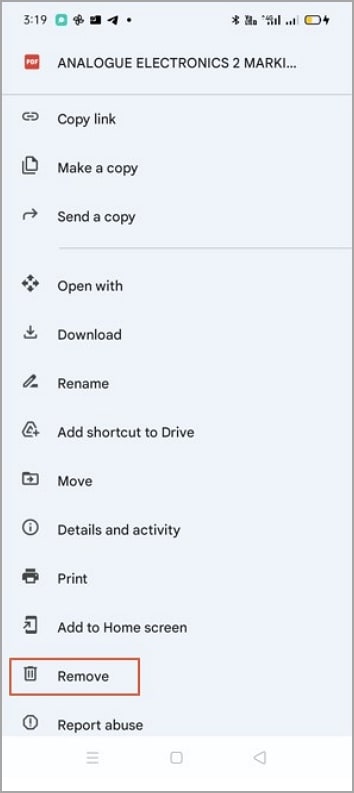
Step 2. Identify the PDF file you want to remove, then tap the three dots that appear on its right. From the options displayed, tap the "Remove" icon. If you want to delete multiple PDF files from Google Drive, select the target PDF files, then click the three dots at the top-right of the screen and choose "Remove."
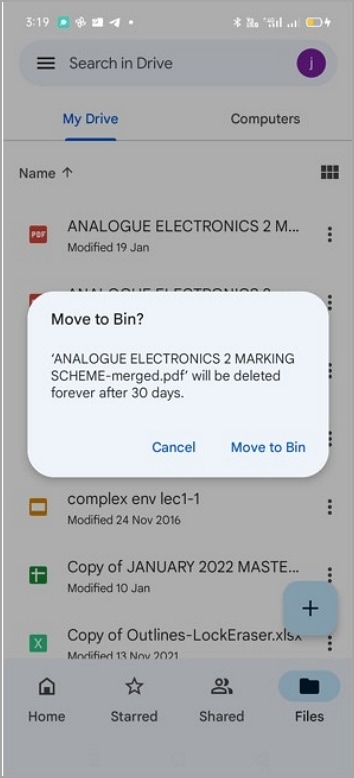
Step 3. From the pop-up that appears on the screen, choose the "Move to Bin" option. The PDF files will be moved to Google Drive Bin.
Step 4. If you want to delete the PDF files from Google Drive permanently, you need to remove them from the bin. Just click the three horizontal lines at the top left of the screen. From the options given, select "Bin." Tap the three dots on the right of the respective PDF file and select the "Delete Forever" option.
Part 2. How To Remove Pages From a PDF in Google Drive
Deleting PDF pages in Google Drive is not that easy. However, connecting Google Drive with the DocHub add-on makes it easier. The following steps illustrate how to remove pages from a PDF in Google Drive.
Step 1. Once you have connected Google Drive with DocHub, open your Google Drive account using a suitable browser. Right-click the target PDF file, select "Open With," and choose "DocHub."
Step 2. When the PDF file is loaded in DocHub, the page control features will appear on the left panel. Scroll down and select the pages you want to delete from your PDF file.
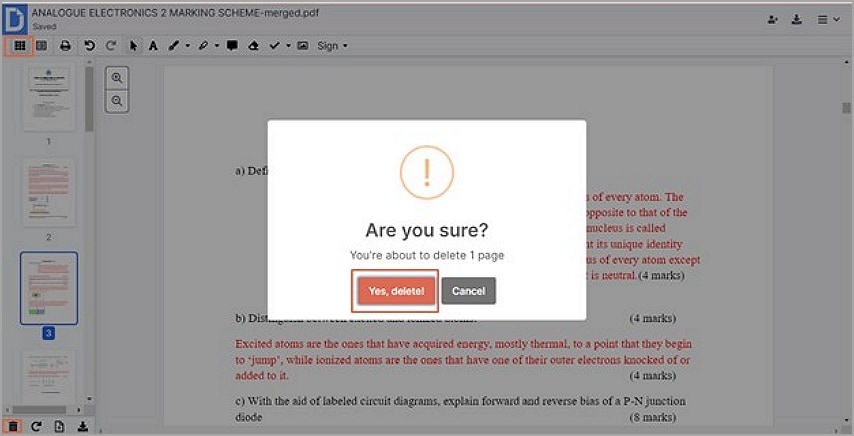
Step 3. Click the "Delete" icon at the bottom of this page control panel. Click the "Yes Delete" button from the pop-up to confirm that you want to delete the selected PDF pages.
Tips: Make sure you connect Google Drive with DocHub to make it easy for you to open files in DocHub directly from Google Drive.
Part 3. Offline Page Remover Tool – Wondershare PDFelement
If you want to remove PDF pages offline, you definitely need a proper PDF tool. Fortunately, PDFelement is that tool you direly need. It transforms how you delete PDF pages offline and gives you a wonderful experience with your PDF files. This program is fast, easy to use, and has a collection of features that work in tandem to produce quality output. Whether you are using Mac or Windows, you can easily remove pages on your PDF. You don't have to be a seasoned user to remove PDF pages on PDFelement. Any user, including newbies, will find it straightforward and full of fun. The following steps illustrate how to remove PDF pages with Wondershare PDFelement - PDF Editor Wondershare PDFelement Wondershare PDFelement.


 G2 Rating: 4.5/5 |
 100% Secure
G2 Rating: 4.5/5 |100% Secure
Step 1 To begin with, launch PDFelement on your device and upload the PDF file you want to delete its pages.
Step 2 When the PDF file is successfully loaded, head to the "Page" tab on the toolbar, then select the pages you want to be deleted from your PDF file. Alternatively, you can press the Ctrl key on your keyboard and select the pages you want to delete.
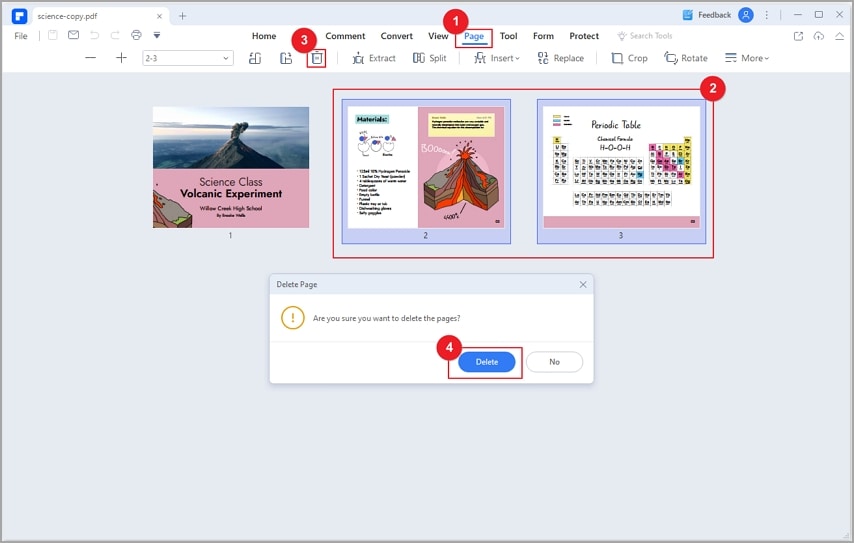
Step 3 Finally, click the "Delete" button and then "Delete" on the subsequent pop-up to confirm that you want to delete the PDF pages. Wondershare PDFelement will immediately delete the PDF pages.
Now that you have deleted the target PDF pages, you need to save the changes you made. To save these changes, go to the "File" menu and select the "Save" button.
Part 4. Other Page Organize Features of Wondershare PDFelement
PDFelement is not limited. It offers plenty of features that make it easy and effective to organize PDF pages and meet your needs. Some of these page organization features include.
G2 Rating: 4.5/5 |100% Secure
- Split PDF- This program allows users to split large PDFs into multiple PDF files of several pages or single pages.
- Insert Pages- This program allows you to add blank or pages with content to a PDF file. You can insert single or multiple pages depending on your need.
- Extract Pages- PDFelement allows you to extract specific pages in a PDF file. You can choose to extract one page, multiple pages, odd, or even pages depending on your preferences.
- Reorder PDF Pages- If you are not satisfied with the order of your PDF pages, you can change the order with PDFelement. You simply rearrange them on the page thumbnails.
- Crop PDF Pages- PDFelement makes it easy to crop and resize PDF pages with the help of inbuilt tools like TrimBox and CropBox.
- Replace PDF Pages- With this program, you can replace one or multiple pages in your PDF files with pages from another PDF file. Furthermore, you can replace the entire PDF document.

