
In today's world, sending signed documents by email is very important. It saves time and makes work easy. This is because we do most of our work on computers and online. People use email to send important papers that need a signature. This can be for jobs, agreements, or school forms.
Our article will explain this step by step and show you different ways to send signed documents by email. We will also discuss programs on your computer and websites that help with this. These tools make signing and sending documents without printing or scanning easy. This guide is for everyone. You will find helpful tips if you are new to this or have done it before. Our goal is to make sending signed documents by email simple for you.
In this article
Part 1. How Do I Send a Signed Document by Email
Now, let's discuss how to send signed documents by email. We will examine different methods, each easy to follow. You will learn how to use your computer or online tools to sign and email papers, making your work faster and simpler.
Method 1: Use PDFelement To Send a Signed Document by Email
PDFelement is a program that helps you work with PDF documents. It's great for signing documents without having to print them out. This is very useful today when many things are done online. PDFelement lets you add your signature to any PDF document. This means you can sign papers from your computer or phone.


 G2 Rating: 4.5/5 |
 100% Secure
This tool is handy for jobs, school, or any paperwork that needs a signature. With PDFelement, you can easily put your signature on documents and quickly send them by email, saving you time. You don't have to print the document, sign it with a pen, and scan it back into the computer.
PDFelement is also safe to use. It keeps your documents and signatures secure. This is important when you're dealing with important papers.
People like PDFelement because it's not hard to use. Even if you're not good with computers, you can learn how to use them fast. It makes signing documents and sending them by email very simple. This tool can help anyone who needs to sign documents often.
How To Sign a Document With PDFelement
PDFelement is a tool that helps you sign documents on your computer. It's very useful for papers that must be safe and can be checked for who signed them. Here's how to use PDFelement to sign a document:
Step1
First, open your document in PDFelement. Look for a section called "Protect."
Step2
Next, in the "Protect" section, find and click on "Sign Document." Then, click on the part of the document where you want your signature to go.
Step3
A small window will appear. This is where you can add a signature you've used before or create a new one.
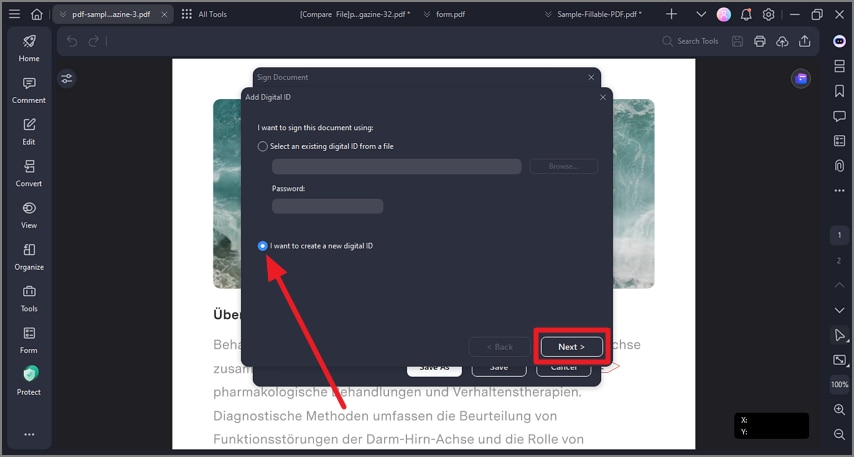
Step4
If this is your first time, you must create a new signature. You'll put in some information about yourself to create it.
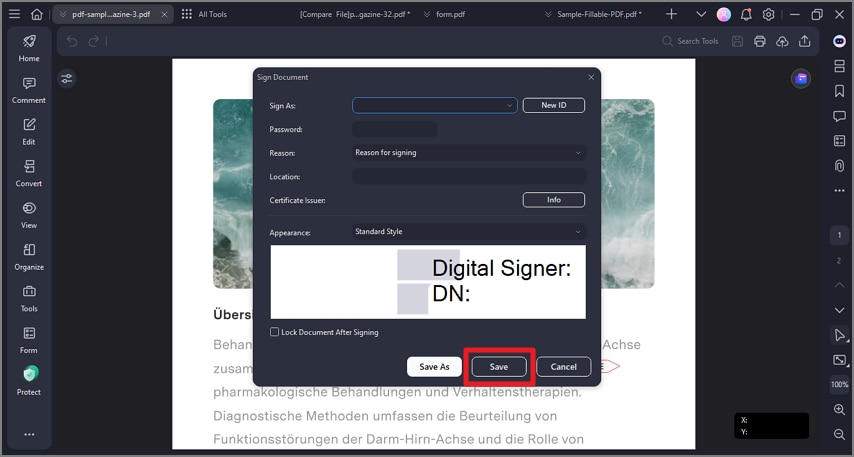
Step5
After you do this, you will see your new signature in a box on the document. Then, just click "Sign," and your signature will be added to the document.
G2 Rating: 4.5/5 |100% Secure
This way, you can quickly sign documents without printing them out. It makes everything faster and keeps your documents secure.
Sending the Signed Document via Email Using PDFelement
After signing your document in PDFelement, you can email it directly from the program. This is a quick way to send your signed document to others. Here's how you do it:
Step1
Look for a downward-pointing icon, then find the "Send Email" button at the top left of PDFelement. When you click this, your email program will open on its own.
Step2
The good news is that the document you just signed will already be attached to a new email. You don't need to attach it yourself.

Step3
Now, all you need to do is write the email address of the person you're sending it to. Remember to add a subject line to your email. Then, send it off.
This feature in PDFelement makes it easy to share your important documents with others right after you sign them. If you need to, you can save the signed document on your computer and attach it to an email manually, just like any other file.
Method 2: Use Jotform To Email a Signed Document
Jotform is a website that lets you make, sign, and send documents easily. It's great for forms that need a signature, like agreements or registrations. With Jotform, you can create a document, add a place for a signature, and email it all in one place. Here's how to do it:
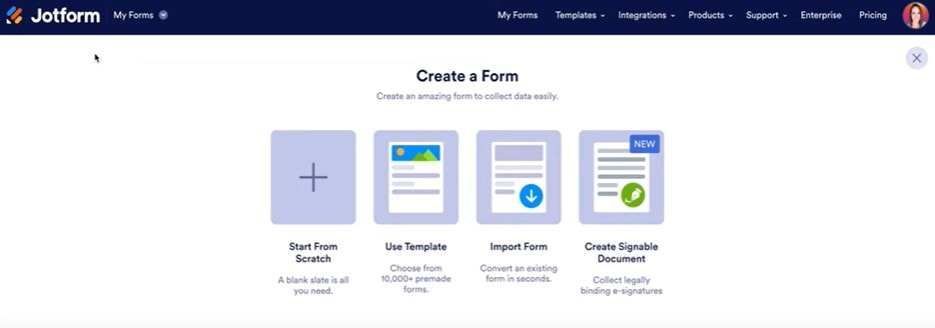
Step1
First, go to Jotform and pick a form template or make a new form. You can add questions or fields where people will put their answers. This is useful for collecting information before the signature.
G2 Rating: 4.5/5 |100% Secure
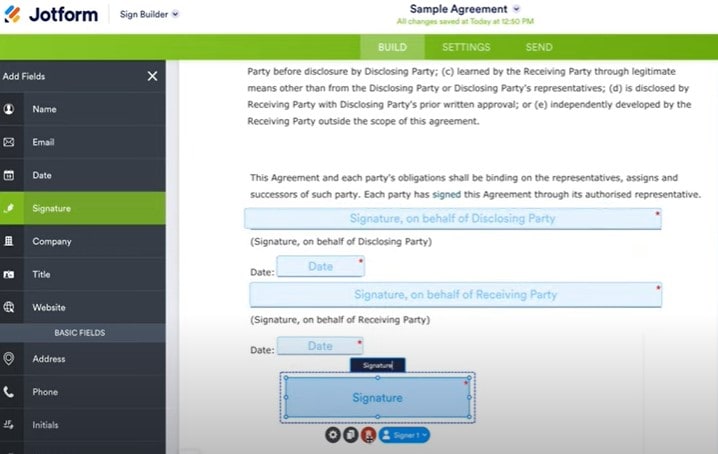
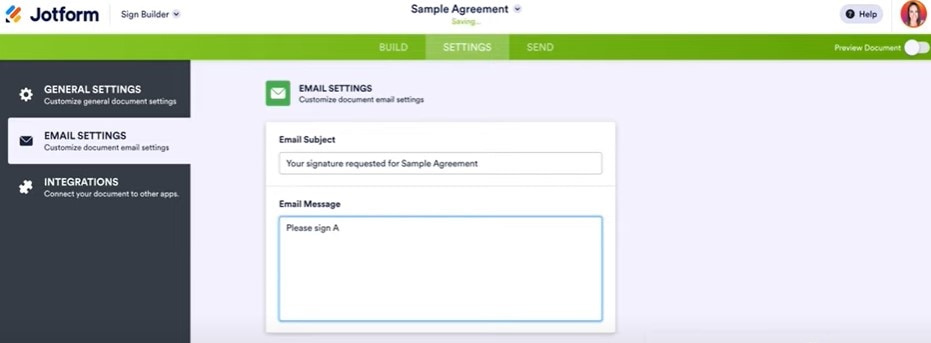
Step2
You'll find an option to add a signature field in your form. This lets the person signing the form do so on their computer or phone. It's simple and makes the form legally binding.
Step3
Once your form is ready, you can send it to others to complete and sign. Jotform allows you to share a link to your form via email or embed it on a website.
G2 Rating: 4.5/5 |100% Secure
Step4
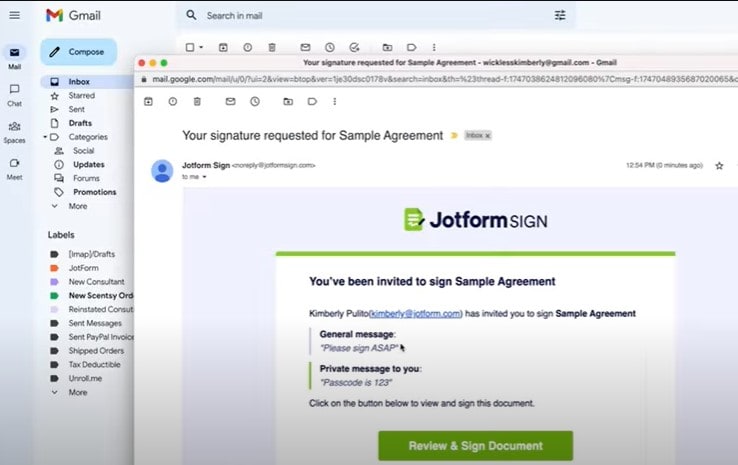
After someone fills out and signs your form, Jotform will notify you. You can then view the completed form.
Step5
Jotform makes it easy to email the signed document. You can set up your form so that a copy is automatically sent to your chosen email address once it's signed. This can be your email or someone else's, like a coworker or manager.
If you need to email the signed document manually:
Step1
Go to your Jotform account and find the signed form.
Step2
Download the signed document to your computer.
Step3
Open your email, create a new message, and attach the downloaded document.
Step4
Type in the email address of the person you're sending it to, add a subject, and write your message.
Step5
Send the email.
Using Jotform is a smooth way to handle documents that need signatures. It's all done online, so it saves time and paper. The process is straightforward, whether you're sending a form directly from Jotform or downloading it to email manually.
Method 3: Sign a Document Online and Use Gmail or Outlook to Send the Email
HiPDF is an online tool for working with documents. One handy feature lets you sign documents from your web browser. This is great for when you need to sign a paper quickly without printing it out. HiPDF is easy to use, and you can access it from anywhere, as long as you have internet access.
With HiPDF, you can add your signature to documents in a few clicks. This makes it super useful for signing contracts, forms, or any other document that needs your signature. It keeps things quick and simple, so you can sign documents and send them off without delay.
Besides signing documents, HiPDF offers other document tools. You can edit PDFs, convert them to other formats, and even protect them with a password. This makes HiPDF a good choice for many tasks, not just signing documents.
HiPDF is designed to be user-friendly. You don't need to be an expert to use it. Whether you're signing a document for the first time or you do it often, HiPDF makes the process easy.
How To Sign a Document Online With HiPDF
Signing a document online with HiPDF is easy. Here's how to do it:
Step1
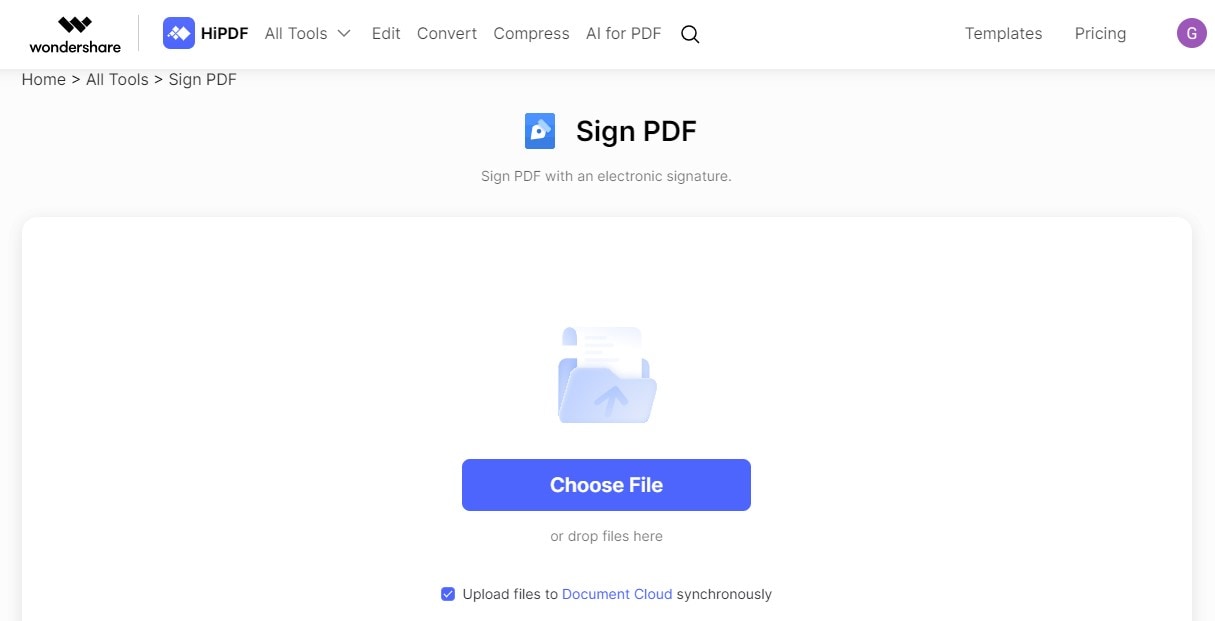
Go to the HiPDF website. Look for the "PDF Editor" in the top menu and click on it.
Step2
Click the "Choose File" button to find and upload the PDF document you want to sign. Once your file is uploaded, you'll see some editing options. One of these options is to sign your PDF online.
Step3
Look for the "Sign" icon on the top right. Clicking this opens a new window where you can choose how to add your signature. You can type, draw, or upload an image of your signature. Select the "Type" option for typing your signature, then type your name as you want it to appear on the document.
G2 Rating: 4.5/5 |100% Secure

Step4
After creating your signature, you can change size by dragging the box's corners around it. This helps ensure it fits well where you want it on the document.
Step5
Once you're happy with the appearance of your signature, click "Apply" to add it to your document. Then, click the "Download" icon to save the signed document to your computer.
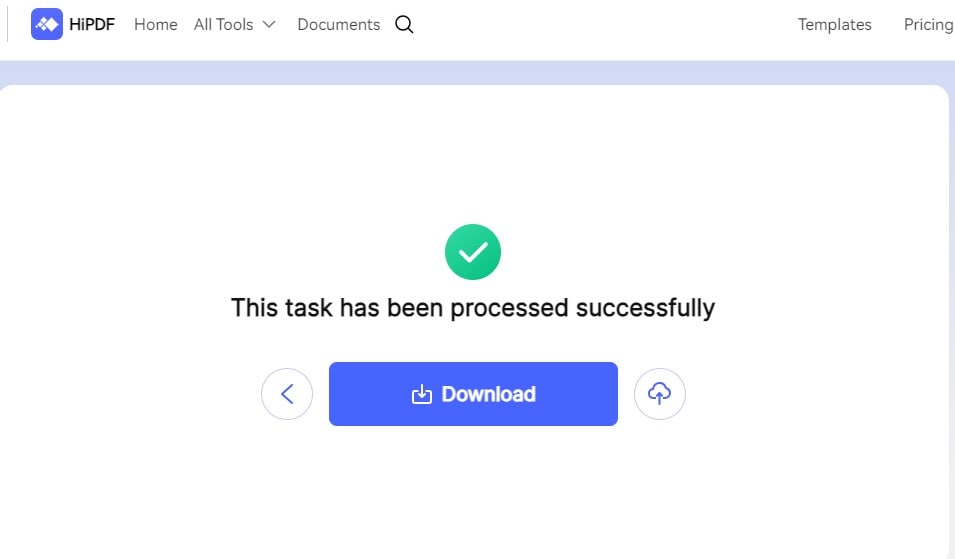
That's it! You've successfully signed a document online using HiPDF without needing to print anything.
Emailing the Signed Document Using Gmail or Outlook
Emailing a signed document is straightforward whether you're using Gmail or Outlook. Here’s how to do it in both:
For Gmail Users
Step1
Open your web browser, go to the Gmail website, and log into your account.
Step2
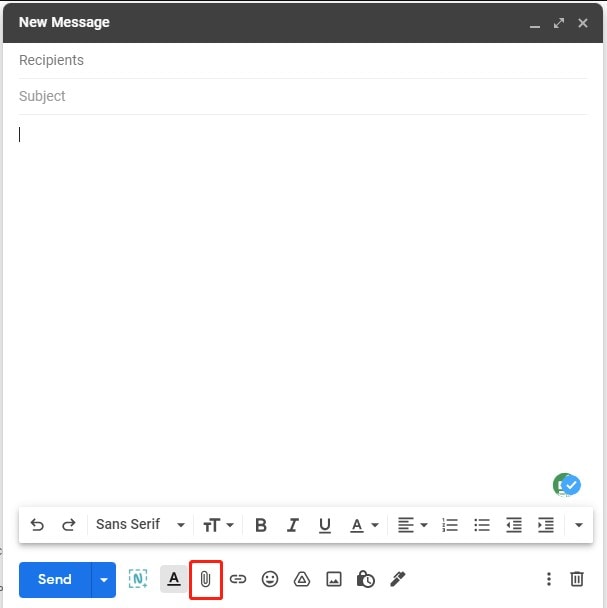
Click the "Compose" button on the left to start a new email.
Step3
Look for the paperclip icon at the bottom of the new email window. Click it to attach your signed document. A window will open for you to find and select your document. Once you find it, click "Open" to attach it to your email.
Step4
Type the recipient's email address in the "To" field. Add a subject and your message in the email body.
Step5
Once your document is attached and your email is ready, click the "Send" button.
For Outlook Users
Step1
Open your web browser, go to the Outlook website, and log into your account.
Step2
Click "New Message" or the "+" sign, usually found at the top left of the screen.
Step3
In the new email window, you'll see an attached icon (it looks like a paperclip or might be labeled "Attach"). Click it and select "Browse this computer" or "Upload from computer" to find your signed document. Select your document and click "Open" to attach it.
Step4
Enter the recipient's email address in the "To" field, write your subject, and type your message in the email body.
Step5
Check that everything is correct, and then click "Send" to email your signed document.
In Gmail, you can use Google Drive to attach larger documents directly from your Drive storage. This is handy if the signed document is too big for a standard email attachment.
In Outlook, you can use "Attach Recent" to quickly attach files you've recently worked on. This can save time if the signed document is one you've just modified or saved.
Both email services make it easy to attach and send signed documents, so you can choose the one that suits you best.
Part 2. Tips and Best Practices for Emailing Signed Documents
When emailing signed documents, keeping them safe is key. Here are some tips to help:
- Use Secure Email: Choose email services that offer encryption. Only you and the person you're emailing can read what's sent. Gmail and Outlook both have secure emailing options.
- Password Protect Your Documents: When you need to send a document securely, adding a password is a crucial step to ensure that only the intended recipients can access it. PDFelement is a user-friendly tool that allows you to effortlessly add a password to your documents.
- Check the Legal Stuff: Digital signatures are legal in many places, but it's good to check. Make sure the people getting your document know that digital signatures are okay. This helps avoid problems later.
- Tell Recipients to Check Spam: Sometimes, emails with attachments or links can end up in the spam folder. Tell the people you're sending documents to keep an eye on their spam folder.
By following these tips, you can help ensure that your signed documents are safe and accepted by those who receive them.
Conclusion
We talked about how to send signed documents by email. We showed you ways to sign documents with tools like PDFelement, Jotform, and HiPDF. We also explained how to email these documents using Gmail or Outlook. Plus, we gave tips on keeping your signed documents safe and ensuring they are legally okay. It's important to pick the method that works best for you. Remember to think about the safety and legal parts of your digital documents. This will help you send your documents safely and correctly.

