 Home
>
Redact PDF
> How to Print Password Protected PDF
What to do if a PDF document is password secured, and not allowed to print? Is there a method to solve this? Printing PDF that is protected with passwords or permissions tends to be stressful if you don’t have the right tool. If you are in such a situation, you can use PDFelement. Keep reading this article and learn how to print password protected PDF easily.
Part 1. How To Print Password Protected PDF on Windows
Wondershare PDFelement - PDF Editor Wondershare PDFelement Wondershare PDFelement is a PDF tool that allows you to perform nearly all PDF functions. You can add passwords and print PDF files including those that are protected. Furthermore, you can edit, create, convert, sign, fill PDF forms, OCR, annotate and share PDF files with PDFelement. Once you have installed this software you can perform all these functions.
Step 1. Open PDF File
First, you need to upload the protected PDF to the installed PDFelement. Open the program and click on the “Open File” button. After that, you have to select the password-protected PDF file and upload it. On uploading it, PDFelement will prompt you to enter the password of your document. Do so and click on the “OK” button.

Step 2. Unlock PDF
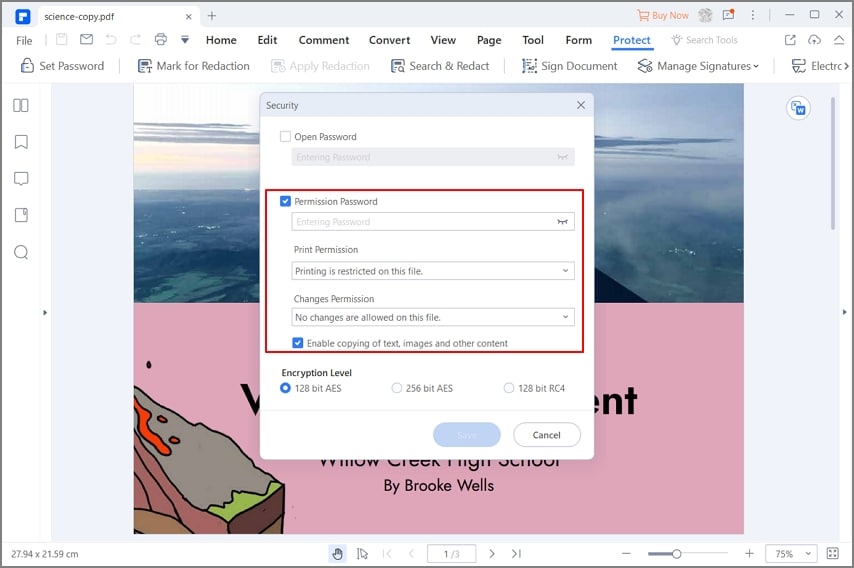
Next, you have to remove the password from the PDF. Click on “Protect” at the main menu and then tap on “Set Password.” After that, a set Password dialogue box will appear. It is at this stage that you can either unlock or lock your PDF file. Now, untick on the password and click on “Save” to delete the password. If the PDF file had permissions set, you can also remove them. Untick the permission password box and you will eventually remove the permission when you click on the “Save” button. From there you can now print the PDF file.

Step 3. Print Unlocked PDF
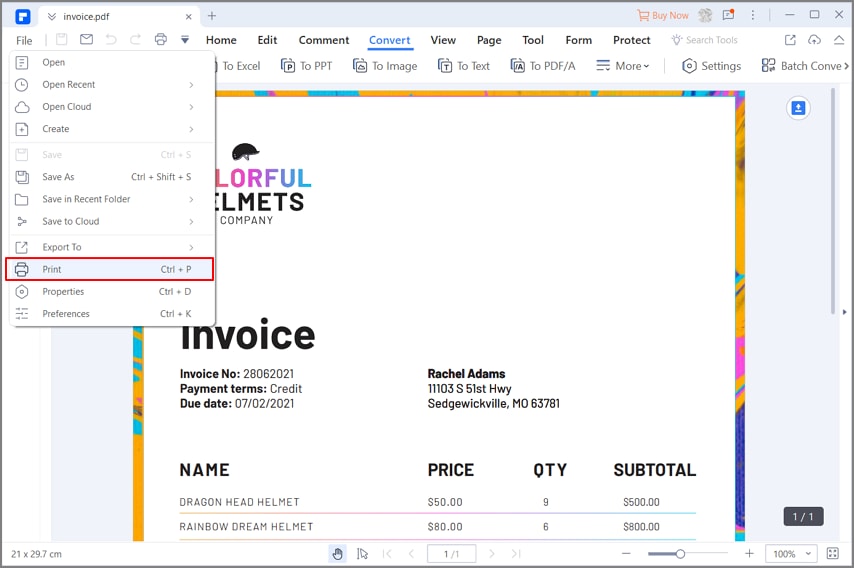
Now go to “File” on the main menu and click on the “Print” button. Here you can choose the printer that you want to use from the list. Alternatively, you can click on “CTRL+P” and you will get the print menu. Now, on the print dialogue box choose the printer that you want to use. After that, select the number of copies, page size, page range, and then the orientation. Since you want the entire document printed, then select all pages in the page range. You can click on the orientation to preview how the document will appear. Once you have set the print settings correctly. Finally, click on the “Print” button.

Part 2. How to Print Password Protected PDF on Mac
In case you are working on Mac operating system, Wondershare provides a remarkable software named PDFelement for printing a password protected pdf file. Here are the steps to do so;
Step 1: Import and Edit Secured PDF
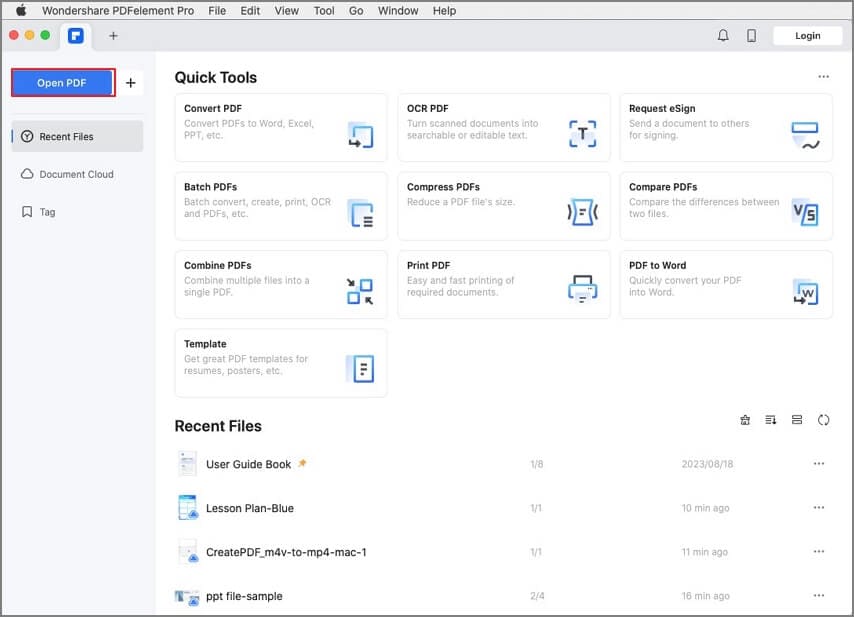
Launch the software and choose the “Open” button and your file will be opened in the software. If you are planning to make any necessary amendments, make them easily here and save your changes.

Step 2: Unlock Protected PDF
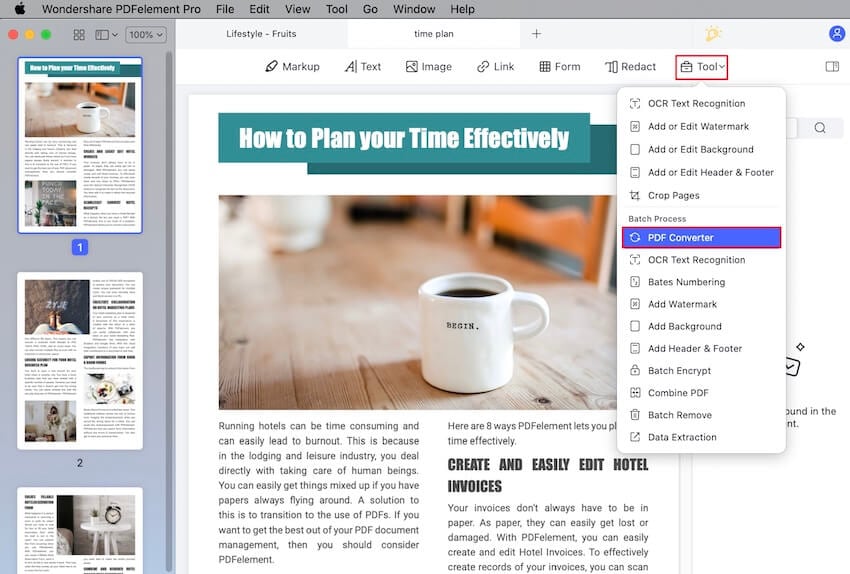
On the top toolbar click the “Tool” button and then click “PDF Converter”. Here, add the secured pdf file and select “To Word” as output. You can also choose the page ranges you want to print. At last, click “Apply” to save the changes.

Step 3: Print the PDF
Once changes are saved, go to “File” and then “Print” and select the printing options to start printing the pdf.

Part 3. How to Print Password Protected PDF Using Chrome
Google Chrome is capable of doing wonders and this is a perfect example. In the implementation of this method, you need to remove the password from the pdf file by putting the required credentials and making it unsecure. Here are the steps to follow;
Step 1: locate your pdf after opening the file explorer windows. Right-click the pdf file and choose “Open with” > “Google Chrome” or you can simply drag and drop the pdf to Google Chrome.
Step 2: Once the pdf file is opened, you will have a few options on the top-right corner of the page, click the printing icon.
Step 3: A new window will pop-up and you can make the amendments regarding new print job here. Once done, choose “Save as PDF” option from the “Destination” drop-down menu, and save the document. Now, open the saved pdf document and you can easily print this unsecured pdf document now.
Part 4. How to Print Protected PDFs with Microsoft PDF Writer
Another efficient method to print password protected pdfs is to use Microsoft PDF Writer. It is built-in feature in Windows 10 for the users. Here are the steps to follow;
Step 1: Locate your pdf file and right-click on it and choose “Open with” > “Microsoft Edge”.
Step 2: The pdf file will be opened in the edge and you will have a lot of options in the top toolbar. Click print icon and move forward.
Step 3: A new dialog will open up, located the printer dropdown menu and click on “Microsoft Print to PDF” and your unsecured version of the pdf file will be saved.
Step 4: In the last step, double-click on the newly saved pdf file and use “CNTRL + P” command to print the document.
Free Download or Buy PDFelement right now!
Free Download or Buy PDFelement right now!
Try for Free right now!
Try for Free right now!
 100% Secure |

Elise Williams
chief Editor