PDFelement-Powerful and Simple PDF Editor
Get started with the easiest way to manage PDFs with PDFelement!
I just created a write-up for a project in my organization using my iPhone's built-in Notes app. But I need to share it with my co-workers in PDF format. Please, how can I create PDF on iPhone from Notes? Kindly help.
The Notes app on iPhone is a great tool for jotting thoughts and taking notes of important things. However, there are times when one might need to have his/her write-up on the Notes app as a PDF file.
Perhaps you're in a situation similar to the one mentioned user query above, don't worry, you've come to the right page to find a solution to your problem. In this article, we've explored different FAQs about the iPhone Notes app and given the ideal answer to them.
In this article
Q1: What is "Notes" on iPhone or iPad
The Notes app on iPhone/iPad is a lightweight built-in tool that allows users to create write-ups, jot down thoughts, create checklists, and execute lots more writing-related tasks seamlessly. Yes, with this app, users can easily take note of anything they wish to remember, and it makes it easy for users to sync notes across various iOS devices just by turning on the iCloud option for the Notes app in iPhone settings.
Q2: What Can You Do with Notes App?
As mentioned earlier, Notes app allows users to create write-ups, jot down thoughts, create a checklist, and do lots more. Below is a list of things you can do with the Notes app on your iPhone;
- Create folders
- Sketch ideas
- Create checklists
- Share notes and folders to other apps
- Draw text with Apple Pencil
- Scan documents or photos
- Change text formatting
- Sort notes and folders from newest to oldest or vice versa
- Lock notes
Q3: How to Create New Notes on iPhone or iPad?
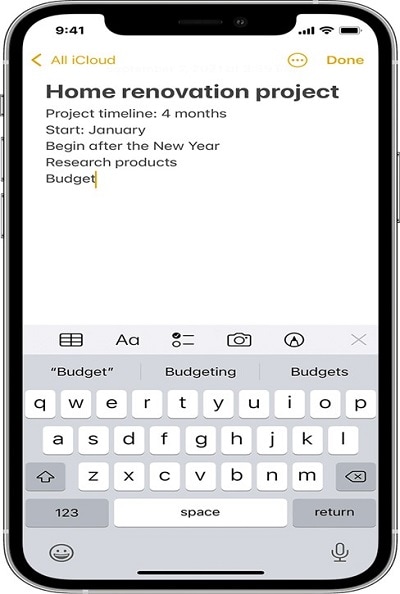
Creating new Notes on iPhone or iPad is not a big deal, as the process is quite straightforward. Just follow the following steps to complete the action within a few minutes;
Step 1 Open the Notes app on your iPhone/iPad.
Step 2 Tap on Compose button , and jot down your ideas.
Step 3 Tap the Done button to complete.
Q4: How to Edit a Note in Notes App?
The iPhone Notes app offers a plethora of editing options that users can take advantage of in editing their notes seamlessly.
To edit your note just do the following;
Step 1 Go to Notes app and tap select the note you want to edit from the Home screen.
Step 2 Tap on the part of the note you want to edit and apply the required editing.
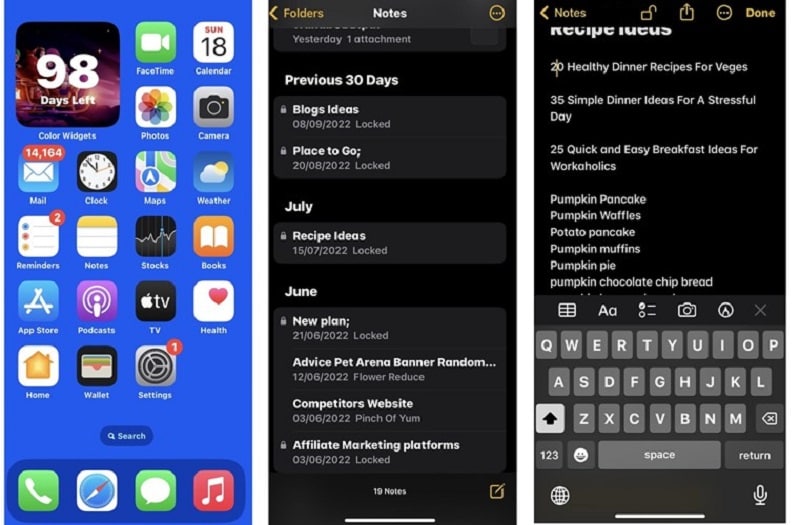
Step 3 Once you've finished editing, tap Done at the top right corner to save the edited note.
Q5: How to Delete Unwanted Notes in Notes App?
Deleting unwanted notes in the Notes app is not hard. The process is as follows;
Step 1 Open the Notes app and tap on the three dots icon at the top right corner.
Step 2 Tap on Select Notes from the pop-up list.
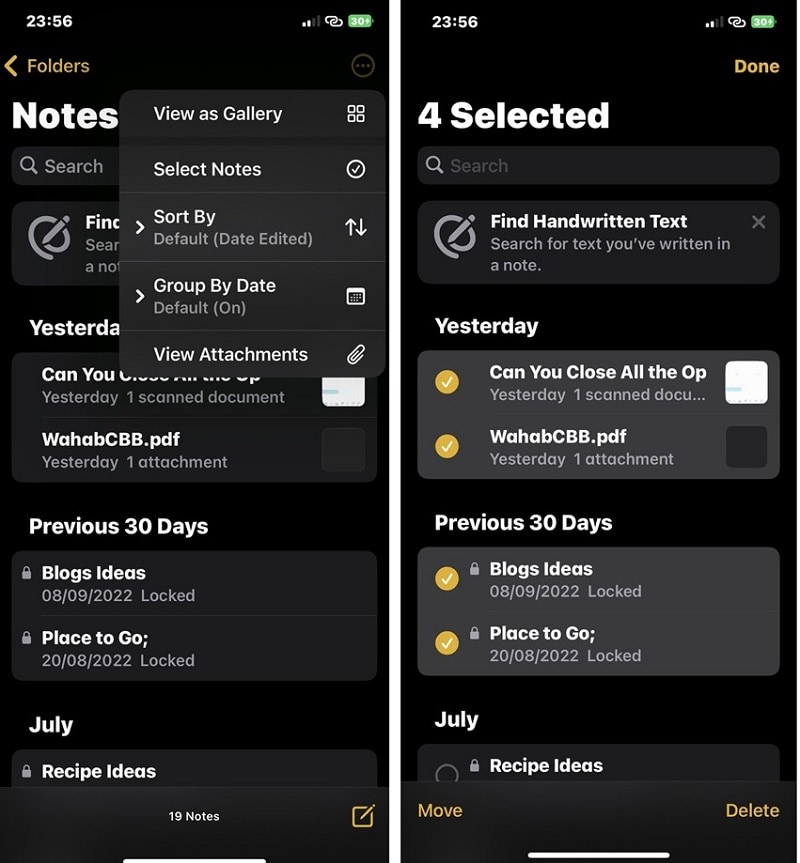
Step 3 Select the Notes that you wish to delete and tap the Delete button to delete unwanted notes in the Notes app.
Q6: How to Make PDF on iPhone Notes?
Fortunately, notes can be exported from the iPhone Notes app as PDF without the use of third-party apps or software. All thanks to the Markup feature that allows users to export notes directly as PDF. It doesn't matter if you're looking to export a regular note or a scanned document as PDF, it'll help you get the job done perfectly.
The steps illustrated below will walk you through how to make PDF on iPhone Notes app.
Step 1 Open the Notes app on your iPhone.
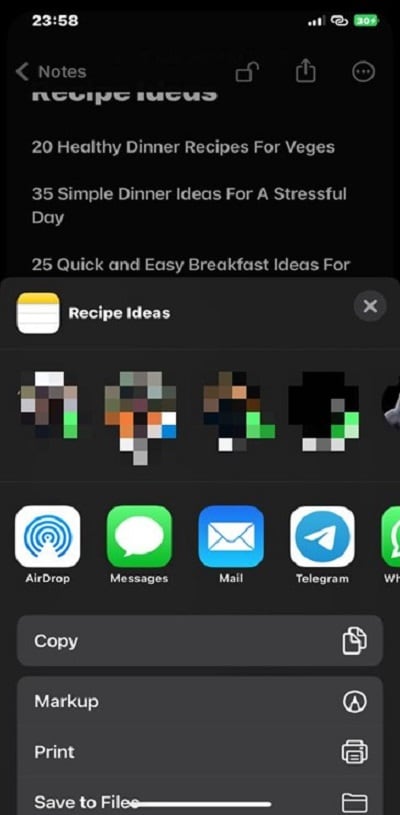
Step 2 Tap on the Note you want to create a PDF from. On the new page, tap the Share icon at the top right corner of the screen.
Step 3 Tap on Markup from the pop-up.
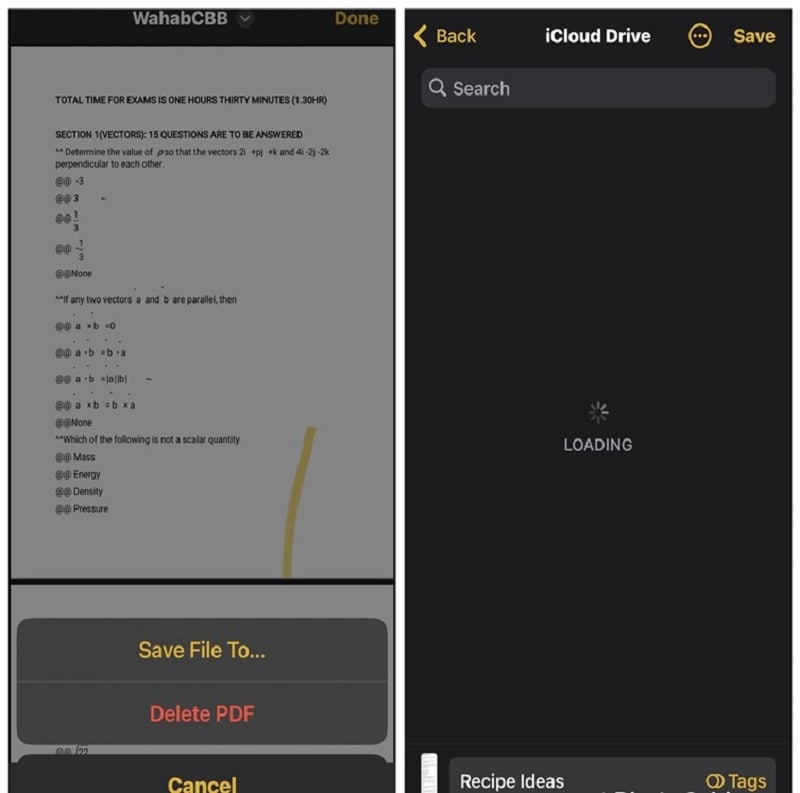
Step 4 On the Markup page, tap Done at the top right corner and Select Save File To…
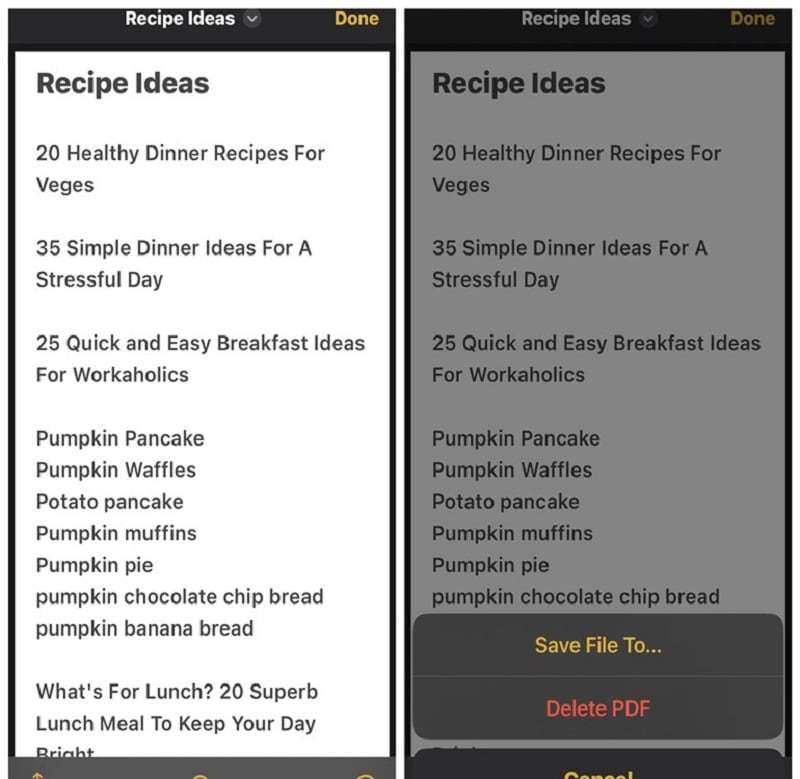
Step 5 Choose a location to save the file, then tap Save. Your note should be in PDF format.
However, creating PDF from scanned documents with multiple pages on the Notes app is quite different. Here is how it works;
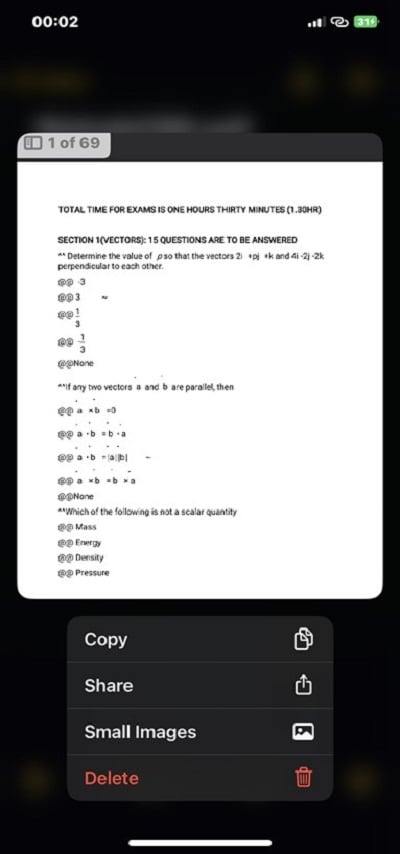
Step 1 Open the scanned document. Then, tap and hold one of its pages until a pop-up showing different options appear. Select Share from the pop-up.
Step 2 Select Markup and tap Done.
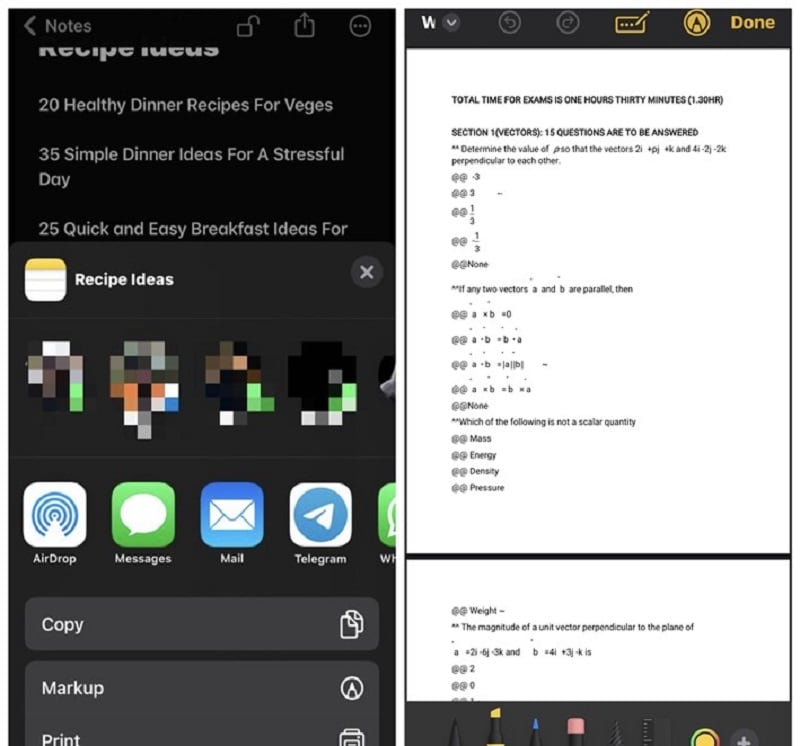
Step 3 Tap Save File To and select the path to save your file. Then tap Save to finish.
Q7: How to Move Notes to New Folders?
Step 1 Go to the Notes app on your iPhone and tap on the three-dot icon at the top right corner.
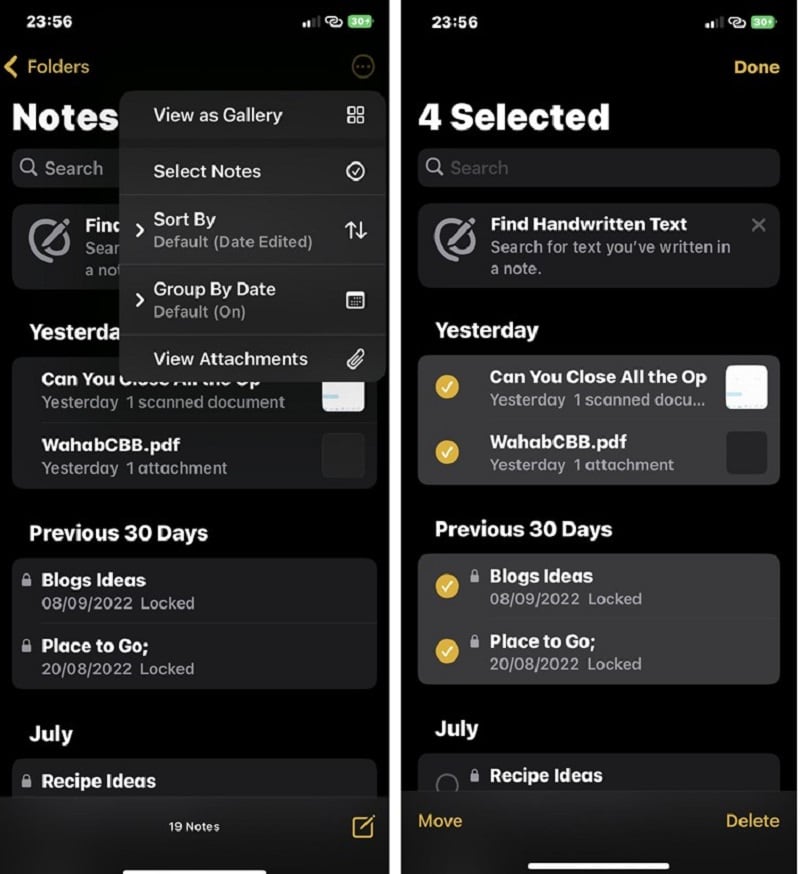
Step 2 Tap Select Notes and choose the Note(s) you want to move to new Folders.
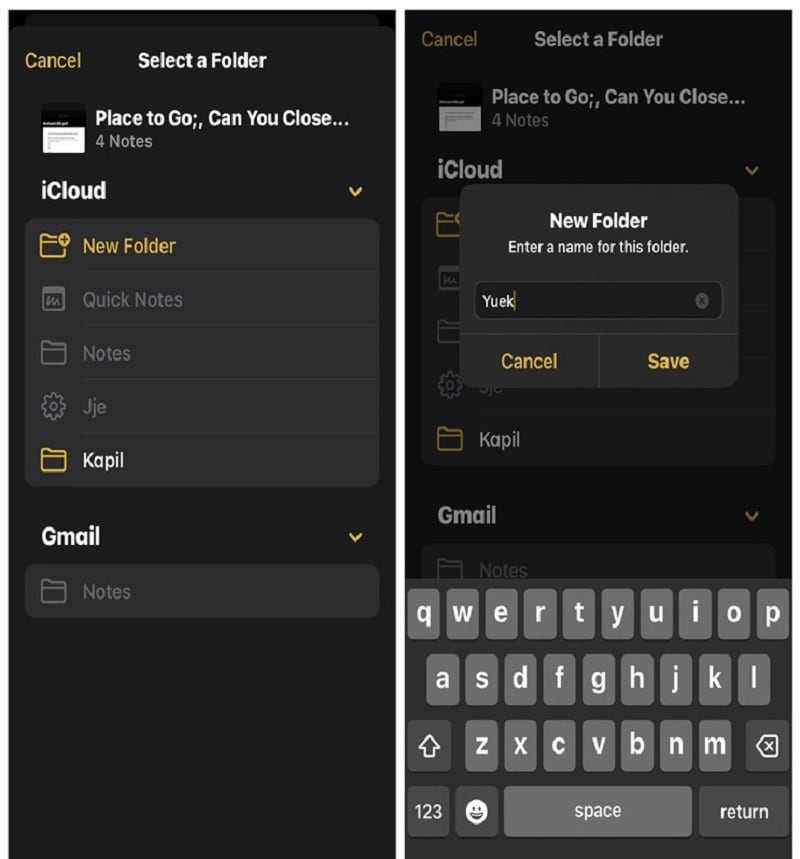
Step 3 Tap Move at the bottom left corner.
Step 4 Select New Folder and enter the Name for the folder. Tap Save to finalize the operation.
Q8: How to Organize Folder in Notes?
The iPhone Notes made it easy for folks to organize folders based on different requirements. You can create subfolders, move folders, rename a folder, and do lots more.
Here is how to organize your folder in the Notes app;
Create Folder: Open Notes and tap on the Folder icon at the bottom left corner. Then give the new folder a name.
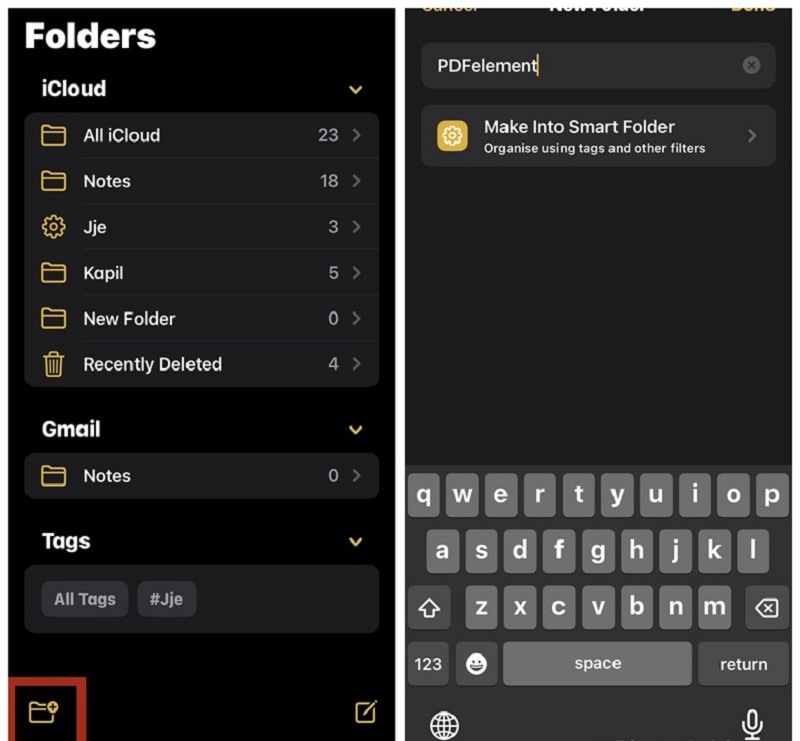
Create a Subfolder: Hold a folder and drag it onto another folder.
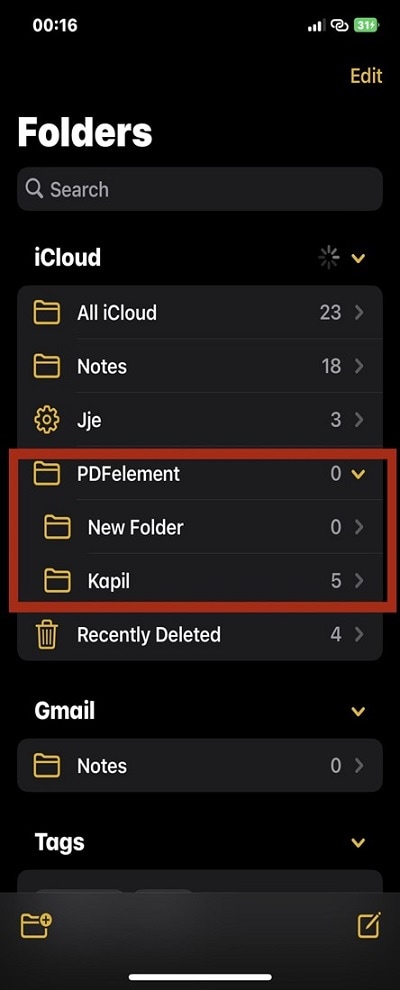
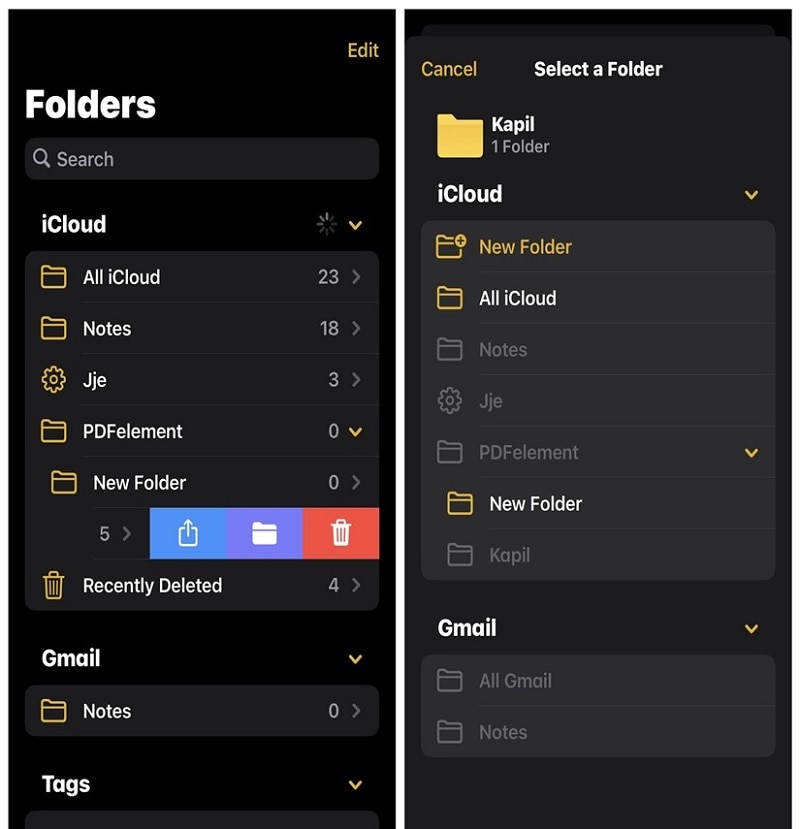
Move a Folder: Swipe left on the folder you want to move, then tap the Folder icon and select where you want to move it to.
Q9: How to Add Images into Notes?
You can also choose to add photos from your library or take a new picture and add it to your note from the iPhone Notes app. The process is pretty simple and has been explained in the steps below;
Step 1 Open the note that you want to add photos to and tap on the Camera icon at the bottom of the screen.
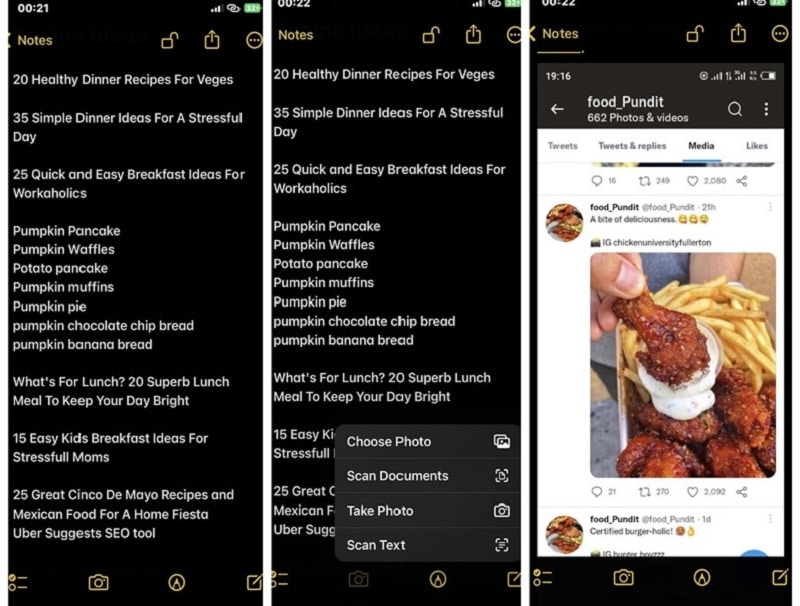
Step 2 Select Choose Photo or Video to upload the images you want to use from your library. However, if you want to take the photos there and then, tap on Take Photo or Video to carry out the action.
Once you're done, you can save the notes instantly or share it with other apps if needed.
Q10: How to Scan Documents with Notes?
Scanning a document is just like taking pictures of a document, thereby, making its output look sharper, as your iPhone camera will focus more on the text of the document. To scan documents with the Notes app, you just have to do the following;
Step 1 Open the Notes app and create a new note.
Step 2 Tap on the Camera icon at the bottom of the screen and select Scan Documents from the bottom of the screen.
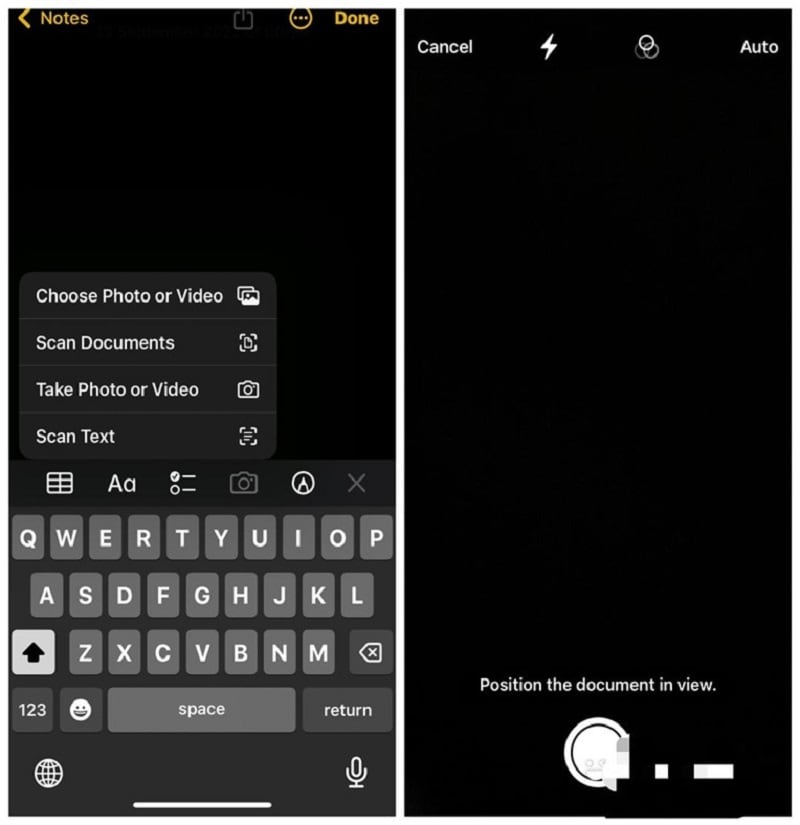
Step 3 The Document Scanning function will be launched, and by default, it'll be in Auto mode. You can change it to Manual if preferable by clicking on Auto at the top left corner of the screen.
Step 4 Position your document right under the viewfinder and tap the Shutter button to scan the document.
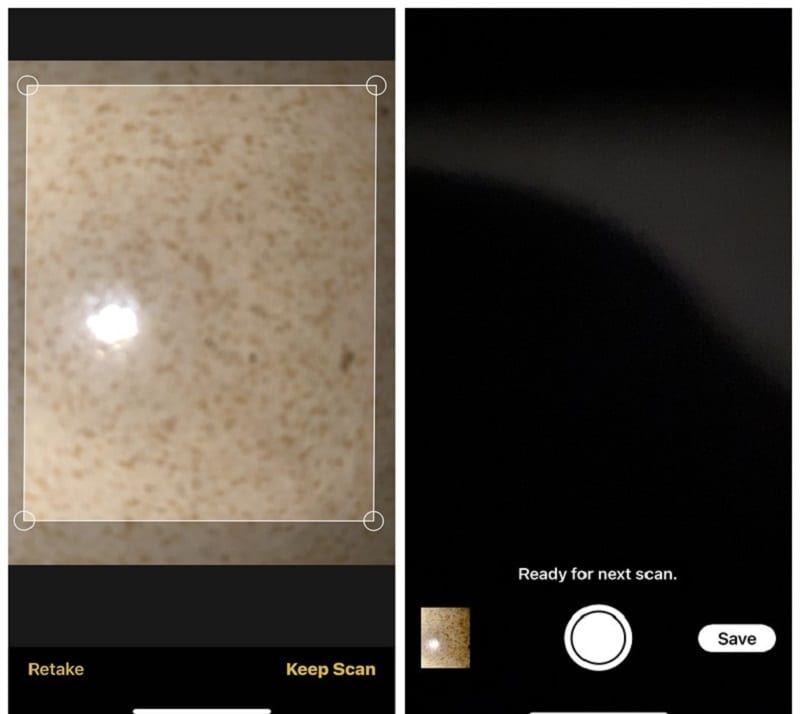
Step 5 Once you've scanned the document, drag the corners to adjust it as per requirement. After that, tap on Keep Scan and select Save to finish.
The scanned document will be saved in your iPhone Notes app.
Want to learn more about PDF editing on iOS? Check out the link given below and know more about PDFelement for iOS.
Conclusion
If you've read the article till this point, then we believe you can now stay productive with the Notes app on your iPhone. Regardless of what you do, be it event planning, shopping, or more, the Notes app can come in handy to write down the information you need seamlessly. All it takes is only a few clicks.
 Home
Home

