How to Use Paperless Printer for Free - Updated
2026-02-02 10:23:03 • Filed to: PDF Printer • Proven solutions
What is the meaning of Paperless printing? For anyone who does not know about this term, it means printing any document and saving it as a PDF, Image, or word document. So, in other words, it is a virtual printer that will print the documents as a PDF file. There are plenty of programs and utilities which can be used as the paperless printer.
All you need to do is install the printer driver and then use any document managing tool to print the document, it will be saved as a PDF file. If you want to print the webpage, Google Chrome offers the built-in free paperless printer which can save any PDF file or webpage as a PDF document on your computer. Other free tools include "Paperless printer" which is absolutely free of cost but can only be used at home. Here's the step-by-step guide.
How to Use Paperless Printer on Windows and Mac
There are many tools that can be used as paperless printers both on Windows or Mac OS X. Windows users will need to install a third-party program such as "Paperless Printer" which is free for personal use but will cost a lot of money for the standard or professional version. Here's how you can use a Paperless printer on both Windows and Mac OS X.

Step by step guide to using Paperless Printer on Windows:
- Get the latest version of Paperless printer on your Windows computer. After installation, a virtual printer will be added to your computer.
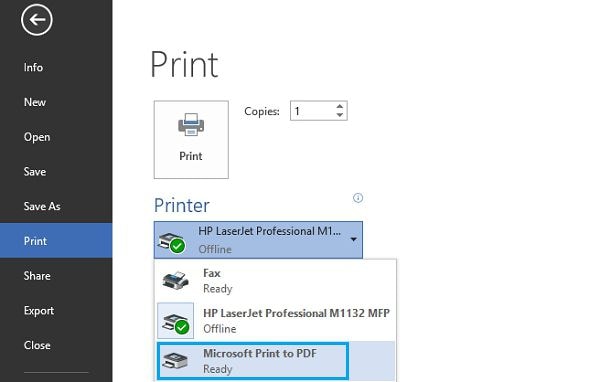
- Open the program in which you want to print the PDF file such as Microsoft Word or Google chrome. We are using it with Microsoft Word, but the method to use it any program is the same. Click on the "File > Print" button.
- Now, select the Printer by clicking the dropdown menu, you will need to choose the paperless printer from the list.
- Finally, hit the "Print" button and the output PDF file will be stored on your computer.
Step by Step guide to using Paperless Printer on Mac:
Mac users will not need to install any utility or tool because it already has the virtual printer installed in the Mac OS X.
- The process of using this printer is pretty much similar to the Windows version except for a few changes. Open the document that you want to print using the paperless printer and use the "Ctrl + P" command which will open the printing window of the program.
- On the bottom left corner of this window, click on the little arrow button and select the "Save as PDF" option from this list.
- Finally, hit the print button to use the paperless printer on your Mac. The output document will be saved in the "Documents" folder on your Mac.
A Better Choice than Paperless Printer
Although Paperless Printer is an easy way to print paperless documents on your computer, it lacks many features. With the price tag of a PDF editor, it has nothing but to save the documents as PDF files. On the other hand, PDFelement for Windows and Mac OS X seems like a perfect option to create, edit, convert, print, or even PDF files.
The business version of the PDFelement will let you even connect the program with the famous cloud services such as Google Drive or Dropbox, so, you can directly save the documents on the cloud. In case of printing, you can print the PDF files from the program to go paperless edition. OCR or Optical Character Recognition provides a way to edit the scanned documents on your computer and it includes a built-in OCR feature. Lastly, there is a discount available for volume licensing to help small businesses get the best PDF editor and printer at a cheaper price. Here's the step-by-step guide to using PDFelement Printer for Windows and Mac OS X.
1. How to Print a PDF
There are two ways of opening the PDF file. You can right-click on the file and select Open in PDFelement Alternatively, open the application and drag the PDF.
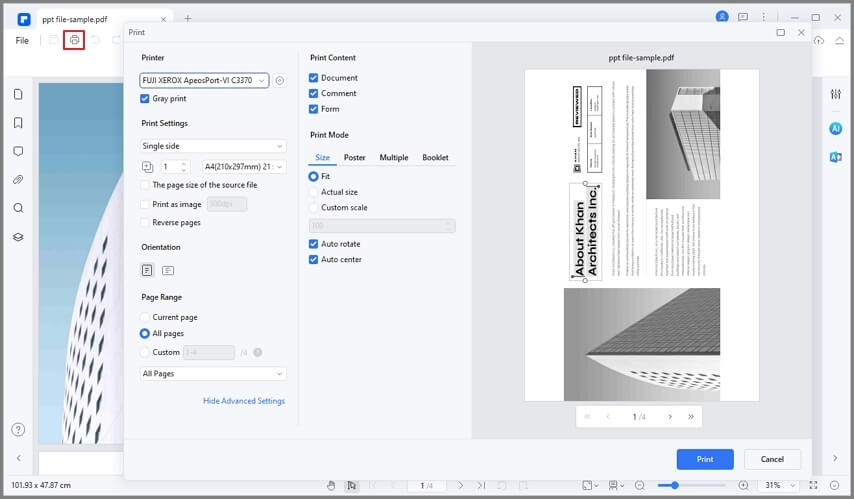
Once the PDF file is opened in the program, use the [Command + P] on Mac or [Ctrl + P] on Windows Shortcut key and it will open the "Printer Preferences". In the bottom right side of the window, click on the "PDF" and select "Save as PDF".

2. How to Create a PDF
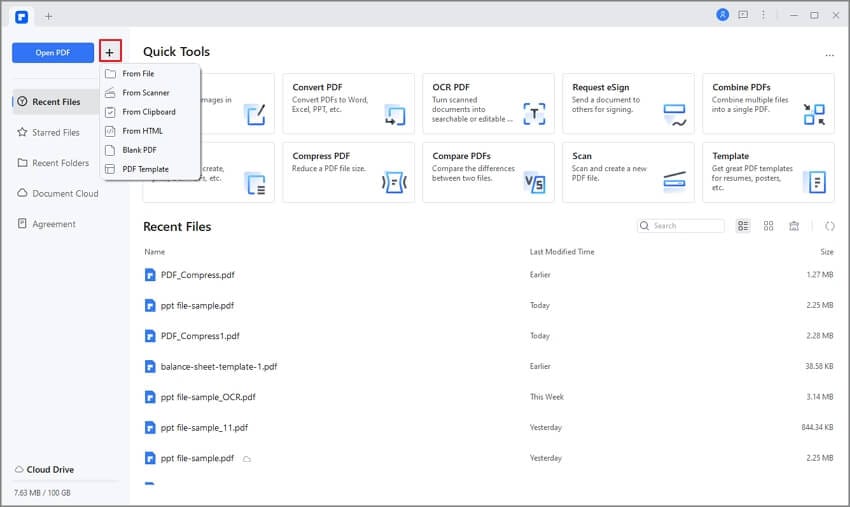
PDFelement provides different ways to create PDF files, you can create a PDF from a blank page, can make a PDF file from a Word document, PowerPoint presentation, Excel sheets, or images. Here's a small tutorial for that:
Click on the "Create PDF" to create PDF files from other files. If you want to create a blank PDF, click on the File button on the top and select "Create". Now, choose the "Blank Document" from the list. The next step is to save the PDF file on your computer. Select the location for the PDF file and click on the "Save" button.
Once the PDF file is opened, you can make changes to the file by clicking on the "Edit" button. You can also add new text, images or forms to the PDF file. After making changes to the PDF file, don't forget to save the PDF file on your computer.

3. How to Share PDF
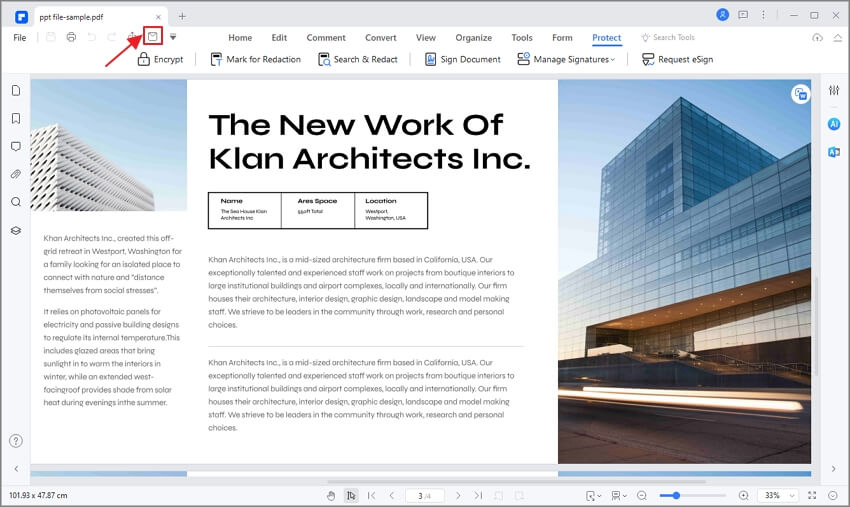
It also lets you instantly share the PDF files using the program. After creating the PDF File, click on "File" and select "Attach to PDF" or "Dropbox" from the list. If you select the "Attach to Email", it will open the mail application. In the case of Dropbox, click on the "Upload" button and select the appropriate folder to save the PDF file.

Free Download or Buy PDFelement right now!
Free Download or Buy PDFelement right now!
Buy PDFelement right now!
Buy PDFelement right now!
Up to 18% OFF: Choose the right plan for you and your team.
PDFelement for Individuals
Edit, print, convert, eSign, and protect PDFs on Windows PC or Mac.
PDFelement for Team
Give you the flexibility to provision, track and manage licensing across groups and teams.

 G2 Rating: 4.5/5 |
  100% Secure


Elise Williams
chief Editor
Generally rated4.5(105participated)