
While allowing access to selected recipients, password protection keeps unauthorized people from opening a file. Sensitive data sharing is very common on personal and corporate levels, and it is secured with a passcode to ensure maximum privacy. Because of their high security, these files are difficult to manage, limiting their usability. This article is a complete guide on how to send a password-protected PDF using different methods.
In this article
Part 1. Reliable Methods of Sharing a Password-Protected PDF
Considering all the problems encountered while sharing a private file, let's dive into a platform that might be of assistance.PDFelement is a PDF management tool that shares a file through a link or a QR code to enhance the accessibility of your content. In addition, you can open a file across all devices by sharing the document with Dropbox and other cloud-sharing services.
Besides sending a password-protected PDF, this platform lets you edit a document by adjusting the font properties. Being a handy tool for teachers, it provides commenting features to point out the errors in the content. If you follow the steps below, you will be able to share a password-protected PDF file on Outlook:
Method 1. Sharing a PDF File via Email
Emailing the PDF file to a recipient is safe, as access requires a password. Follow the instructions below to share a PDF file using the direct emailing option across PDFelement:
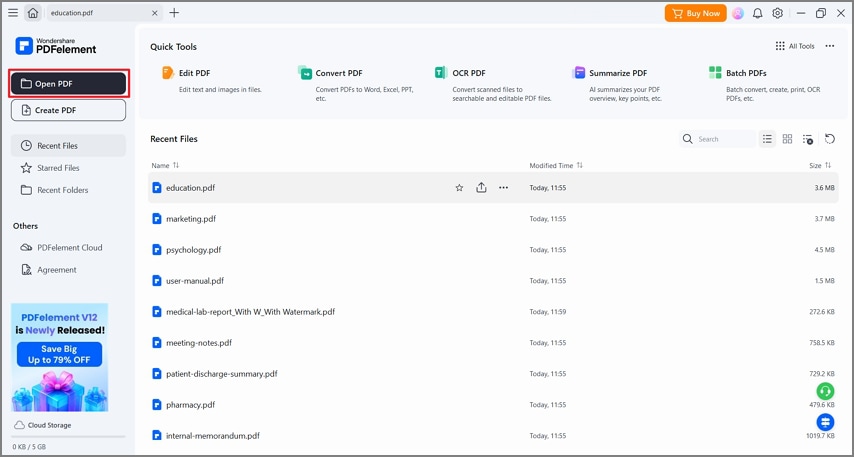
Step 1Set Up New PDF across PDFelement
Initially, install and launch PDFelement on your device and explore the interface. Click "Open PDF" from the left-hand panel to open the selected file in the next window.
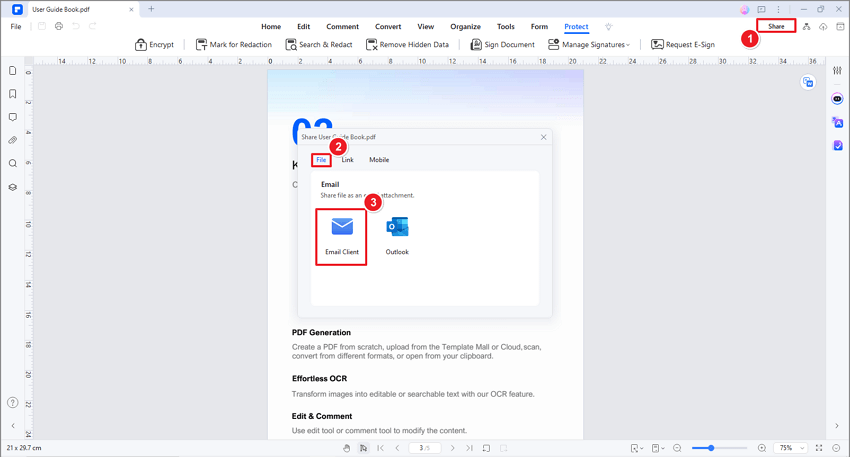
Step 2Share the File through Email Directly
Now, find the "Share" button at the top-right corner and wait for the next window to open. Next, go to the "Email" section and click "Outlook" or "Email" to share the file using the Outlook interface.


 G2 Rating: 4.5/5 |
 100% Secure
Method 2. Sharing a PDF File on Cloud Sharing Services
To enhance the accessibility of your files, you can share your documents on cloud-sharing services like Dropbox, Google Drive, OneDrive, and more.
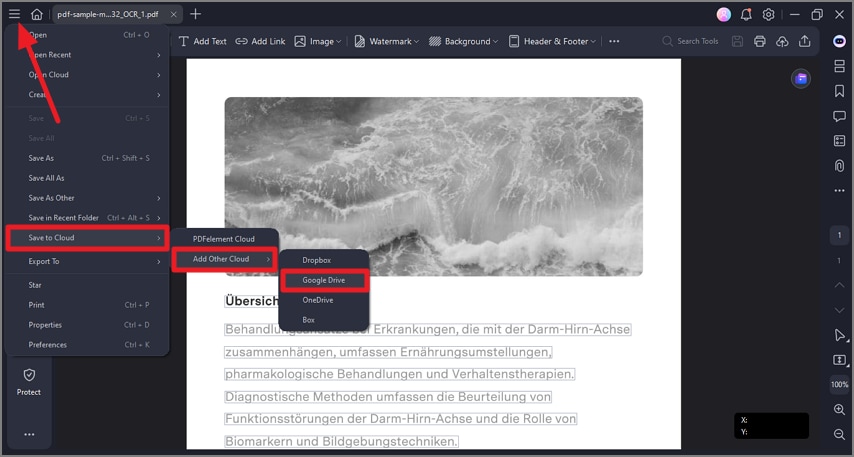
Step 1Open the File and Select the Cloud Sharing Platform
As the PDF file opens, go to the top right corner and find the "File" button to expand the pop-up menu. Hover over the "Save to Cloud" option to select your desired service from the "Add Other Cloud" menu.
Step 2Upload the File Across PDFelement Cloud to Share as Link
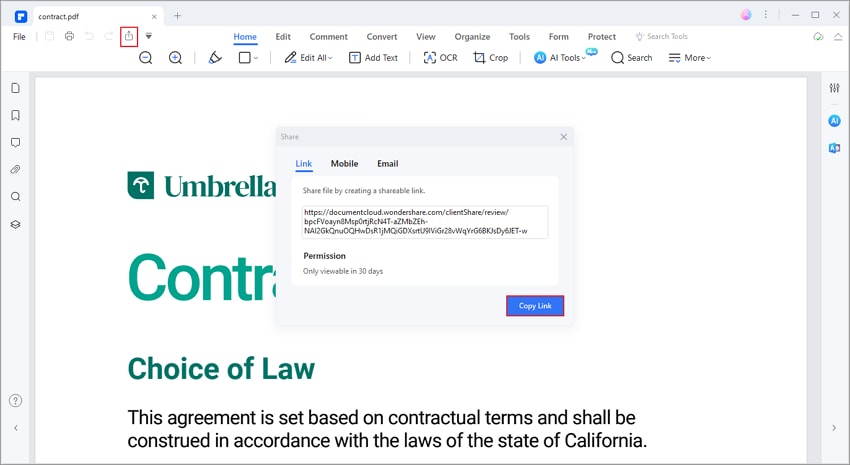
You can also consider uploading your PDF document to PDFelement Cloud, a dedicated cloud storage and sharing service. Click the "Cloud" icon at the top right to open a pop-up where you must tap "Upload." The PDF will be inserted into PDFelement Cloud. Navigate to the respective folder on the homepage to find your uploaded PDF, which can be shared as a link with other users.
Part 2. Effective Way of Adding Password Protection on PDF Documents
If you send a password-protected PDF, the sensitive data, including your digital signature, can be kept from being leaked or misused. PDFelement allows users to set a password when opening the file or performing various actions after opening it. You can secure the actions of printing, editing, and deleting content from your file.
After creating a PDF file, you can only allow authorized recipients to insert and extract pages from it. If you want to know how this feature can be used in PDFelement, follow the guide below:
Step 1Initiate Protecting the File
When the uploaded file appears on the screen, go to the menu bar and click "Protect" to open a toolbar. Select "Encrypt" from this toolbar, and a small window will open.
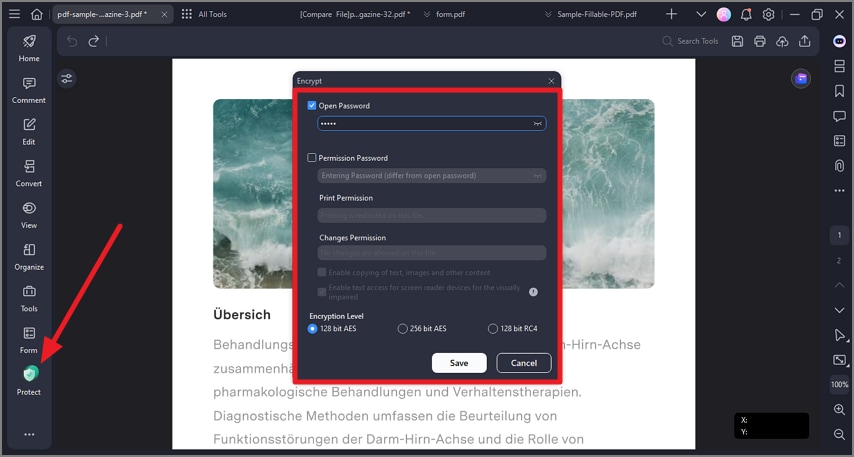
Step 2Protect the File With an Open Password
In this window, check the "Open Password" box if you want to put security on opening the file. Enter the password, set the security level from the "Encryption Level" section, and click "Save."
Step 3Set the Permission Password
To keep unauthorized recipients from making certain changes to the document, check the "Permission Password" box and explore the "Print Permission" and "Changes Permission" drop-down menus. To save the changes, set the "Encryption Level" and click "Save" from the bottom of the window.
G2 Rating: 4.5/5 |100% Secure
Part 3. Tips to Securely Send a Password-Protected File
If you send someone a highly sensitive file, a mere password might not suffice. You need to keep various other things in mind while sharing files. Sending a password-protected PDF can become much safer if you follow the tips mentioned below:
- Set High Security: After securing a file with a password, set the encryption high and choose a reliable file-sharing source. Also, adding expiry dates for the file may decrease the risk of unauthorized access.
- Choose a Unique Password: A good password is hard to guess and contains unique characters like numbers and symbols. Mix the characters and symbols to create a strong password to ensure document security.
- Use Separate Platforms for Sharing: When sharing a file over the internet, ensure that you select two different platforms to share the password and the file itself. The password must be hard to obtain in case someone attempts a data breach.
- Educate Recipients: When you send sensitive data to the recipient, they must take care of the document. This includes keeping the password confidential and destroying the files as soon as the intended purpose is fulfilled.
Part 4. Removing Password From a File
Once you set a password for a PDF file using PDFelement, you can remove it and make it easily accessible to everyone. To enhance file accessibility through password removal, follow the steps below.
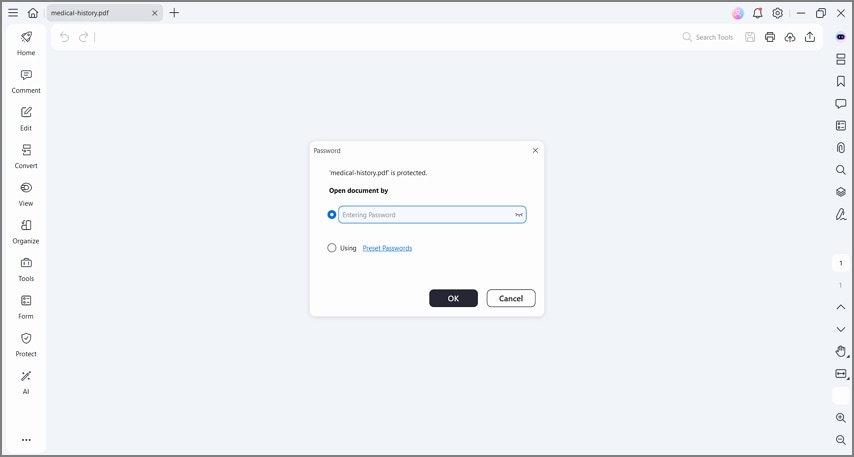
Step 1Enter the Password to Unlock PDF
From the main interface of PDFelement, press the "Open PDF" button and select the desired password-protected file from the device. In the "Password" window, enter the file's password and click "OK" to open it in the next window.
G2 Rating: 4.5/5 |100% Secure
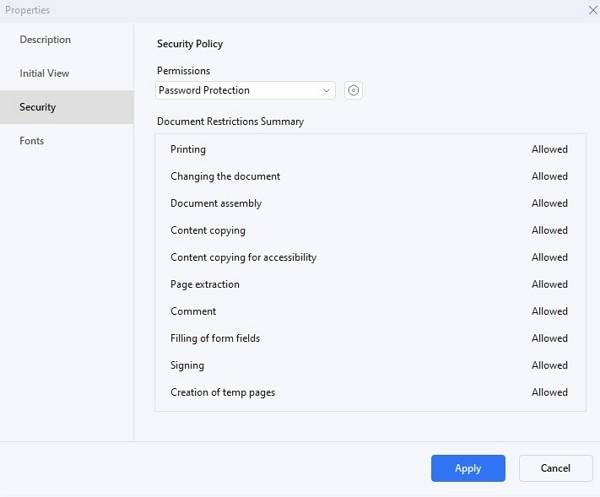
Step 2Remove the Password and Apply Changes
Access the "Properties" section following the "File" tab selection from the top left corner of your screen. From the left side panel in the new window, go to the "Security" tab and remove the password from the "Permissions" drop-down menu. After you "Apply" the changes to your document, save the file to be freely accessed.
Conclusion
To conclude, PDFelement offers various methods for sending a password-protected PDF to the discussion; password protection is an integral part of securely sharing a file. You can use various methods offered by PDFelement to send a password-protected PDF to the authorized recipients. This platform also offers a strict password setting feature that can help protect your data.

