 Home > macOS Tips and Tricks > How to Edit Photos with Preview in macOS 10.14
Looking for a quick and easy way to manipulate images without having to master a battery of functionalities or any hassle of sort? With a decent collection of essential tools, editing and annotating images with preview on macOS 10.14 is a no-brainer operation. The moderate battery of tools on the app is available on a user interface with a minimalist design, making it all the easier to edit images and mark up pdfs with Preview on macOS 10.14. By learning how to manipulate images using Preview, you can easily alter images without using complex photo editing software like Photoshop or Pixelmator. Read on to learn more.
Editing and Saving An Image Using macOS 10.14 Preview
1. How to Open Images on Preview
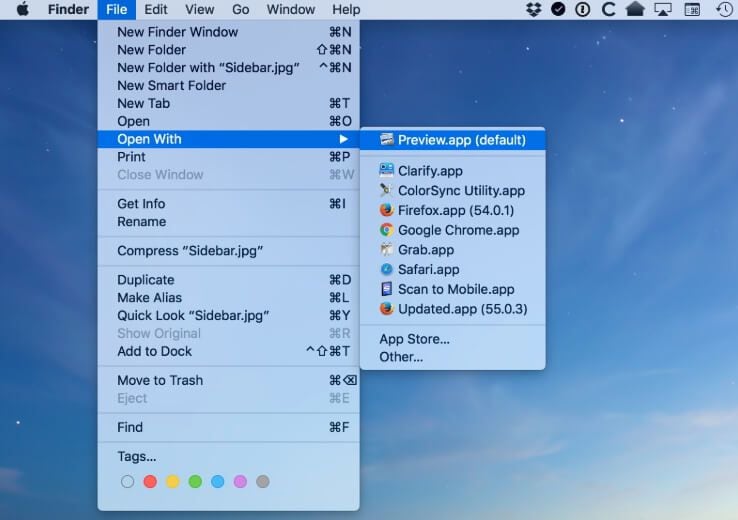
Preview is Mac’s default image viewer, so when you double-click an image on your Mac OS Mojave, it opens automatically in Preview. And if your default image file association settings has been changed, you can view images with Preview by Command-clicking or right-clicking an image file, and then scrolling to "Open with" and then choosing Preview.
To open a file directly from the window of Preview app itself, select the Preview app from the Application folder or Launchpad. Tap "File" on the menu bar of the open Preview window, and then select “New” and choose the desired image file.
2. How to Annotate Images
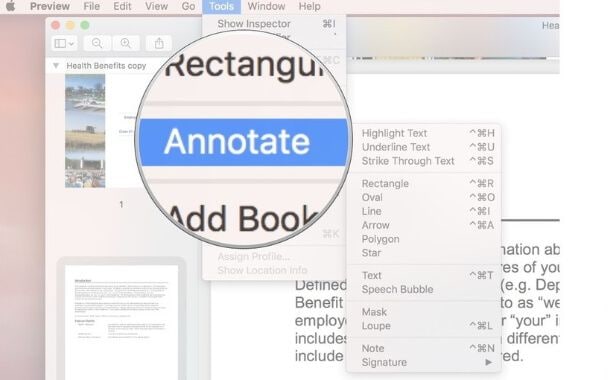
Preview comes with an impressive collection of tools to edit images and mark up pdfs with preview on macos 10.14, including tools for adding text, drawing lines, inserting arrows and custom shapes, etc. All the tools are applicable to both PDF files and images. To access these features, tap the "Show Markup Toolbar" around the top-right corner of the screen. Alternatively, you can tap "Tools" on the menu bar, scroll to "Annotate" and select any of the annotation tools.
3. How to Combine Images
You can insert portions or the entirety of images on an image to form new backgrounds or manipulate the image in various ways using Preview. To do this, open both images on the same Preview window by selecting and opening both of them. Then select the image whose portion you want to insert in the other image, and then use the "Instant Alpha" tool to crop out the unneeded parts. Press "Command" + "A" to highlight the cropped image, and then press "Command"+ "C" to copy it. Switch over to the image you want to insert the cropped image into, and then press "Command" + "V" to insert the copied image. You can also rotate and resize your pasted clip (see the sections below) to make it fit in more perfectly.

4. How to Rotate an Image
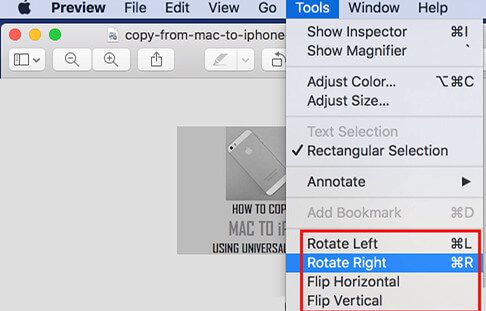
As earlier noted, the functions for editing images with OS 10.14 preview are easily accessible. To rotate an image, simply click the "Rotate" button on the toolbar around the top-right corner of the window as many times to perform any rotation sequence. Open the "File" menu, and then select "Save" to save the changes.
5. How to Crop Images
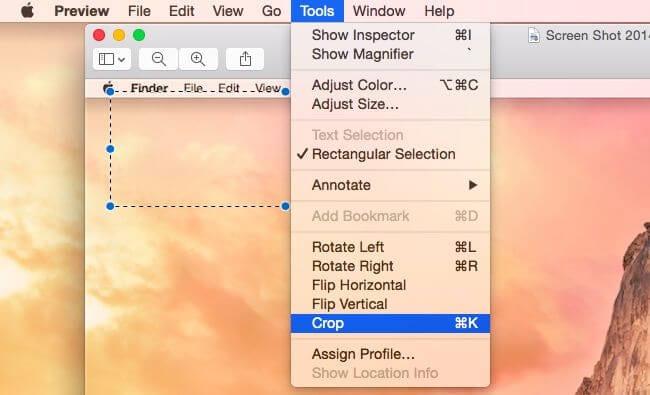
The rectangular selection is the default cropping setting of Preview. Simply mark out a rectangular section to be cropped, and then tap "Tools", and then select "Crop" .
Nonetheless, with an additional cropping function, it’s even easier to edit images with OS 10.14 Preview. You can remove the background or portions of an image by using the Instant Alpha tool. Select the "Instant Alpha" tool from the "Tool" menu, and then drag your mouse around to mark out the area to be removed with a red shade. Select delete to remove the selected area. Save the changes by opening the "File" menu and then selecting "Save".
6. How to Resize An Image
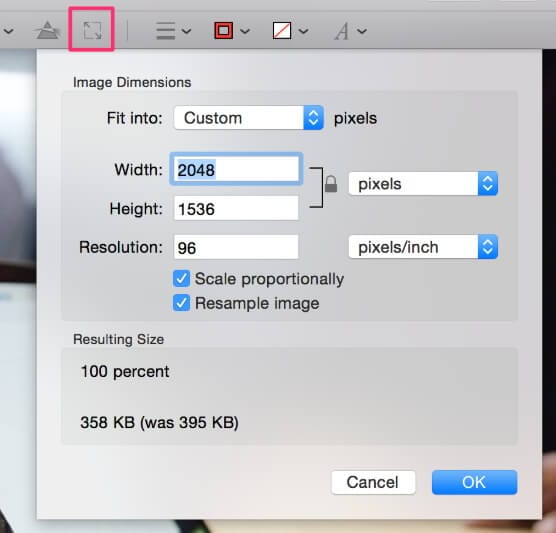
Open the "Tools" menu, and then select "Adjust Size". A "Resize" dialog box will then pop up to allow you to adjust the size of images based on numerous measurement units, including pixels.
Note that the quality of the image actually diminishes the more you enlarge the image, although the aspect ratio will remain intact by default. Save the changes by opening the "File" menu and then selecting "Save".
7. How to Adjust Color
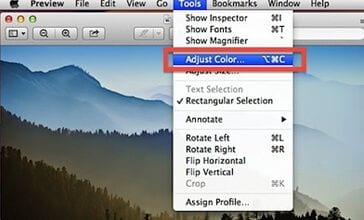
With a color-adjustment functionality that’s accessible through a couple of clicks, it’s relatively easier to edit images with apple’s preview on macOS 10.14. Simply open the "Tools" menu, and then select "Adjust Color" to access the color-adjustment tools. These include tools for adjusting contrast, temperature, exposure, sharpness, etc. They come in sliders that allow you to automatically view the changes as you’re apply them.
8. How to Revert Changes on A Document
Preview allows you to browse through the history of file changes and edits. To view the previous changes you made on a file, open the image, and then open the "File" menu, and then select "Revert To", and then select "Browse all Versions", This will bring up all the saved versions of the image file.

How to Take a Screenshot in MacOS Mojave
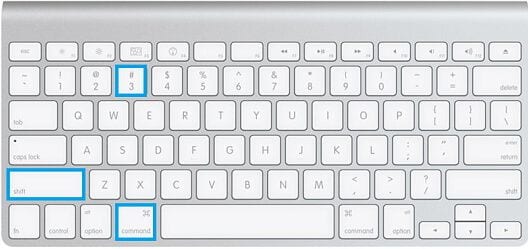
Taking screenshots on MacOS Mojave is only a matter of a couple of clicks. To take a screenshot of the entire screen, press "Command" + "Shift" + "3"; To take a screenshot of a selected area, use "4" in place of "3" in the keypress sequence. Using "5" in the keypress sequence opens up a comprehensive snapshot menu with functions for capturing the entire screen, a particular window, a selectable area on the screen, and a video of the entirety or a selectable area of the screen. This menu also features options for saving, copying, and mailing the screenshot, as well as for editing the image with the OS 10.14 preview.
Best Alternative to Preview for macOS 10.14
For a good number of reasons, you may run into a need for an alternative to Preview for editing images. You may find it challenging to effect certain changes to the file, either because you’re finding it hard to navigate to the relevant functions or because the image file’s format is not supported on Preview. The best Preview alternative must offer all the key functionalities of Preview, but must be devoid of the inconveniences and limitations of Preview. PDFelement for Mac offers a collection of image editing tools that match those of Preview on an even more intuitive UI.
PDFelement comes with a comprehensive array of PDF and image editing and annotation tools. These include tools for inserting hand-drawn shapes, arrows, basic shapes, highlights, etc. You can also secure your files with watermarks and signatures, crucial features which are unfortunately not available on Preview. What’s more, you can crop, resize, impose and superimpose images, and lots more. You can also convert your image files to and from a wide array of formats, including jpeg, bmp, gif, etc. Another outstanding feature of PDFelement is the OCR technology that allows you to convert images to editable PDF files. This technology extracts data and text from scanned images and saves them in an editable format.
Key features:
- A slew of image annotation tools, including tools for hand-drawn shapes, arrows, highlights, etc
- A splendid collection of image and PDF editing tool, including rotating, cropping, watermark, inserting images and texts, and lots more
- Signature function for creating digital signatures and inserting them in images and PDF files
- A versatile converter for converting image to a myraid of image formats, as well as for converting PDF to and from a wide array of text formats
- Batch processor for effecting changes like file conversion or form-filling on multiple identical files at a go
- Password protection to protect files from unauthorized access
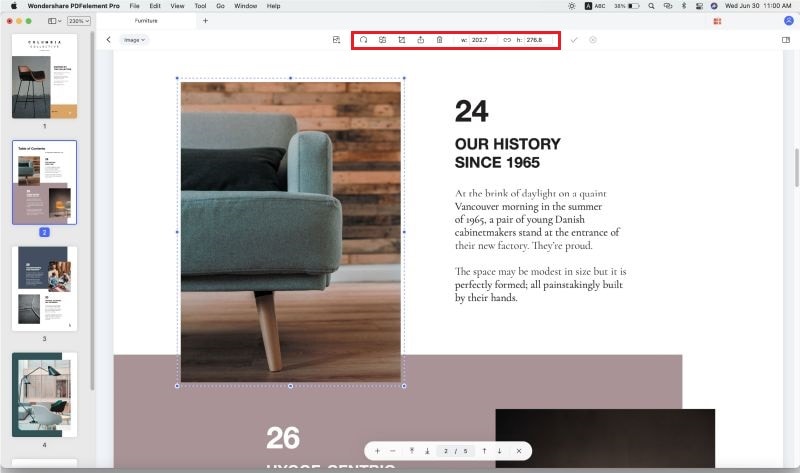
It’s super-easy to edit images and PDFs with PDFelement, and this has endeared PDFelement to its world-wide customer base. Simply open the PDFelement, and then select and open an image. If the image is inside a PDF file, you can open the PDF file on the app, and then highlight the select image. On the toolbar, you’ll find a rich collection of editing tools, including tools for rotating, resizing, changing the color, and cropping the image. You’ll also find tools to add text, watermark, and background images.
Free Download or Buy PDFelement right now!
Free Download or Buy PDFelement right now!
Buy PDFelement right now!
Buy PDFelement right now!
 100% Secure |

Elise Williams
chief Editor
Comment(s)