
Have you ever needed to print only a few pages from a large PDF for a meeting or assignment? It can be frustrating when printing the entire document feels wasteful or unnecessary. Fortunately, modern PDF tools make it easy to select specific pages or sections and print only what you need. In this guide, we'll explore simple methods on how to print a portion of a PDF effortlessly.
In this article
- Quick Start: Three Fast Ways to Print a Portion of a PDF
- Scenario A — Print a Small Selection (Fastest)
- Scenario B — Print Exactly What You See
- Scenario C — Print a Half Page or Precise Portion
- Scenario D — Multiple Portions Across Many Pages (Batch-Friendly)
- One-Screen Toolbox (Labels You'll See in Different Apps)
- Quality & Scaling Cheatsheet
- Quick Troubleshooting When Printing Portion of PDFs
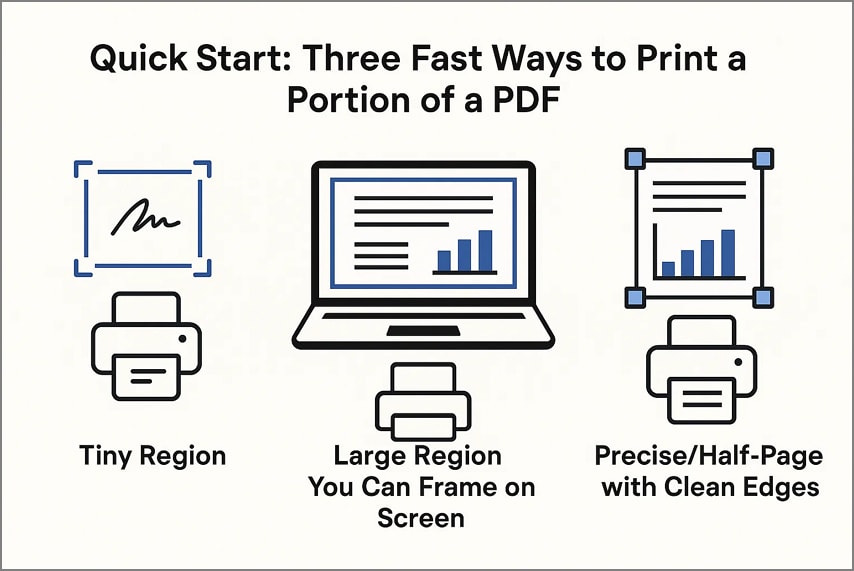
Part 1. Quick Start: Three Fast Ways to Print a Portion of a PDF
- Tiny Region (Totals/Signatures/Maps): For very small sections, taking a screenshot and printing it directly can be the quickest solution. This works well for signatures, totals, or small diagrams that don't require full-page formatting.
- Large Region You Can Frame on Screen: When the area is bigger but still fits your monitor, using Print Current View allows you to print exactly what you see on your screen. This method avoids extra cropping while keeping the layout simple for users wondering how to print a part of a PDF.
- Precise/Half-Page with Clean Edges: For exact sections or professional-looking prints, cropping the page using Page Boxes before printing ensures clean edges and precise output. PDFelement includes built-in cropping tools to make this process seamless.
Part 2. Scenario A — Print a Small Selection (Fastest)
Best For: Totals, stamps, signatures, a small table cell, a map tile.
When you only need a tiny portion, such as a signature, a total, or a small diagram, printing a small selection is the quickest option. This approach is ideal for situations where speed matters more than formatting. This allows you to capture the essential content without processing the entire page. Tools like PDFelement make it easy to focus on a specific area to ensure important details are not missed.
Steps for Printing a Small Selection
As discussed, PDFelement allows users to effortlessly print a small section of the PDF page. Follow the steps provided next to learn how to print a portion of a PDF:
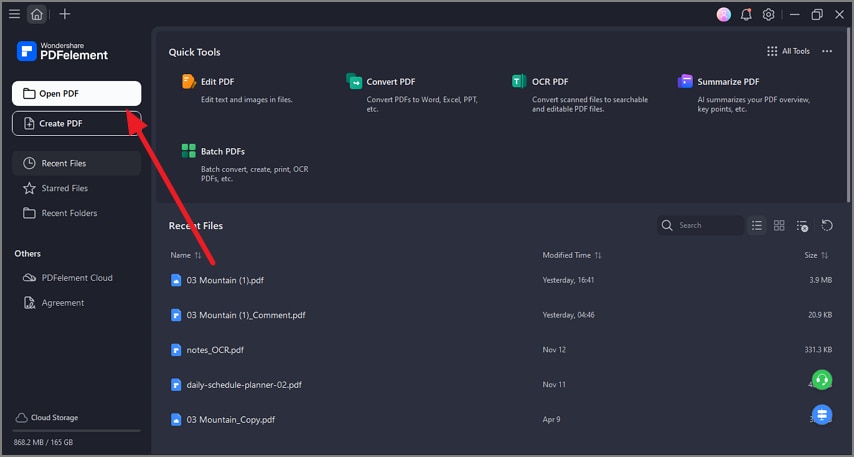
Step 1Launch PDFelement and Open the PDF
To begin, launch PDFelement on your device and click on the "Open PDF" button located at the top-left corner to open the document successfully.


 G2 Rating: 4.5/5 |
 100% Secure
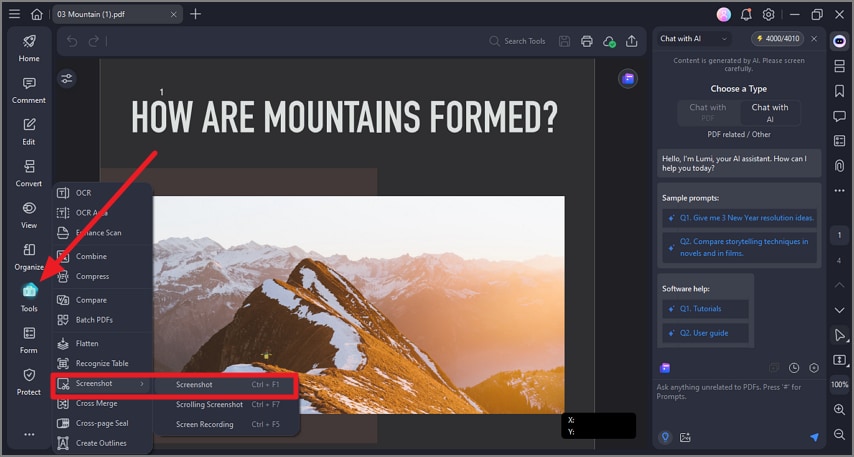
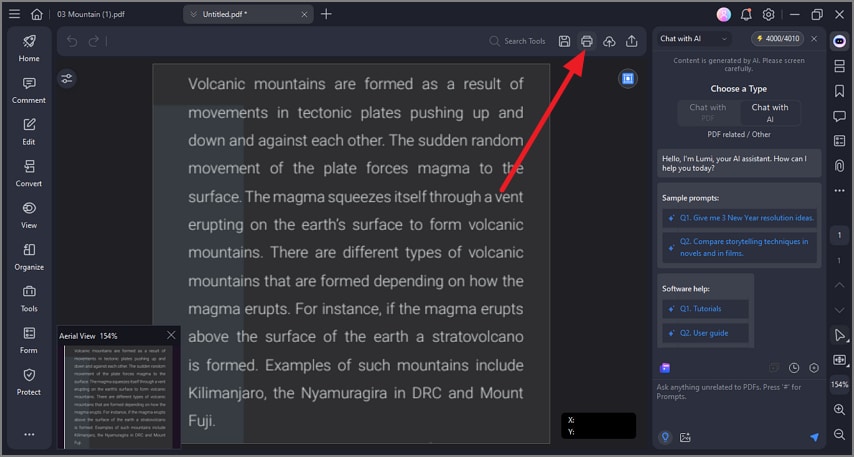
Step 2Opt For Tools and Select Screenshot
Once the document is opened within the interface, head to the toolbar on the left and click on the "Tools" option. From the expanded list, click on the "Screenshot" option and select "Screenshot."
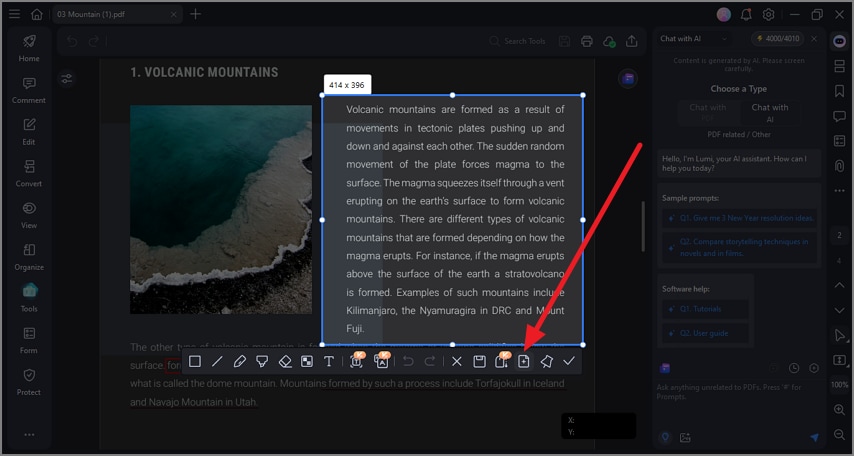
Step 3Select Portion Of Page
Now drag the cursor to select the portion of the page that you want to print. Click on the "Save as PDF" icon on the floating toolbar to save and open the screenshot as a PDF.
Step 4Open Screenshot and Print
Once the screenshot is opened in a new tab, head to the top-right corner of the interface and click on the "Print" icon to print the selected portion.
G2 Rating: 4.5/5 |100% Secure
Part 3. Scenario B — Print Exactly What You See
Best For: Wide tables, drawings, diagrams; anything you can frame neatly on screen.
This method is perfect when the portion you need fits neatly on your screen and you want the printout to match your view exactly. It's especially useful for charts, highlighted sections, or zoomed-in details where framing matters. With tools like PDFelement, you can quickly print the current view, ensuring the output reflects the exact region you're focused on.
Steps to Print Exactly What You See
Follow the steps mentioned below to learn how to print the selected area in PDF with precision:
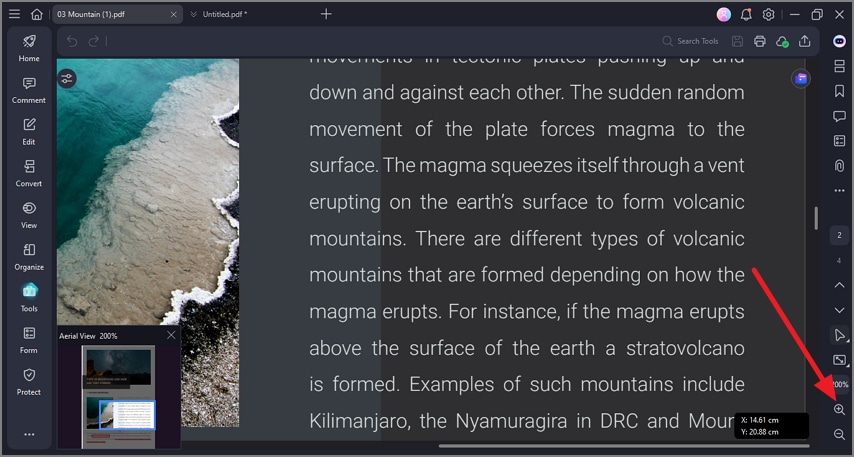
Step 1Open PDF and Zoom the Page
After opening the document within the PDFelement's interface, access the toolbar on the right and zoom in on the page till you get the desired view by clicking on the "Magnifying Glass." Once the page area is in view, press the "Print" icon in the top-right corner.
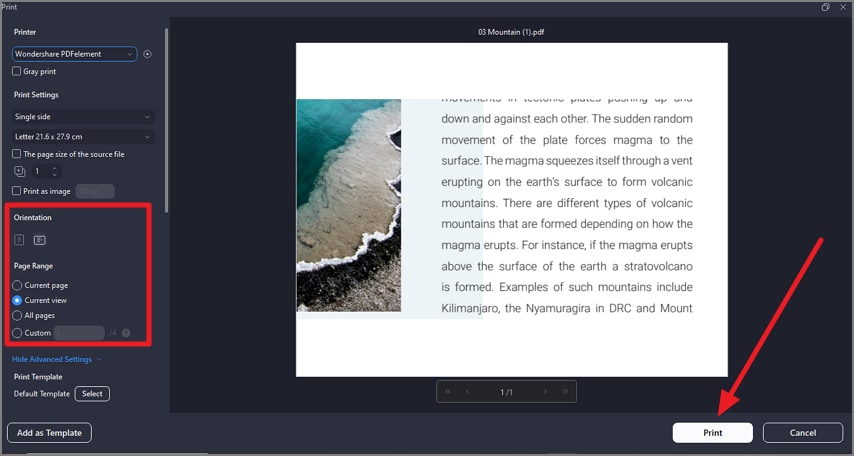
Step 2Set Orientation and Print
In the print window, select "Orientation" as landscape and choose "Page Range" as "Current View." Once done, click on the "Print" button to successfully print the page with exactly what you see.
G2 Rating: 4.5/5 |100% Secure
Tips
- Use grid or zoom controls to align the edges cleanly before printing.
- Choose Fit to Printable Area if borders look too close to the edge or risk clipping.
Part 4. Scenario C — Print a Half Page or Precise Portion
Best For: Handouts, forms, or repeated regions where edges must be perfect.
When you need a clean, professional-looking output, such as half a page, a neatly framed section, or a precisely defined area, this method delivers the most accurate results. With PDFelement, you can define an exact crop area before printing, ensuring your selected portion prints perfectly without unwanted margins or extra content.
Step-by-Step Guide to Print A Half Page
As discussed, with PDFelement, users get the ability to crop the page and then print it effortlessly. Follow the steps mentioned below to learn how to print half a page in a PDF:
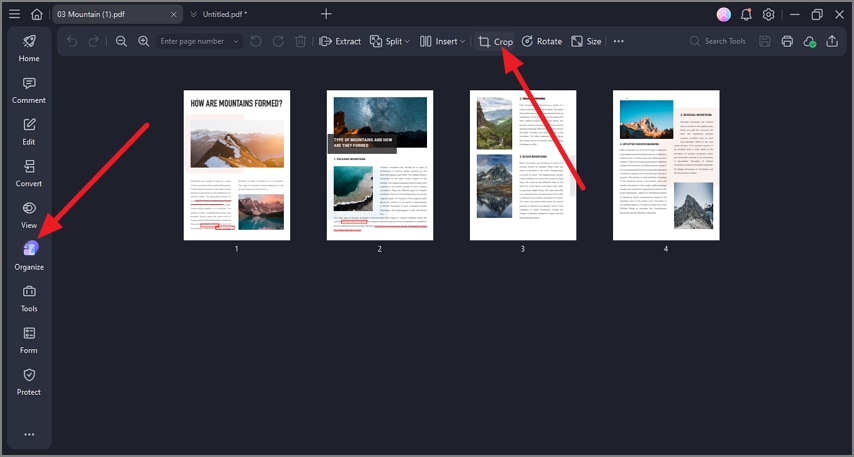
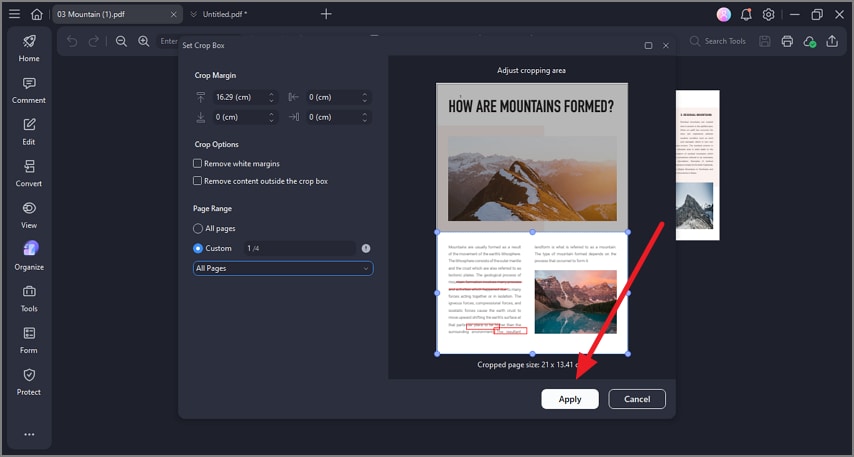
Step 1Import PDF Select Crop
Once the document is imported, click on the "Organize" button located on the toolbar on the left. Now, select the "Crop' option located at the toolbar at the top.
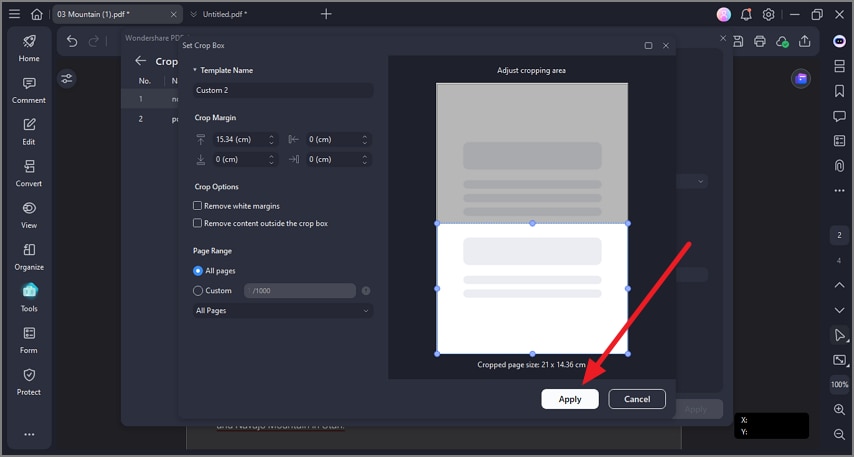
Step 2Select Half Page and Crop
Now, select the half area of the page and configure margin settings. Once done, press the "Apply" button to successfully save the changes.
G2 Rating: 4.5/5 |100% Secure
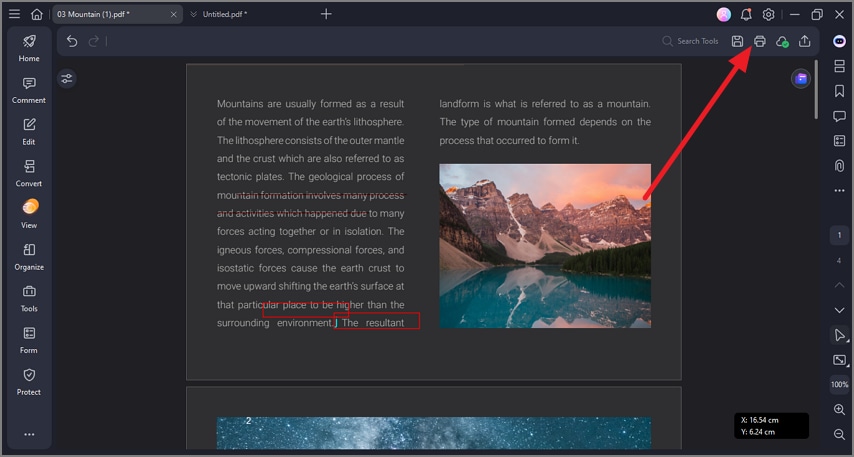
Step 3Preview Page and Print
When the page is cropped to half, preview it and press the "Print' icon from the top-right corner.
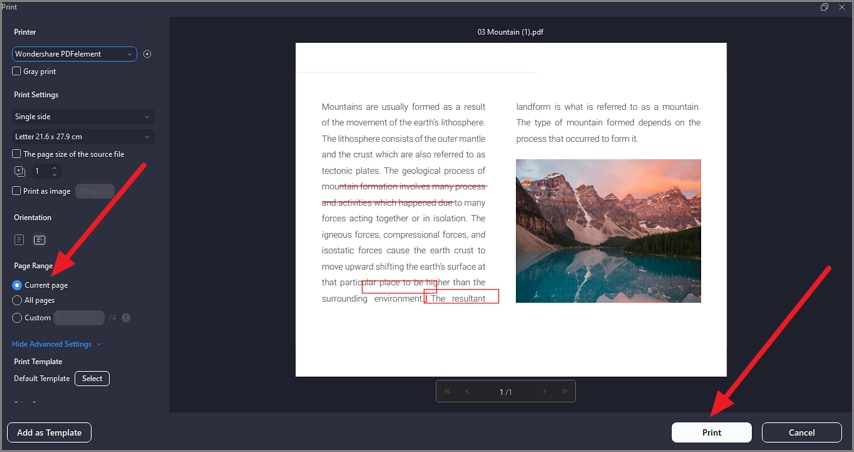
Step 4Choose Current Page and Print
In the print window, select "Current Page" as the Range and press the "Print" button to successfully print the cropped page.
Half-Page Recipe: Set the crop to precisely half the page's height or width, then print using "Actual Size" to maintain true scale and clean proportions.
Part 5. Scenario D — Multiple Portions Across Many Pages (Batch-Friendly)
Best For: The same area across reports, invoices, or worksheets.
When you need to extract and print the same region from many pages, this batch-friendly approach saves enormous time. Instead of cropping each page manually, you can apply one consistent crop setting across the entire document for perfectly aligned results.
Steps to Print Multiple Portions Across PDFs
As discussed, PDFelement makes this task efficient by letting you apply identical crop boxes to multiple pages in one action. To learn how to print a part of a PDF in a batch, read the steps mentioned below:
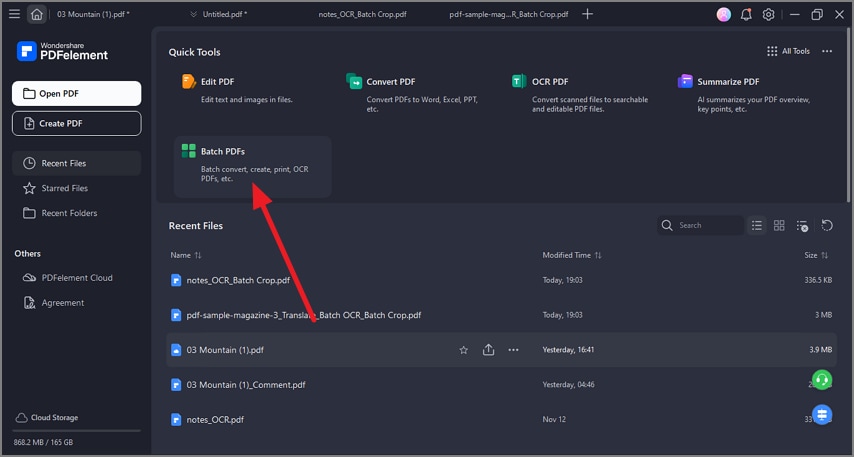
Step 1Access Tools Choose Batch PDF
From the "Quick Tools" section, locate and click on the "Batch PDFs" option.
Step 2Select the Crop PDFs Option
In the following interface, choose the "Crop" option located within the interface.

Step 3Import PDF Select Areas
Next, import your multiple PDFs to the tool's interface and select the page area to be cropped. Press the "Apply" button to save the changes.
G2 Rating: 4.5/5 |100% Secure
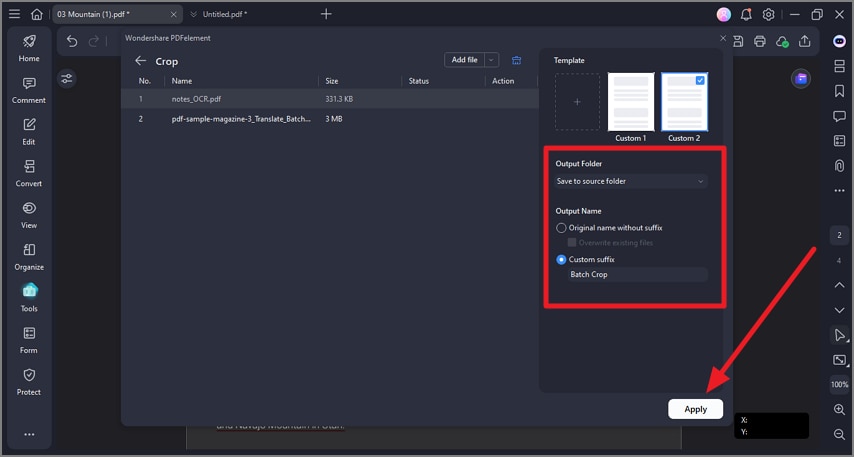
Step 4Save Cropped PDFs
Once done, configure other settings like file names and output folder, and press the "Apply" button to save the results.
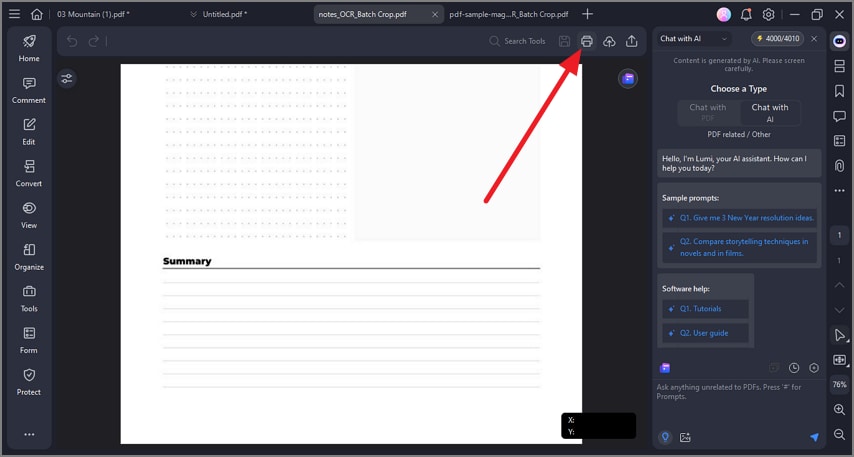
Step 5Open PDFs and Crop
Now open the cropped PDFs and head to the top-right corner to hit the "Print" button and print the files successfully.
Tip: Note your exact crop values (top, bottom, left, right) so you can reuse them later for consistent, repeatable results.
Part 6. One-Screen Toolbox (Labels You'll See in Different Apps)
Different PDF editors often use slightly different names for the same printing and cropping functions. Knowing these common labels helps you quickly recognize the print area feature you need:
- Print Current View: Often labeled as "Current View," "Visible Area Only," or "What You See." This prints exactly what's on your screen.
- Crop / Page Boxes: May appear as "Set Page Boxes," "Crop Pages," or "Trim Area." These options let you define precise print regions.
- Document and Markups: Sometimes listed as "Print Annotations," "Document + Comments," or "Include Markups." This prints content with comments inline.
- Comment Summary: Also shown as "Summarize Comments," "Print Comments Only," or "Create Summary." This prints a clean list of all annotations.
Part 7. Quality & Scaling Cheatsheet
When printing only part of a PDF, small settings can make a big difference in clarity. These quick pointers help you get crisp output when working with professional documents to print a selection from a PDF:
- Crisp Lines/Text: Use Crop/Page Boxes instead of screenshots, since cropping preserves vector quality while raster snapshots lose sharpness.
- True Measurements: Select Actual Size (100%) and double-check that printer scaling is disabled to maintain accurate dimensions.
- Avoid Clipping: Enable Fit to Printable Area or switch between Portrait/Landscape if edges look too close to the page boundary.
- Dark on Light: For maximum readability, avoid pale or low-contrast annotation colors when printing on white or light backgrounds.
G2 Rating: 4.5/5 |100% Secure
Part 8. Quick Troubleshooting When Printing Portion of PDFs
Even when you know exactly which portion of a PDF to print, small settings can still cause unexpected results. These quick fixes help you solve the most common print area issues instantly:
- Whole Page Prints, Not Selection: This happens when the print mode is set to "Document." Switch to Current View or use Snapshot to print only what you selected.
- Output Looks Blurry/Jagged: If the result looks pixelated, you likely printed a raster snapshot. Use Crop/Page Boxes instead to keep vector-sharp text and lines.
- Edges Cut Off: When content prints too close to the page boundary, turn on Fit to Printable Area, adjust the crop slightly inward, or try changing orientation.
- Half Page Misaligned: Misalignment usually comes from uneven margins. Enter exact numeric values and print using Actual Size for perfect alignment.
- Annotations Missing: Many apps hide markups by default. Enable Print Annotations/Markups or flatten the file to ensure they appear.
- Multiple Regions Needed: If you need several portions from different pages, Extract Pages first, then crop and print each region as a batch for efficiency.
People Also Ask
-
How do I print a portion/section of a PDF?
You can use Snapshot for a quick selection or Print Current View to capture exactly what's on screen. For precise, clean output, use Crop/Page Boxes, which tools like PDFelement make the print area simple. -
How do I print a selected area at actual size?
Crop to the area you want and choose Actual Size in the print dialog. This ensures the selection prints at true scale without distortion. -
Can I print only half a page?
Yes, crop to the top/bottom or left/right half of the page before printing. Using PDFelement, you can set exact crop values for consistent, professional results. -
How do I repeat this on many pages?
Extract the relevant pages first, then apply a single crop to the whole set. This batch-friendly approach saves time and maintains uniform alignment. -
Why does my selection print pixelated?
Printing a raster snapshot can produce jagged, blurry output. Cropping the page instead preserves vector quality for crisp lines and text. -
Can I include highlights/notes in the selection?
Yes, make sure Print Annotations/Markups is enabled before printing. PDFelement also allows you to flatten annotations so they always appear on the printed output.
Conclusion
To wrap it up, this article provided a complete guide on how to print a portion of a PDF efficiently. Pick the method that works best: Snapshot for quick selections, Current View for exactly what you see on screen, and Crop/Page Boxes for precise half-page or repeatable prints with clean edges.
Always preview before printing, choose Actual Size for true scale, or use Fit to Printable Area if margins are tight. With Wondershare PDFelement, all these options are easy to use, making your prints accurate, professional, and consistent every time.

