How to Reduce Line Spacing in Word

2024-04-30 11:10:47 • Filed to: Word Tips and Tricks • Proven solutions
Formatting is one of the major pillars in the documentation where content writers are quite keen to build a sustained structure of the document. Various techniques can be adopted to develop a perfectly formatted document across a word processing document. One of the techniques is setting up lines across the document and amending their spacing of the lines to make the document look far more presentable and catchier. This article describes a detailed guide on how to reduce space between lines in Word.
Why is a Word Document Leaving Big Gaps?
Before finding out how to reduce space between lines in Word, let’s identify the reasons that may cause this issue. For this purpose, go through the points given below to acknowledge all such reasons.
Paragraph Spacing: If you are facing this issue, you need to recognize the amount of paragraph or text spacing before and after the space. You have to ensure that there is no extra paragraph spacing that produces large gaps. Therefore, users can adjust this spacing in the "Paragraph" menu under the "Home" tab.
Hidden Page Breaks: Sometimes, you can experience large gaps due to hidden page breaks or section breaks. However, you can reveal these hidden spaces to remove space between lines in Word by switching to Draft view.
Hidden Characters: You may face large spaces while working on Word due to hidden characters, including tabs, spaces, or line breaks. After displaying these hidden characters, you will be able to delete any unwanted characters.
Table Cell Spacing: It may be possible that the height of table cells is causing large gaps in Microsoft Word. You can solve this problem by accessing the Cell settings from the Table Properties dialog box.
How to Reduce Line Spacing in Word
There are several formatting features that can be utilized to make the document look impressive and attractive. One method that can be tested by users is reducing the line spacing in their document. Several documents have a huge gap between their lines, which replenishes the quality it usually infuses in itself. For this, Word provides its users with a very simple and straightforward solution with explicit options and tools. To understand the simple method of how to reduce line spacing in Word, you need to follow the steps.
Step 1. Open File and Select Text
As you launch Word, you need to open the respective file that you wish to format. With the file opened, you need to select the text that is to be spaced properly.
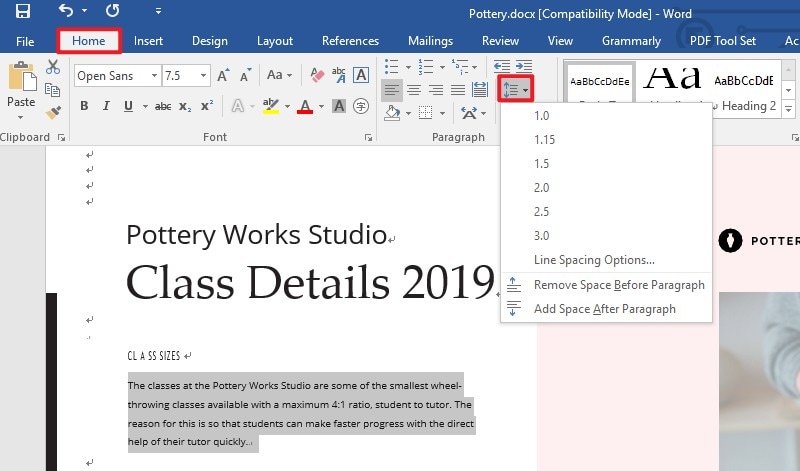
Step 2. Select Text and Approach Scale
From the "Home" tab, you need to navigate to the "Paragraph" section and select the option of "Line and Paragraph Spacing" to open a set of different options to select from.
Step 3. Set Line Spacing
You can set the line spacing with the options that are available in the drop-down menu. The smallest value for line spacing that is available is 1.0 in the options. You can access the "Line Spacing Options…" present in the list to set a value of your own.
How to Reduce Space Between Lines in Word by Changing the Default Line Spacing
After recognizing the reasons behind large spaces between lines, you may be wondering about how to reduce line spacing in Word. To solve such issues, Microsoft Word allows you to adjust the spacing before and after the lines through an "Indents and Spacing" setting. Let's learn the best way to apply these settings to your Word document.
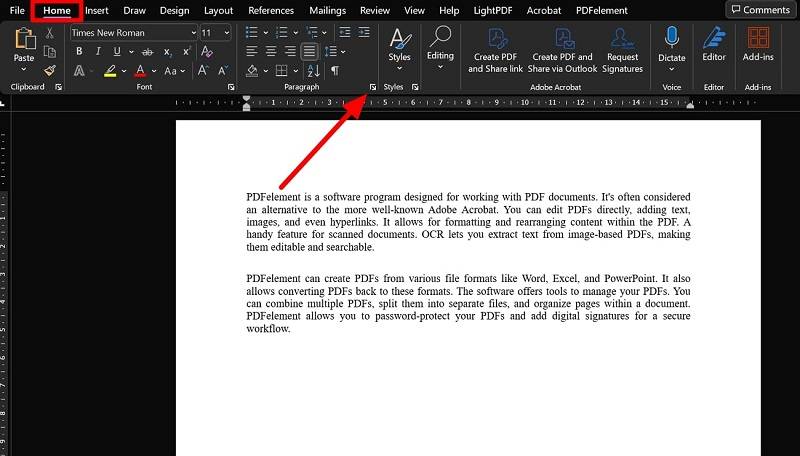
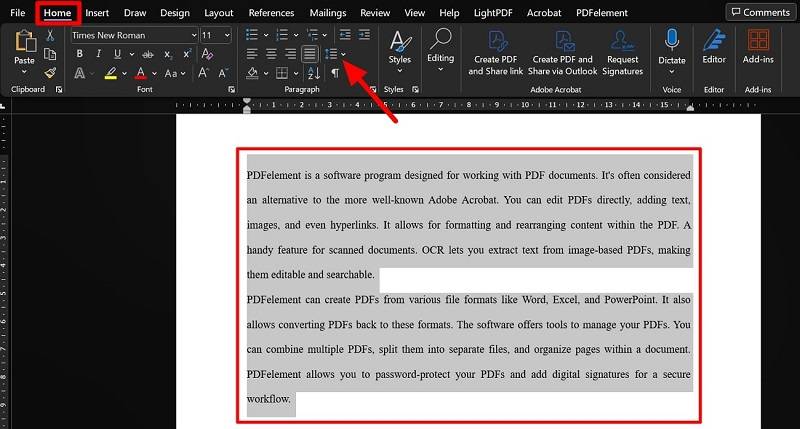
Step 1. After opening your desired document on Microsoft Word, access the "Home" tab to access various document settings. Now, click on the "Paragraph Settings" arrow in the "Paragraph" section to start adjusting the line spacing.
Step 2. Upon clicking this icon, a new "Paragraph" window will appear from where you need to access the "Indents and Spacing" tab. Afterward, choose the "Single" option from the "Line Spacing" drop-down menu to remove any extra spaces.
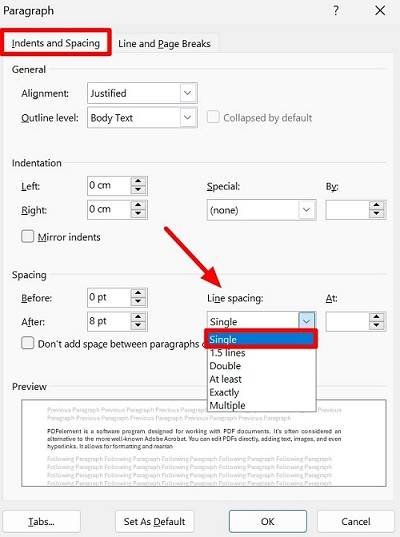
Step 3. Next, you can adjust the "Before" and "After" spacing values to adjust the line spacing based on your preferences. Finally, hit the "Set as Default" button to save all these settings for future documents.

How to Make No Space Between Lines in Word?
You can even remove all the spaces between the lines using the Paragraph settings in the documents. So, go through the steps given below to learn how to remove line spacing in Word.
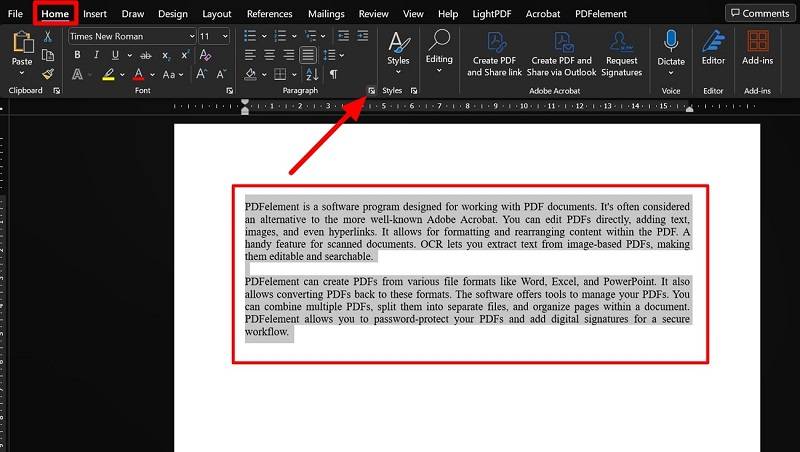
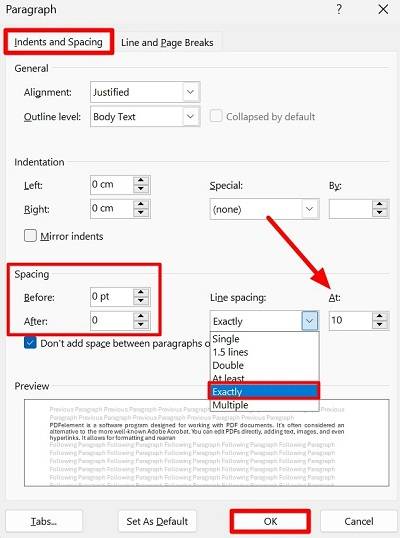
Step 1. Once you open your desired document with line spacing issues, access the Home tab. Next, highlight all the text from which you want to remove the line spaces. Next, hit the "Paragraph Settings" icon in the "Paragraph" section to move forward with the process.
Step 2. Now, hit the "Indents and Spacing" tab and choose the "Exactly" option from the "Line Spacing" drop-down menu. Afterward, adjust the value of this option to remove all the spaces between the lines. In addition, you need to set the "Before" and "After" values of "Spacing" to 0 to resolve this problem. At the end, press the "OK" button to apply these settings to your file.
How to Remove Double-Spacing in Word?
Professionals facing double line spacing issues can resolve it with a simple fix. There are multiple line spacing options available to optimize the way the text looks within the file. Therefore, you need to follow these steps to learn how to remove double spacing in Word.
Step 1. Upon opening your Word document, select the lines that have double spacing issues. Moving forward, access the "Home" tab and hit the "Line and Paragraph Spacing" drop-down menu.
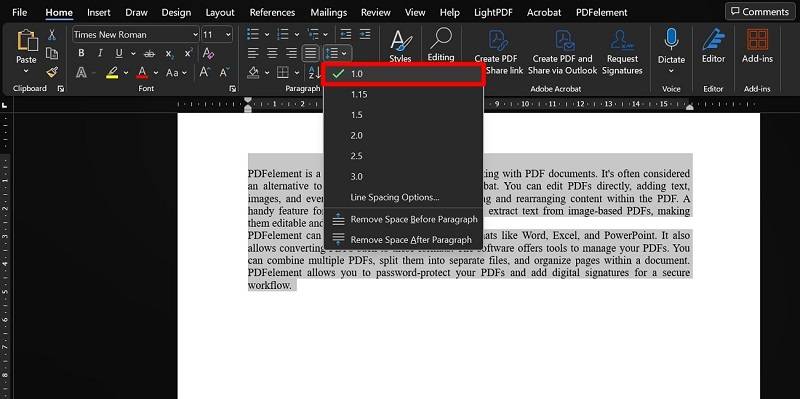
Step 2. Once you access this drop-down menu, click on the "1.0" option to solve this double-spacing issue within your document.
How to Reduce Line Spacing in PDF
PDFelement, as stated, is a PDF editor that offers unique tools and features to work with. As you get to know the simple method of how to add hanging indent in Google Docs, you should be set aware of the simple and effective feature of text alignment offered in PDFelement. The following guide explains the steps that are required to align any text in a PDF.


Step 1. Import a PDF File
Install the platform on your desktop and launch it. Over the home window that opens up with the launch, select the option of "Open File" from the list to import the PDF from the local directory.

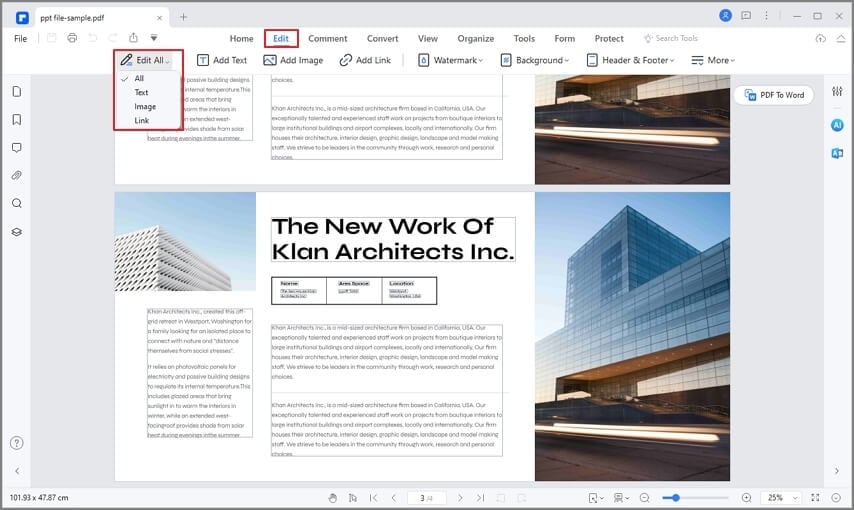
Step 2. Access Editing Option
Hover your cursor towards the "Edit" tab present on the top of the window. With the new sub-menu that opens up, select the icon displaying "Edit Text and Image Object."
Step 3. Adjust Line Spacing
Following this, you need to select the text and access the option of "Paragraph Mode" on a similar menu. With the options available in the left window, select a specific number or tap the "Adjust Line Spacing" option to settle the spacing.

The Best PDF Software
As we look over a guide on how to reduce space between words in Word, there is another file format that is frequently consumed among professionals. PDF files are regarded among the perfect file formats for reading documents. This follows the need to have a PDF editor that would offer them the options for managing the PDF files efficiently. In this case, the article presents the user with the option of Wondershare PDFelement - PDF Editor, a prolific and exemplary platform that offers its users the perfect tools to edit and convert the PDF document.
While assuring the sustenance of the quality of PDF file, it also provides you with a variety of other tools to work with. PDFelement ensures that you can review and comment across the PDF files directly without having them converted. Following this, it also provides different options to develop fillable forms that can be edited and managed with the interface of the platform. Over the question of file security, PDFelement ensures a password-protected environment with the option to redact information that would keep the files safe from illegal and unnecessary access.
Free Download or Buy PDFelement right now!
Free Download or Buy PDFelement right now!
Buy PDFelement right now!
Buy PDFelement right now!
Elise Williams
chief Editor